Extending with Macros
|
Before I discuss the CommenTater macro, I want to spend a little bit of time discussing a few key things about macros and some of the issues you'll encounter. The biggest point I want to make is that even if you think you have the coolest add-in idea in the world and can't wait to get started, you need to spend a lot of time writing macros before you jump into building add-ins. Since macros access all the same objects and properties as add-ins, they provide the best opportunity to learn about the ins and outs of the Visual Studio .NET object model. As you'll see later in the chapter, the object model has lots of quirks, and getting add-ins working is sometimes problematic. Macros are much easier to write and debug, so you'll want to use them first to prototype.
Before finding the Macro option on the Tools menu, you should spend some time reading the documentation about macros and the object model. Macros themselves are discussed in the Visual Studio .NET documentation under Visual Studio .NET\Developing With Visual Studio .NET\Manipulating The Development Environment\Automating Repetitive Actions By Using Macros. The all-important object model is discussed in Visual Studio .NET\Developing With Visual Studio .NET\Reference\Automation And Extensibility Reference.
After perusing the documentation for a while to see what the various objects are, start recording macros so that you can see some of the objects in action. Keep in mind that recording works primarily on the code editors (including the Find/Replace dialog boxes), Solution Explorer, and window activation. You won't be able to record things like building up a Web form or Windows form with controls. Also make sure to take a look at the macro samples provided by Microsoft, which are automatically loaded into the Macro Explorer as part of the Samples macro project. The Macro Explorer is shown in Figure 9-1. The macro samples are good examples of how to use the object model to solve problems. The MakeAddinFromMacroProj macro (in the MakeAddin macro project) is my personal favorite because it takes a macro and converts it to an add-in. It shows the power we now have at our fingertips with Visual Studio .NET.
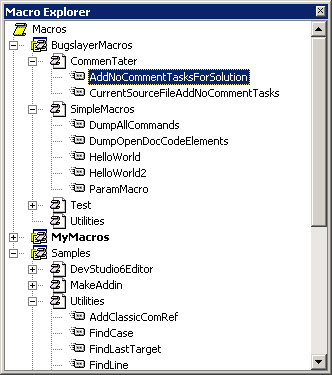
Figure 9-1: Macro Explorer window
There are two ways to execute macros: by double-clicking the macro function name in the Macro Explorer and by using the Command window. If you start typing "macro," the Command window's IntelliSense popup, shown in Figure 9-2, will allow you to choose the macro to run.
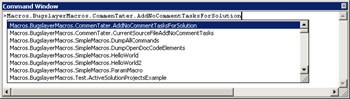
Figure 9-2: Command window's IntelliSense popup executing a macro
If you're really into using the Command window to run macros or any of the other built-in commands, the built-in alias command allows you to redefine shorter text commands so that you don't have to type something like this every time you want to run a macro:
Macros.BugslayerMacros.CommenTater.AddNoCommentTasksForSolution
You also can remove aliases by passing a /d in front of the defined alias.
Macro Parameters
One fact that's not very clear from the Macro Explorer window and the Command window's IntelliSense popup is that the only macros shown in both windows are macros that don't take any parameters. That makes sense in Macro Explorer because it would be pretty difficult to pass parameters when you're double-clicking on an item. However, if you're using the Command window, you probably do want to pass some form of parameter. The trick is to declare the macro subroutine as taking a single optional string parameter, as in the following:
Sub ParamMacro(Optional ByVal Param As String = "")
Handling multiple parameters is almost as easy; you add an additional optional string parameter for each subsequent one, as in the following code, which shows a macro that takes three parameters:
Sub ParamMacroWithThree(Optional ByVal Param1 As String = "", _ Optional ByVal Param2 As String = "", _ Optional ByVal Param3 As String = "")
Although using multiple optional strings for parameters works great for Visual Studio .NET 2003, if you want your macros to be backward compatible with Visual Studio .NET 2002, you're out of luck: you'll find that your macro won't work even from the Command window. You can have only a single optional string parameter for Visual Studio .NET 2002. However, if you want to pass multiple parameters in the Command window, the situation gets a little strange. If you have any spaces whatsoever other than the one separating the macro name from the parameters, your macro won't be called. This means that when you want to pass three parameters, you pass them as a single string but with the parameters separated by commas. If you have a string parameter that has spaces, you have to pass the individual string surrounded by quotes. What's odd is that the quotes won't be in the actual string your macro processes. Interestingly, there's no way to pass a quote-delimited string with a comma in it. The following are examples of proper string passing and how the strings would appear when you go to process the parameter in the macro:
Command window call : MyMacro x,y,z Macro parameter string : x,y,z Command window call : MyMacro x,"a string",y Macro parameter string : x,a string,y
To make macro life a little easier in writing macros that work in both versions, this book's sample files includes a utility macro module (Utilities.VB, contained in the Macros directory) with a function named SplitParams that takes care of splitting up the parameters into a string array for you. I also provided some convenient wrappers around the Command window and Output window objects in the same utility module. We'll use these objects when we work with the SimpleMacros macro discussed in the section "Code Elements."
Problems with Projects
One key point I need to make that's not completely clear when you start reading the documentation is that the different languages have different project object models. In the common environment object model discussion, the Project object lists all sorts of cool methods for manipulating and saving projects. I wasted a huge amount of time because I had the mistaken impression that the common project was the root of all language and technologies projects. In fact, nothing is further from the truth. There are only two properly documented project types, VSProject for C# and Visual Basic .NET projects, and VCProject for C++ projects. Other types of projects, such as CAB and Setup, aren't documented and will sling exceptions all over the place if you access them using a generic Project object. This is especially annoying since methods that you'd expect to work, such as Save, throw Not Implemented exceptions. Make sure you're using lots of exception handling when dealing with projects!
When enumerating a solution's projects, you're given the generic Project object. Your best route is to use the Kind property to retrieve the GUID that will help you determine the type of the project. Table 9-1 lists the project kind GUID strings. If you're working on a C++ project, immediately use the Object property to convert the Project into a VCProject, and then branch off to deal with that VCProject because few of the Project methods will work. VSProject objects are a little more forgiving about being accessed through the generic Project object.
| Project Language | GUID |
|---|---|
| C# | {FAE04EC0-301F-11D3-BF4B-00C04F79EFBC} |
| Visual Basic .NET | {F184B08F-C81C-45F6-A57F-5ABD9991F28F} |
| C++ | {8BC9CEB8-8B4A-11D0-8D11-00A0C91BC942} |
| J# | {E6FDF86B-F3D1-11D4-8576-0002A516ECE8} |
An alternative method of determining the project type is to use the Project.CodeModel property, which describes the code elements present in the project files. I'll be discussing the code elements more in a moment. The CodeModel object contains a Language property that returns a GUID string identifying the language. This is the technique I used to determine the project type in the SettingsMaster add-in because I needed to work with all language types. Note that the documentation is wrong in saying the language strings returned by the Language property are vsCMLanguage constants—that constant doesn't exist. The real constant is CodeModelLanguageConstants.
Code Elements
One of the most amazing aspects of Visual Studio .NET is that all the programming constructs for source files can be accessed easily through the object model. The fact we can now simply add, change, or remove items such as methods in all languages supported by Visual Studio .NET without having to do the parsing ourselves opens up huge opportunities for all sorts of unique tools that might never have been created because parsing is so hard. Every time I use the code elements to manipulate the code in a file, I'm amazed at how cool this capability really is.
To show you how easy it is to access and utilize the code elements, I created a macro, shown in Listing 9-1, that dumps the code elements out of the active document. What's not obvious is that the code works for any language. The output reports the name of the code element along with its code element type. You can find this macro with this book's sample code in Macros\SimpleMacros.VB along with its supporting file, ![]() Utilities.VB. The following output shows a partial listing of the results returned from calling this macro on the
Utilities.VB. The following output shows a partial listing of the results returned from calling this macro on the ![]() SETTINGSMASTER.VB file from the SettingsMaster project:
SETTINGSMASTER.VB file from the SettingsMaster project:
SettingsMaster.SettingsMaster(vsCMElementClass) SettingsMaster.SettingsMaster.RegSettings(vsCMElementVariable) SettingsMaster.SettingsMaster.m_ApplicationObject(vsCMElementVariable) SettingsMaster.SettingsMaster.New(vsCMElementFunction) ApplicationObject(vsCMElementParameter) AddInInstance(vsCMElementParameter)
One issue that's a little problematic when you're dealing with the code elements is consistency in how child items for an element are retrieved. For example, a CodeClass object uses the Members property to retrieve the subelements for the class when the class is a Visual Basic .NET or C# class. However, when the class is a C++ class described by the CodeClass object, the Children property retrieves the subelements. Toward the end of the DumpElements function, I use some nested Try…Catch blocks to find the appropriate child elements. As you can see, CodeFunction objects use yet another property, Parameters, to get child objects. What's important is that you know there are possibly more ways than one to get child elements.
Listing 9-1: DumpActiveDocCodeElements
' Dumps all the code elements for the open document of a project. Public Sub DumpActiveDocCodeElements() ' Where the output goes. Note that the OutputPane class comes ' from the Utilities macro project. Dim ow As OutputPane = New OutputPane("Open Doc Code Elements") ' Clear the output pane. ow.Clear() ' See if there's a document open. Dim Doc As Document = DTE.ActiveDocument If (Doc Is Nothing) Then ow.WriteLine("No open document") Exit Sub End If ' Get the code model for the doc. You have to get the project ' item to diddle down to the code elements Dim FileMod As FileCodeModel = Doc.ProjectItem.FileCodeModel If (Not (FileMod Is Nothing)) Then DumpElements(ow, FileMod.CodeElements, 0) Else ow.WriteLine("Unable to get the FileCodeModel!") End If End Sub Private Sub DumpElements(ByVal ow As OutputPane, _ ByVal Elems As CodeElements, _ ByVal Level As Integer) Dim Elem As CodeElement For Each Elem In Elems Dim i As Integer = 0 While (i < Level) ow.OutPane.OutputString(" ") i = i + 1 End While ' If there's an exception accessing the FullName property, ' it's probably an unnamed parameter. Dim sName As String Try sName = Elem.FullName Catch e As System.Exception sName = "'Empty Name'" End Try ow.WriteLine(sName + "(" + Elem.Kind.ToString() + ")") ' This is kinda weird. Some CodeElements use a Children property ' to get sub elements while others use Members. Then again, ' functions use the Parameters property. Dim SubCodeElems As CodeElements = Nothing Try SubCodeElems = Elem.Children Catch Try SubCodeElems = Elem.Members Catch If (TypeOf Elem Is CodeFunction) Then SubCodeElems = Elem.Parameters Else SubCodeElems = Nothing End If End Try End Try If (Not (SubCodeElems Is Nothing)) Then If (SubCodeElems.Count > 0) Then DumpElements(ow, SubCodeElems, Level + 1) End If End If Next End Sub
|
EAN: 2147483647
Pages: 177