| The Dope Sheet is another window used for editing keyframes. You can move, scale, cut, copy, paste, and delete in it, much as you can in the timeline and the Graph Editor. It has the advantage of offering a simple, clear way to move the keyframes of multiple objects in time. For this reason, it's most helpful for adjusting the timing of many objects simultaneously (Figure 12.49) Figure 12.49. The Dope Sheet is especially helpful when working on the timing of a large number of objects. 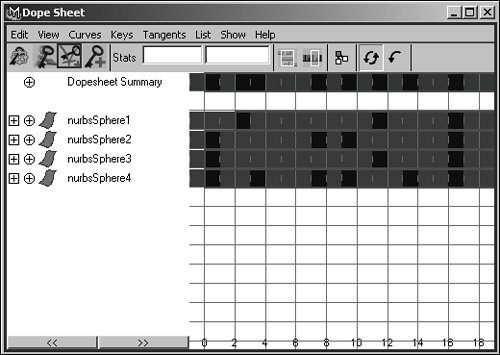
The Dope Sheet can also be useful in creating offset animation. If you set keyframes on a number of objects on the same frame, you can open the Dope Sheet and select those keys easily per object and move them together. In this task, you'll create joints and animation for a wagging tail, offset the keys, and cycle the animation. To create a cycled animation in the Dope Sheet: 1. | Create four joints in the Front view. Start at the center of the grid, and place them one grid unit apart in the positive y direction (Figure 12.50)
Figure 12.50. Four joints used to represent a tail. 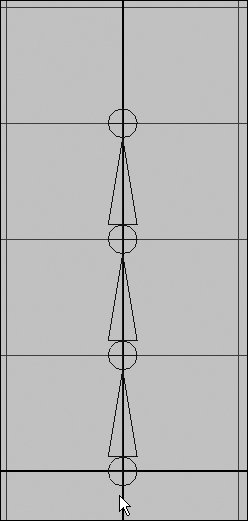
| 2. | At frame 0, select the first three joints, and set a key by pressing  . .
| 3. | Move to frame 10, and rotate the three joints 40 degrees along the z axis (Figure 12.51)Press  . .
Figure 12.51. The first three joints rotated 40 degrees on the z axis. 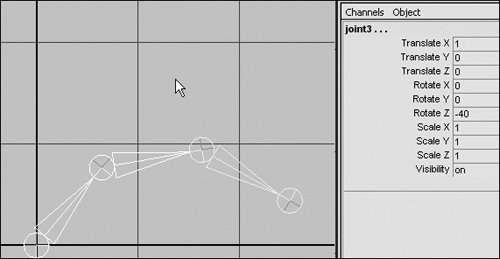
| 4. | Move to frame 20, and rotate the three joints back to 0 along the z axis. Press .
| 5. | Move to frame 30, and rotate the three joints 40 degrees along the z axis. Press .
| 6. | Move to frame 40, and rotate the three joints back to 0 along the z axis. Press .
Now you are ready to offset the keyframes for each joint so that the second and third joints start to rotate slightly later than the first.
| | | 7. | Select Window > Animation Editors > Dope Sheet (Figure 12.52).
Figure 12.52. Select the Dope Sheet. 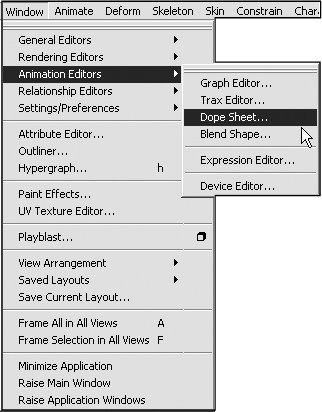
You see the three joints and the block representation of the keyframes you created.
| 8. | Click joint2 on the left side of the Dope Sheet.
The keyframes for joint2 are highlighted in the right panel of the Dope Sheet.
| 9. | In the Dope Sheet toolbar, choose the Select Keyframe tool from the upper-left corner. This tool lets you drag a box around the keyframes you want to move. You can slide or resize the box so that it contains the keyframes you want to select (Figure 12.53).
Figure 12.53. Choose the Select Keyframe tool from the upper-left corner of the Dope Sheet, and drag a selection box around the keyframe you want to move. 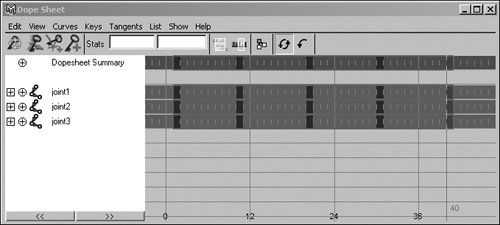
| 10. | Switch to the Move tool, and, with the middle mouse button, move the keyframes to the right three frames (Figure 12.54).
Figure 12.54. The keyframes for joint2 can be moved using the middle mouse button. 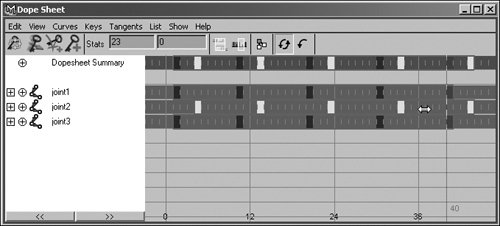
| 11. | Click joint3 on the left side of the Dope Sheet.
| 12. | With the middle mouse button, move the keyframes to the right six frames.
| 13. | Select all three joints on the left side of the Dope Sheet.
| 14. | Select Curves > Pre Infinity > Cycle (Figure 12.55).
Figure 12.55. Select Pre Infinity or Post Infinity and then Cycle to cycle the animation before or after the keyframed animation. 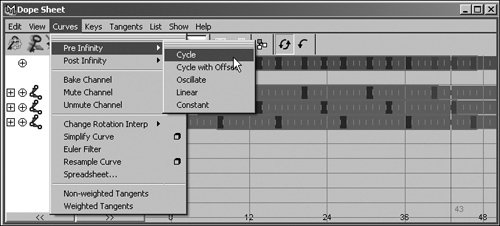
| 15. | Select Curves > Post Infinity > Cycle.
You now have a cycled and offset tail wag animation.
| 16. | Click Play to see the resulting animation.
|
|