| The Snap Align tools are a set of alignment aids for placing multiple objects. Alignment is very important in the world of 3D because an object can appear to be aligned in the Perspective view but be completely off in the orthographic views (Figure 6.50). The align tools can help you quickly ensure that your objects really are where you want them. Figure 6.50. The cone seems to be centered on the plane in the Perspective view, but in the orthographic views, you can see that it's actually very much out of alignment. 
The Snap Alignment toolbox includes Snap Align Objects, Snap Align, and Snap Together. Many of these function in a similar fashion, so use the tool that suits your particular needs or preferences. To align two or more objects using the Align Objects tool: 1. | Create two primitive cylinders (making one taller along the y axis) with some space between them (Figure 6.51).
Figure 6.51. The cylinders are different sizes to better illustrate the change after alignment. 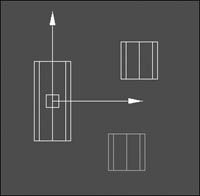
| 2. | Select the cylinders.
| 3. | From the Modify menu, select the box beside Snap Align Objects > Align Objects.
The Align Objects Options dialog box opens.
| 4. | Select Min  for the Align Mode, and select Align in World Y (deselecting World X and Z) (Figure 6.52). for the Align Mode, and select Align in World Y (deselecting World X and Z) (Figure 6.52).
Figure 6.52. Min aligns the surfaces with the minimum y value of the two. 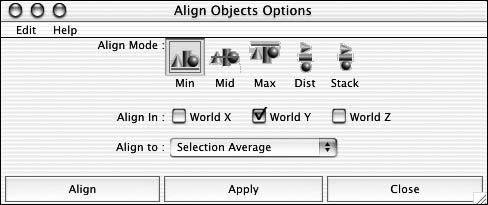
Setting the World to Y forces the movement to happen along the y axis.
| | | 5. | Click Apply.
One cylinder moves up the y axis and the other moves down the y axis until the base (the minimum) of each object is aligned with the other (Figure 6.53).
Figure 6.53. The bases of the two surfaces are now placed on the same grid line. 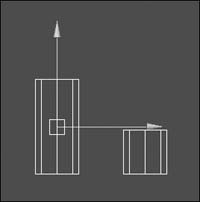
| 6. | With the Align Objects Options dialog box still open, select Mid  for the Align Mode, and select Align in World Y (deselecting World X and Z). for the Align Mode, and select Align in World Y (deselecting World X and Z).
| 7. | Click Align.
One cylinder moves up the y axis and the other moves down the y axis until their centers are aligned (Figure 6.54).
Figure 6.54. The two surfaces are aligned to their centers. 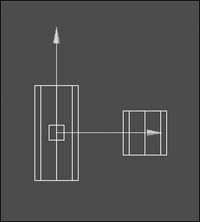
|
To evenly distribute multiple objects along an axis using the Align Objects tool: 1. | Create a primitive cylinder.
| 2. | Duplicate the cylinder four times.
| 3. | Move one of the cylinders up the y axis 10 grid units (Figure 6.55).
Figure 6.55. Only the placement of the two surfaces furthest away from each other matters, because the rest of the objects will be distributed evenly between them. 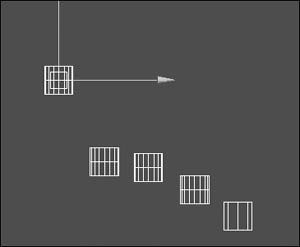
| 4. | Select all of the cylinders.
| 5. | From the Modify menu, select the box beside Snap Align Objects > Align Objects.
The Align Objects Options window opens.
| | | 6. | Select Dist  as the Align Mode, and select Align in World Y (deselecting World X and Z) (Figure 6.56). as the Align Mode, and select Align in World Y (deselecting World X and Z) (Figure 6.56).
Figure 6.56. The Dist option can be used to evenly distribute the selected objects along the selected axes. 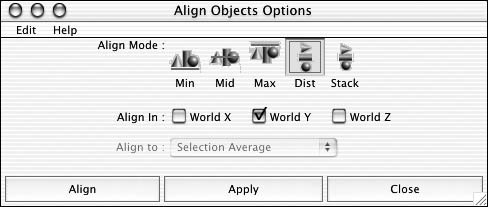
Setting the World to Y forces the objects to be distributed along the Y axis.
| 7. | Click Apply.
Each of the cylinders moves up the y axis until they're evenly spaced between the two cylinders that are furthest from the others (Figure 6.57).
Figure 6.57. The cylinders are perfectly spaced along the y axis. 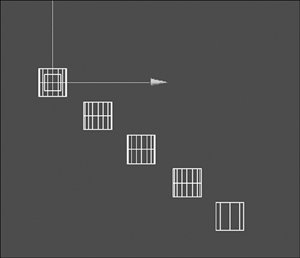
|
 Tip Tip
To align two or more objects using the Align tool: 1. | Create five primitive cylinders, and randomly space them away from each other.
| 2. | Select one cylinder by clicking it, and then  select the others one at a time until all are selected. select the others one at a time until all are selected.
| 3. | From the Modify menu, select the box beside Snap Align Objects > Align Tool.
A gray box appears around the selected cylinders. On the edges of the box are icon manipulators used to align the objects (Figure 6.58).
Figure 6.58. The order of selection becomes important because the objects are aligned to the last selected object. 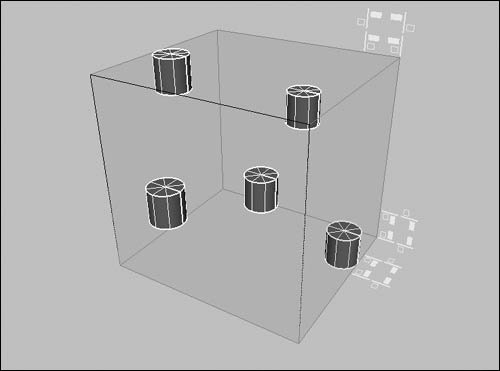
| | | 4. | Click  or one of the other shapes on the surrounding box (Figure 6.59). or one of the other shapes on the surrounding box (Figure 6.59).
Figure 6.59. The gray bounding box is for visualization purposes only: You need to click the icons for the Align function to work. 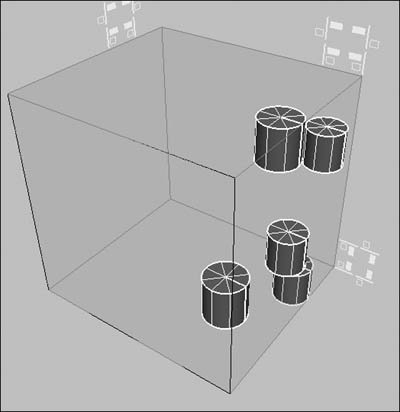
The cylinders fall into alignment with the selected icon. The yellow arrows preview the alignment, indicating how each object will move (Figure 6.60).
Figure 6.60. The plane shows where the objects are being aligned, and the arrows indicate the path of each object. 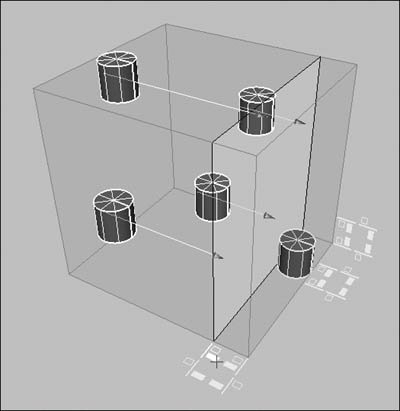
| 5. | Press  to undo the alignment, and then click another icon to see its alignment type. to undo the alignment, and then click another icon to see its alignment type.
| 6. | Repeat the last step until you feel comfortable with each of the alignment icons' functions.
|
Tip
To align objects using the Snap Together tool: 1. | Create a primitive cylinder and a primitive cone (Figure 6.61).
Figure 6.61. Two objects ready for alignment. It helps to have them far enough apart that you can easily click anywhere on their surfaces. 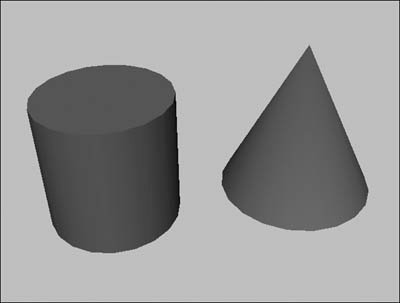
| 2. | Choose Modify > Snap Align Objects > Snap Together Tool.
| 3. | Click the cone.
A blue arrow appears, denoting the spot you clicked.
| 4. | Click the cylinder.
A dotted blue line connects the two objects (Figure 6.62).
Figure 6.62. The dotted line indicates the path and rotations the object will follow to align the selected points. This is a visual aid only. 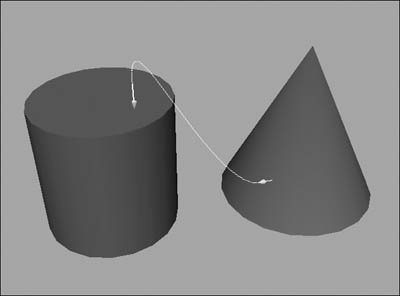
| 5. | Press  . .
The two objects are drawn together, so that the two selected points touch (Figure 6.63).
Figure 6.63. The two points on the surfaces are drawn together, like pulling a stitch shut. 
|
Tip
|