| Simple image mapping isn't the only way to texture a surface. Maya provides options for painting directly on a surface and for importing a Photoshop document you've painted on. Both methods offer more interactive and artisan-based methods of texturing your models. The 3D Paint tool lets you paint directly on a surface. You can create a new texture image from scratch with this method, and Maya creates a new image file. It's important to make sure you've set your project (File > Project > Set) before you begin painting, because the current project determines where this image ends up. When you save the scene after painting, a folder named after your scene is created in the 3dPaintTextures folder of the project you're currently set to. Any images created by painting are put in that folder. You can also paint on a surface that already has an image file textured on itfor example, you can add dirt or other details to an existing image. To paint directly on a surface: 1. | Open the Hypershade, create a lambert material, and assign it to a NURBS sphere.
| 2. | With the sphere selected, from the Texturing menu, select the box next to 3D Paint Tool.
The 3D Paint Tool Settings window opens (Figure 14.122).
Figure 14.122. The 3D Paint Tool Settings window includes many controls that determine the look of your brush strokes. 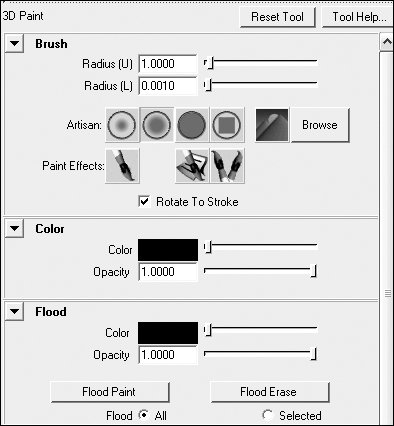
| 3. | Scroll down until you see the File Textures section (Figure 14.123).
Figure 14.123. Under File Textures in the 3D Paint Tool Settings window, you can assign a texture to the material for a selected object. You can't paint on a surface that doesn't have a file mapped to its color. 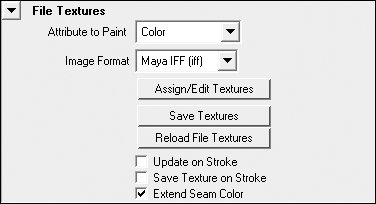
If necessary, you can change the image format that will be created.
| | | 4. | Click the Assign/Edit Textures button.
The Assign/Edit File Textures window appears. You can increase the resolution of the texture here if you need a highly detailed texture. The default of 256 by 256 will suffice for now (Figure 14.124).
Figure 14.124. Once you click Assign/Edit Textures, you can paint, because a file texture is connected to the material for the object you want to paint. 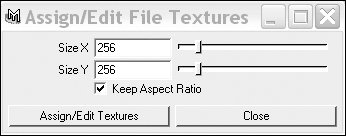
| 5. | Click Assign/Edit Textures.
A file texture is connected to the material so you can paint.
| 6. | Click in the Perspective view, hold down  , and, using the middle mouse button, drag from right to left to get the brush down to size. , and, using the middle mouse button, drag from right to left to get the brush down to size.
The red circle, which represents brush size, shrinks.
| 7. | Click and drag on the surface of the sphere to paint on it.
A mark appears on the surface (Figure 14.125).
Figure 14.125. The paintbrush has been dragged across the sphere, producing this black mark. 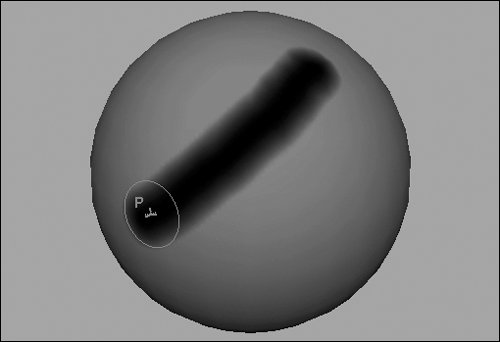
| 8. | Click the swatch next to Color in the 3D Paint Tool Settings window under the Flood section (Figure 14.126).
Figure 14.126. You can choose a color to flood the whole object by clicking the Color swatch. 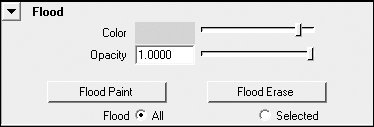
The Color Chooser appears.
| 9. | Choose the yellow swatch at the top of the Color Chooser, and click Accept.
| 10. | Click Flood Paint.
The sphere turns yellow.
| 11. | Paint a smiley face by clicking and dragging on the surface (Figure 14.127).
Figure 14.127. A smiley face has been painted on the sphere with three brush strokes. 
|
To use the 3D Paint tool: 1. | Continue with the sphere from the previous task.
If the paintbrush isn't visible or the tool options are no longer open, select the sphere; then, from the Texturing menu, select the box next to 3D Paint Tool.
| 2. | Click the Get Brush button  , which is to the right of Paint Effects in the 3D Paint Tool Options window. , which is to the right of Paint Effects in the 3D Paint Tool Options window.
The Visor window opens.
| 3. | Scroll down in the Visor, and click the Hair folder.
Several hair types appear (Figure 14.128).
Figure 14.128. You can choose from a variety of brushes to use with the 3D Paint tool in the Visor. Here you see the brushes in the Hair folder. 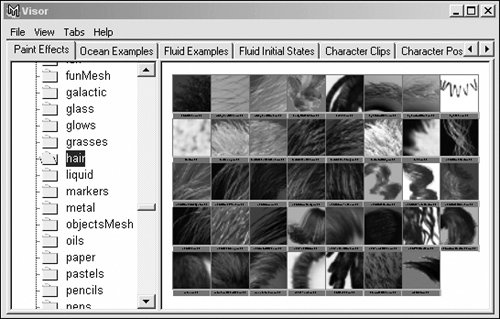
| 4. | Click the hair of your choice.
| 5. | Paint some hair on your smiley-face sphere (Figure 14.129).
Figure 14.129. Hair has been painted on the sphere by using one of the Paint Effects brushes. 
| 6. | Clear the surface texture by clicking the Flood Erase button under the Flood section.
The texture is cleared, and the original gray surface is ready to be repainted.
|
 Tips Tips
After using a Paint Effects brush, you can return to a normal brush by clicking one of the Brush Profile buttons next to Artisan in the 3D Paint Tool Settings window (Figure 14.130). Figure 14.130. To return to a normal brush, choose from one of the profiles of the Artisan brushes. 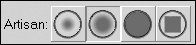 By decreasing the opacity in the 3D Paint Tool settings, you can paint on a surface but still see the color beneath your brush strokeshelpful if you're trying to make a surface appear dirty. You can use the 3D Paint Tool to paint areas roughly to mark the different parts of a surface. You can then open the image file (which is created once you save the scene) in Adobe Photoshop and paint the details there. You can use the same steps for other attributes, such as transparency and displacement. Just select the desired attribute from the drop-down menu under File Textures.
Using Adobe Photoshop In Maya, you can create layered PSD (Photoshop Document) files or use PSD image files with layers from Adobe Photoshop for textures. Being able to use layered files makes it simpler to manage complex textures that require individual image maps for one or more channels in a single shader. To create layered PSD files in Maya: 1. | Select an object, and choose Texturing > Create PSD Network.
The Create PSD Network Options dialog box opens.
| 2. | In the Attributes section, select color and transparency, and click the right arrow (>) to add them to Selected Attributes (Figure 14.131).
Figure 14.131. Select color and transparency, and click the right arrow (>) to add them to Selected Attributes. 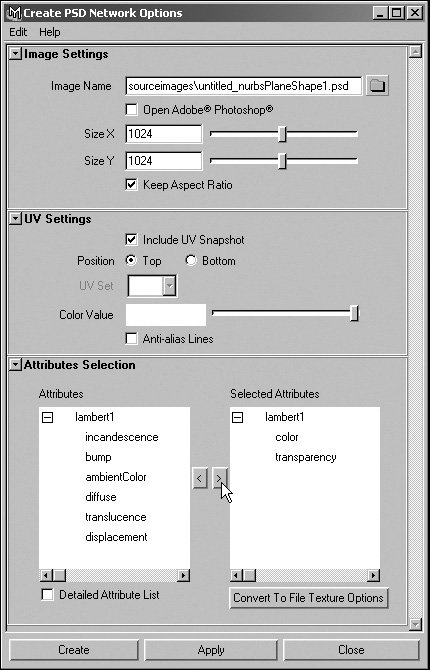
| 3. | Click Create.
The dialog box closes, and Maya saves the PSD file to the sourceimages folder in your current project directory.
| 4. | Open the PSD file in Adobe Photoshop (Figure 14.132).
Figure 14.132. Open the PSD file that Maya created in Photoshop. 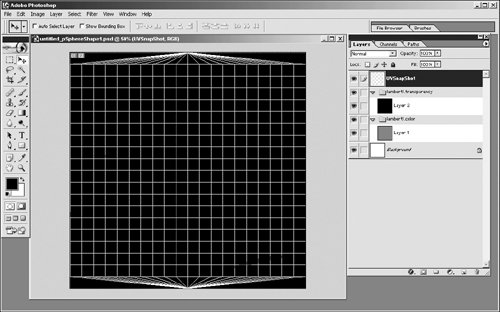
The layered image file has a layer called UVSnapShot that you can use as a reference while painting in Photoshop (PS). The file also has layer sets named after the channels that were selected in the Create PSD Network Options.
| | | 5. | Paint several strokes on the layer in the lambert1.transparency layer set (Figure 14.133).
Figure 14.133. Paint some strokes on the layer contained in the lambert1.transparency layer set. 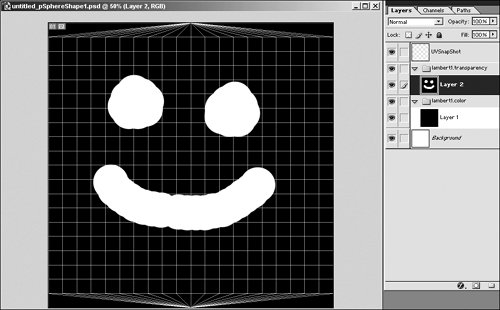
White is fully transparent, and black is fully opaque.
| 6. | Click the eye icon  next to the lambert1.transparency layer set and the UVSnapShot layer so that they're hidden. next to the lambert1.transparency layer set and the UVSnapShot layer so that they're hidden.
| 7. | Paint some colorful strokes on the layer in the lambert1.color layer set (Figure 14.134).
Figure 14.134. Paint some colors on the layer. 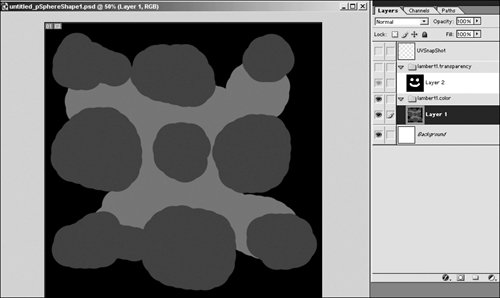
| 8. | Save the PSD file, and switch back to Maya.
| 9. | In the active view, choose Shading > Hardware Texturing.
The hardware shaded view can display texture maps assigned to surfaces.
| 10. | Select the object for which the PSD texture was originally created, and choose Texturing > Update PSD Networks.
The surface updates, displaying the color map that was created in Photoshop (Figure 14.135).
Figure 14.135. The surface displays the color map. 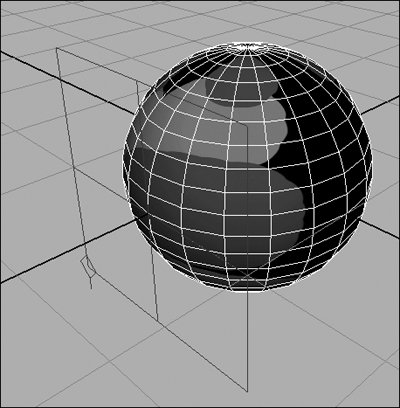
| 11. | Choose Render > Render Current Frame.
The Render View dialog box opens and renders the current view, showing the color channel and transparency channels that were painted (Figure 14.136).
Figure 14.136. Render the view so that the transparency layer can be seen. 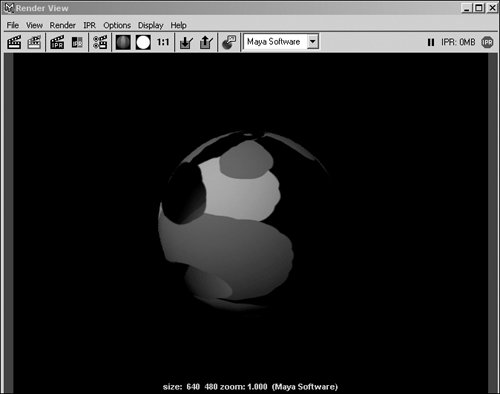
|
To edit an existing PSD network: 1. | Select the object from the last task.
| 2. | Choose Texture > Edit PSD Network.
The existing network appears, and the icons indicate which attributes have been linked to the PSD document (Figure 14.137).
Figure 14.137. Any attribute that has been mapped has a corresponding icon that indicates whether it's currently controlled by a file, PSD, or texture. 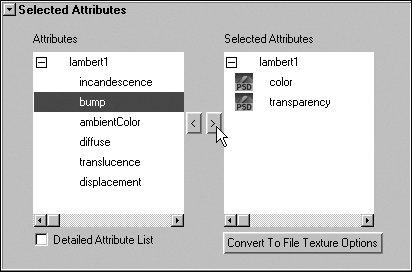
| 3. | Click bump, and then click the right arrow to assign a new attribute to the PSD file.
| 4. | Click Apply.
| 5. | Open your document in Photoshop; you can see a new layer has been added (Figure 14.138).
Figure 14.138. The new bump layer has been added to the PSD and can be edited in Photoshop. 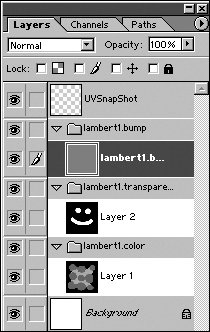
or
If your Photoshop document is already open, choose File > Revert to ensure the changes are reflected in your current document.
|
To use an existing layered PSD file in Maya: 1. | Open the Hypershade, and, in the Create bar, expand 2D Textures.
| 2. | Click Normal, and then click the PSD File icon (Figure 14.139).
Figure 14.139. The PSD file node is used to import a PSD document with layers instead of as a flat image (as the file node does). 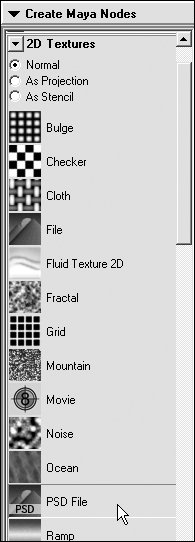
A PSD file node appears as psdFileTex1 in the Work Area (Figure 14.140).
Figure 14.140. A PSD file node appears as psdFileTex1 in the Work Area. 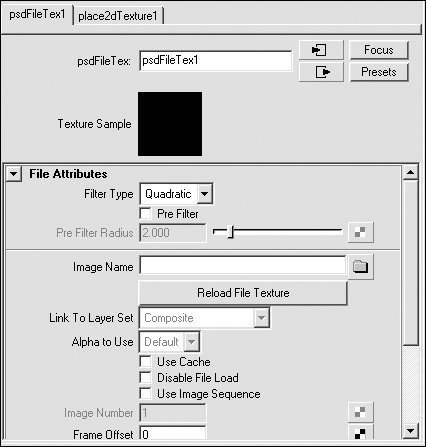
| 3. | Double-click the psdFileTex1 node to open its Attribute Editor.
| 4. | Click the Folder icon  next to Image Name. next to Image Name.
The Open dialog box appears (Figure 14.141).
Figure 14.141. The Open dialog box appears and defaults to the current project directory. 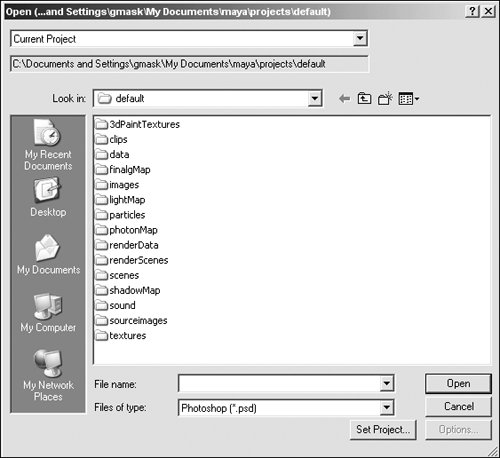
| | | 5. | Select a PSD file from the hard drive, and click Open.
The Open dialog box closes, and the texture sample of psdFileTex1. updates with the PSD file that was selected (Figure 14.142).
Figure 14.142. The texture sample updates with an image of the file that was selected. 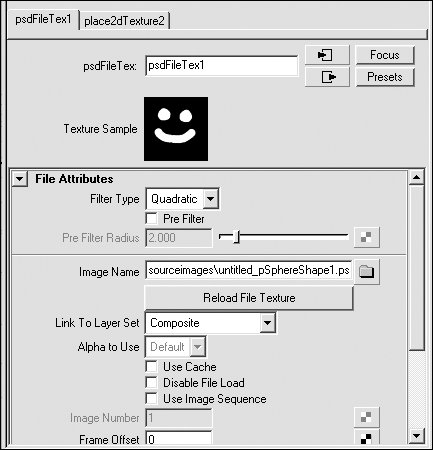
| 6. | From the pull-down menu next to Link To Layer Set, choose Composite (Figure 14.143).
Figure 14.143. Choose Composite from the Link To Layer Set pull-down menu. 
This pull-down menu lists each layer set in the image. If the image has no layer sets, then Composite is the only item in the list. Composite is a flattened combination of all the visible layers in the PSD file.
| 7. | In the Hypershade, create a blinn shader, and assign it to the surface.
The blinn shader appears in the Work Area next to the psdFileTex1 node.
| 8. | With the middle mouse button, click and drag the psdFileTex1 node onto the blinn1 icon.
| 9. | From the marking menu that appears, select Color (Figure 14.144).
Figure 14.144. Middle-click and drag the psdFileTex1 node onto blinn1 to open the marking menu. 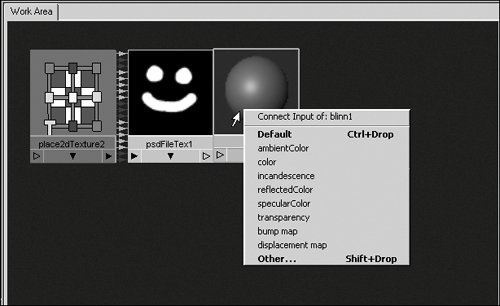
The icon of the blinn1 shader updates with the new texture.
|
Maya provides a one-click method to convert a PSD file node into a layered texture. The Convert To Layered Texture command creates a separate PSD file node for each layer set and connects them to a layered texture node. This command is also useful if you need to connect the layer sets to the channels of a shader. Convert to Layered Texture automatically creates additional PSD file nodes for each layer set and selects them in the Link To Layer Set section of the PSD file node attributes. Then you can use the middle mouse button to connect each PSD file node to the appropriate channel in the shader. To create a layered texture from a PSD file node: 1. | Follow steps 1-6 from the previous task.
| 2. | Right-click the psdFileTex node, and select Convert To Layered Texture from the marking menu that appears (Figure 14.145).
Figure 14.145. Right-click psdFileTex, and select Convert To Layered Texture from the marking menu. 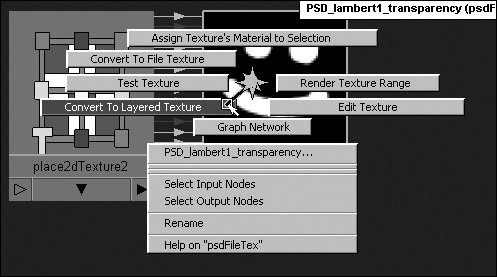
Several new nodes appear in the Work Area. For each layer set in the PSD file, a new psdFileTex node is created (Figure 14.146).
Figure 14.146. Convert To Layered Texture creates psdFileTex nodes for each layer set in the PSD file and connects them to a layeredTexture node. 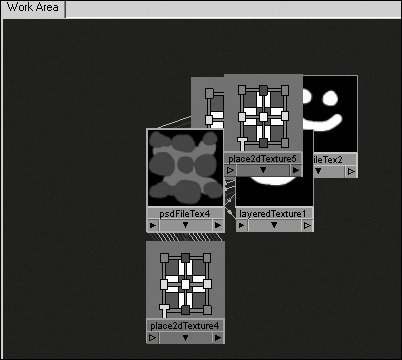
| 3. | Click and drag the nodes so they don't overlap (Figure 14.147).
Figure 14.147. Click and drag the nodes to rearrange them. 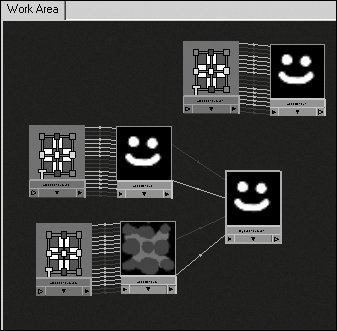
| | | 4. | Right-click the layeredTexture node, and select Graph Network from the marking menu (Figure 14.148).
Figure 14.148. Right-click layeredTexture, and select Graph Network from the marking menu. 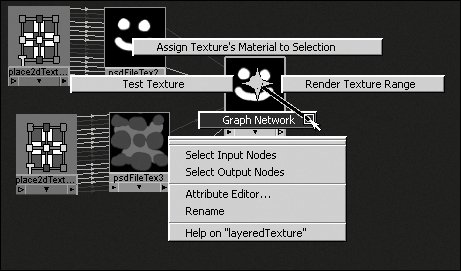
The Work Area updates, showing how the psdFileTex nodes are connected to the layeredTexture node (Figure 14.149).
Figure 14.149. The graph of the psdFileTex nodes connected to the layeredTexture. 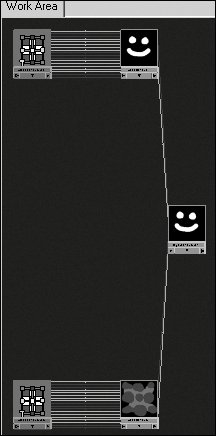
| 5. | With the middle mouse button, click and drag the layeredTexture node to any channel input of a shader.
| 6. | Repeat step 5 with the individual psdFileTex nodes.
|
|