Ghosting


Another way to see problem areas in your animation is to apply ghosting to an object. Ghosting leaves a trail showing where your object is going and where it came from. Some animators find ghosting very useful because it can provide a snapshot of an entire animation.

To ghost an object:

1.

Create a sphere.

2.

Go to frame 0 in the timeline and key the sphere by pressing .

3.

Go to frame 40, translate the sphere 40 units in the X direction, and set another keyframe.

4.

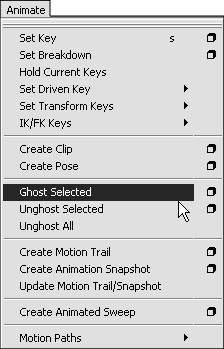
From the Animate menu, choose Ghost Selected (Figure 12.57).

Figure 12.57. Choose Ghost Selected to see the position of your object before and after the current frame.


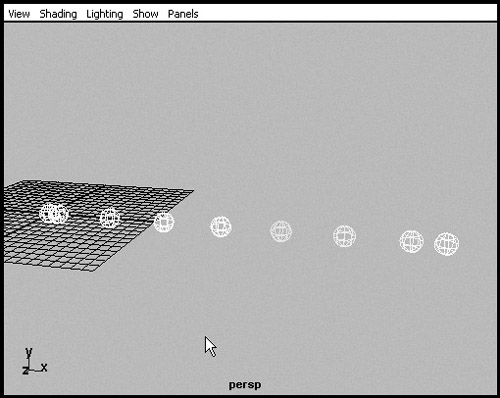
You should now see multiple spheres. The blue spheres represent where the object was, and the orange spheres represent where it's going (Figure 12.58).

Figure 12.58. The original sphere in the middle is ghosted, showing its position before and after its current frame.


5.

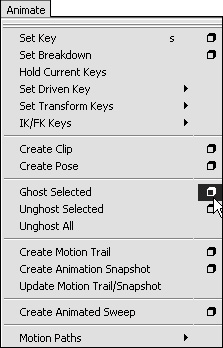
To change the display of the ghosting, return to the Animate menu and select the options box next to Ghost Selected (Figure 12.59).

Figure 12.59. Open the Ghost Options dialog box to adjust the display.


The Ghost Options dialog box opens.

6.

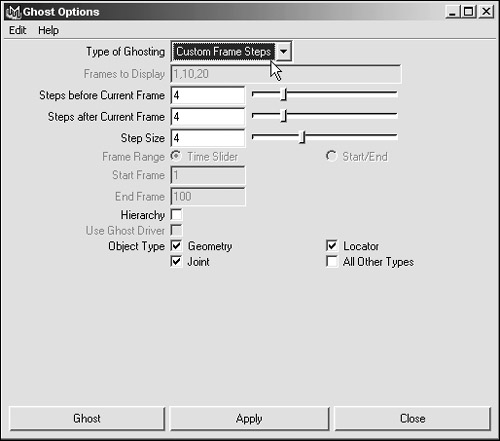
Change Type of Ghosting to Custom Frame Steps (Figure 12.60).

Figure 12.60. Custom settings for the ghosting display.


7.

Change Steps before Current Frame to 4.

8.

Change Steps after Current Frame to 4.

9.

Change Step Size to 4.

The step size refers to the number of frames that are skipped between display of a ghost object. If the step size were 1, a ghost of the object would be displayed on every frame.

10.

Click Ghost.

Motion Trail is another preview function similar to ghosting. When you apply motion trail to an animated object, a line traces where the object has been and is going.

To create a motion trail:

1.

Create a sphere.

2.

Go to frame 0 in the timeline and press to create a keyframe.

3.

Go to frame 40, translate the sphere 10 units in the X direction, and set another keyframe.

4.

Go to frame 20, translate the sphere 5 units in the Y direction, and set another keyframe.

5.

From the Animate menu, select the option box next Motion Trail.

The Motion Trail Options dialog box opens.

6.

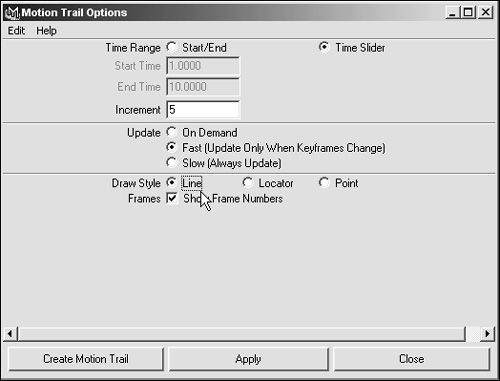
Set the Increment to 5 and set the Draw Style to Line (Figure 12.61).

Figure 12.61. Set the Increment to 5 and the Draw Style to Line.


7.

Click Apply.

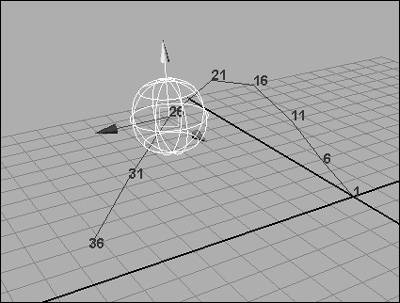
You should now see a line that traces the path that the sphere travels (Figure 12.62).

Figure 12.62. A line shows where the object travels and the keyframes at different points on the path.


    Maya for Windows and Macintosh
    MAYA for Windows and MacIntosh
    ISBN: B002W9GND0
    EAN: N/A
    Year: 2004
    Pages: 147
    Authors: Danny Riddell

    flylib.com © 2008-2017.
    If you may any questions please contact us: flylib@qtcs.net