Use the Palm Desktop Application
| The Palm Desktop application serves as a desktop PIM for entering and managing data that's synchronized with your Treo. You can use Palm Desktop to create PIM records and then synchronize them with your device. Beyond basic PIM data, Palm Desktop also enables you to move media files back and forth between your device and desktop computer as well as launching the palmOne Quick Install application and accessing VersaMail accounts. Following are the default applications and data types you can manage with Palm Desktop:
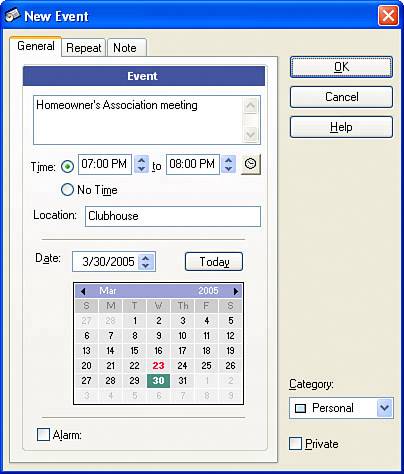
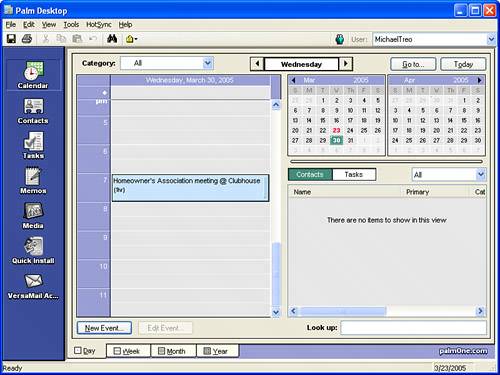
The first four applications are the standard PIM applications on your Treo that take care of managing calendar events and appointments, contacts, tasks, and memos. The Media support in Palm Desktop is what makes it possible to share pictures, videos, and music between your Treo and your desktop computer. Quick Install is simply a link to the palmOne Quick Install application for installing new applications onto your device. And finally, VersaMail allows you to create and manage email accounts for synchronization via VersaMail. The next few sections explore these features of Palm Desktop in more detail. Keep in mind that the PIM applications on the Treo side of the equation are covered in more detail in upcoming chaptersthe focus right now is on learning how to manage applications and data on the desktop side for synchronization. Schedule Calendar EventsIf you haven't already done so, launch the Palm Desktop application on your computer. Calendar is the first Treo application you see referenced in Palm Desktop, as is evident by its icon in the upper-left corner of the application window. If Calendar isn't already selected, click this icon. The remainder of the Palm Desktop window changes to the desktop calendar, as shown in Figure 4.2. Figure 4.2. You can use the desktop calendar in the Palm Desktop application to create and manage calendar data for your device.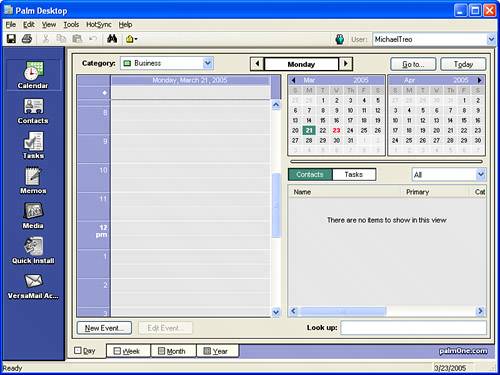 Because I'm starting out clean with no previous PIM data, the desktop calendar shows no events. You'll notice an event list on the left side of the desktop calendar and on the right, a small calendar view of the current month and the upcoming month. Below the small calendars is a list that can be changed to show either contacts or tasks. Along the top of the desktop calendar is the Category list for filtering events, along with a day navigation control and buttons for jumping to another day or returning to today. Along the bottom are tabs for selecting different views on the calendar, such as Day, Week, Month, and Year. To create a new event in the desktop calendar, follow these steps:
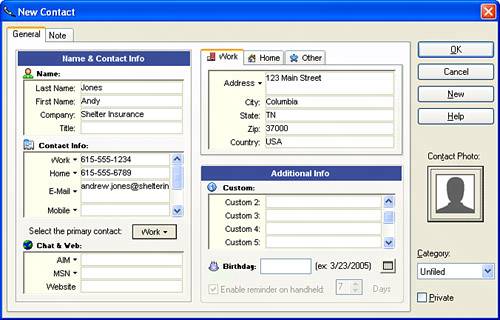
Tip To delete an event, select it in the event list and press the Delete key. Optionally, you can right-click the event and select Delete from the shortcut menu. The next time you synchronize your device with the Palm Desktop, the new event is added to the Calendar application on your device. Similarly, events you created on your device appear in the desktop calendar in Palm Desktop. Any changes you make to events in the Palm Desktop application carry over to your device upon synchronization. Organize ContactsThe Contacts application appears just below Calendar in Palm Desktop. To activate the desktop contact manager, click its icon. The Palm Desktop window changes to the desktop contact manager, as shown in Figure 4.5. Figure 4.5. With the desktop contact manager in the Palm Desktop application, you can create and manage contacts for your device.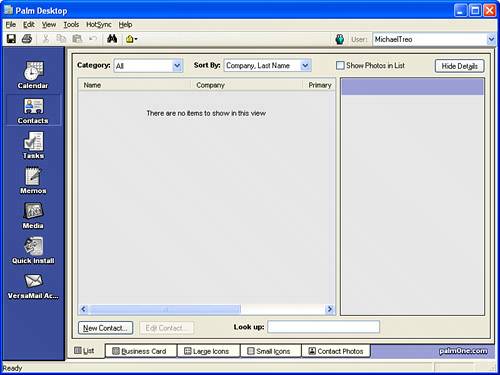 The desktop contact manager looks somewhat similar to the desktop calendar, in that it has a Category list at the top and multiple tabs at the bottom. The List tab at the bottom is probably the most important tab because it enables you to view contacts in a compact list. The other tabs offer different approaches to viewing contacts, including a photo view that displays a picture of each contact. To create a new contact in the desktop contact manager, follow these steps:
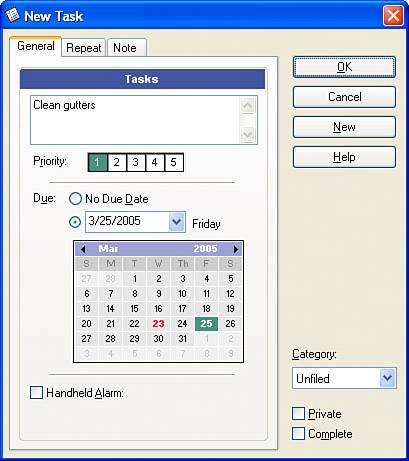
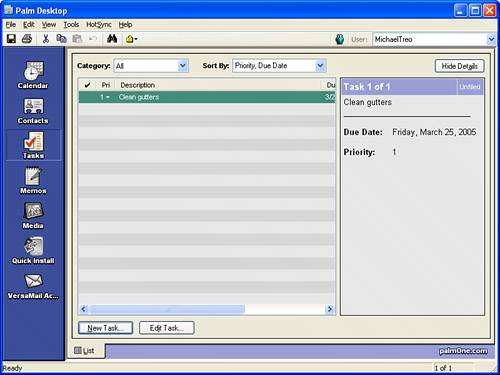
Tip The contact photo is used in the Phone application on your Treo to serve as a photo caller ID when the person calls you. The easiest way to set the contact photo is to edit the contact on your device and take a picture of the person with your Treo camera. In other words, you'll probably want to leave the contact photo blank when creating contacts in the desktop contact manager. However, if you happen to have pictures of contacts on your desktop computer, by all means set the contact photo. You can let the photos automatically resize to the smaller contact photo size (144x144), or you can manually resize them yourself to 144x144 by using an image editor before setting the photo in the contact. The new contact is added to the contacts on your device the next time you synchronize. Future changes made to the contact on your device or in the Palm Desktop application are automatically updated on the other when you synchronize. Work with TasksThe Tasks application is linked through Palm Desktop via the desktop task manager, which is accessed by clicking the Tasks icon just below Contacts. The Palm Desktop window changes to the desktop task manager, shown in Figure 4.7. Figure 4.7. The desktop task manager in the Palm Desktop application allows you to create and manage tasks for your device.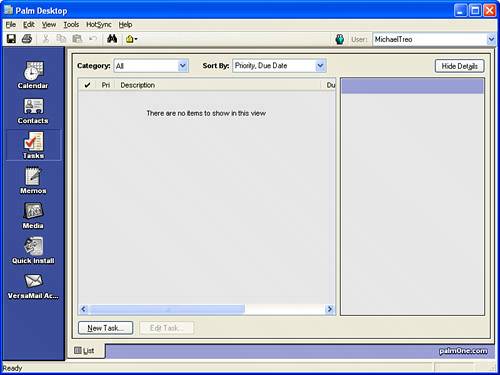 The look and feel of the desktop task manager should be familiar now that you've seen the desktop calendar and contact manager. Similar category and sorting options appear along the top of the window, and a single tab appears at the bottom along with a couple of buttons. To create a new task in the desktop task manager, follow these steps:
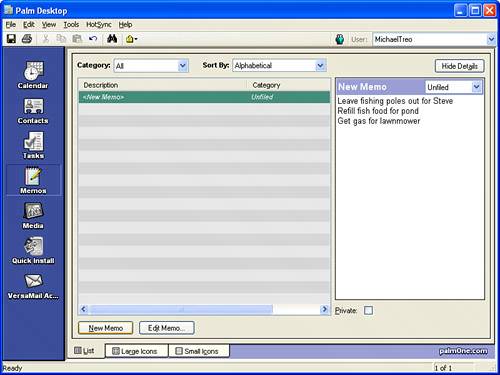
The new task is added to the tasks on your device the next time you synchronize. If you delete the task or otherwise modify it in the future, it's automatically updated upon a device synchronization to keep your device and desktop data in sync. Manage MemosTip To flag a task as completed, click to enable the Complete check box. The Memos application is connected to the Palm Desktop application through the desktop memo manager, which is accessed by clicking the Memos icon just below Tasks. The Palm Desktop window changes to the desktop memo manager, shown in Figure 4.10. Figure 4.10. The desktop task manager in the Palm Desktop application enables you to take control of memos for your device.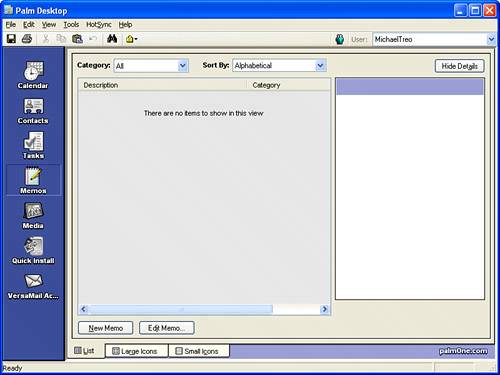 I realize this discussion is starting to get a bit redundant, as the Palm Desktop PIM features are very similar. However, for the sake of completeness, I'll continue to wrap up this little desktop PIM tour by showing you a quick look at the desktop memo manager. The familiar category and sorting options appear along the top of the window, and a few tabs appear at the bottom along with a couple of buttons. To create a new memo in the desktop memo manager, follow these steps:
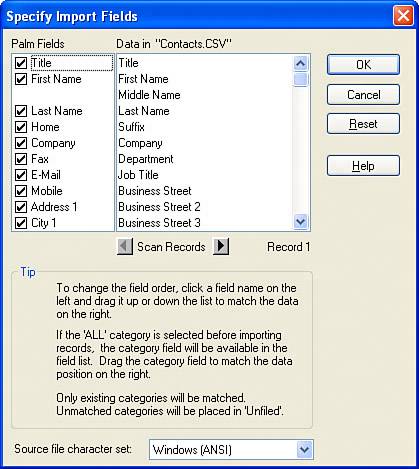
The new memo is added to the memos on your device the next time you synchronize. If you delete the memo or otherwise modify it later, it automatically updates upon a device synchronization to keep your device and desktop data in sync. Import and Export DataYou might find it helpful at some point to import or export data with the Palm Desktop application. For example, if you've been using a PIM that Treo doesn't support, you might be able to export data from it and import into Palm Desktop to prevent having to re-enter everything manually. The import and export features in Palm Desktop are carried out based on a certain type of PIM data, such as events or contacts. More specifically, you select the PIM application in Palm Desktop, and then carry out an import or export operation on that application's data. Data can be imported in several different formats that depend on the specific data being imported. First, you need to reference the application from which you are exporting data to see what formats are available. Then match up that data type with Palm Desktop to import the data. As an example, Palm Desktop accepts the following file types for importing contact data:
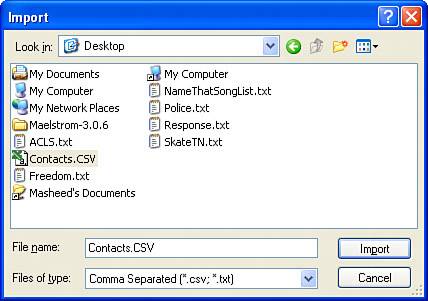
Understanding the details of these data formats isn't as important as finding a format that's compatible with the application from which you are exporting data. Comma- and tab-separated text are fairly common data formats used regularly to shuttle data from one database to another. For example, Microsoft Excel is capable of exporting an Excel spreadsheet as comma-separated text. I doubt you store your contacts in an Excel spreadsheet, but you get the idea. Tip Most PIM applications, such as Microsoft Outlook, include flexible export features that enable you to export PIM data in a variety of different formats, including those supported by Palm Desktop. To import a data file into the Palm Desktop application, follow these steps:
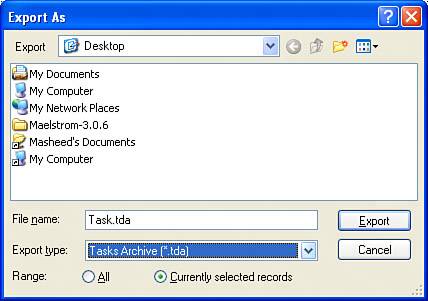
You'll probably find that you're more likely to import PIM data than export data, but you still might need to export data on occasion. An advantage of Palm Desktop's export feature is that you can export individual records or all the records for a particular type of data. Following are the steps required to export PIM data from Palm Desktop:
Importing and exporting data in the Palm Desktop application is the fastest way to migrate PIM data to and from your Treo if you don't have the luxury of synchronizing directly with Microsoft Outlook. I highly recommend considering at least importing data into Palm Desktop to ease the pain of initially setting up your device, assuming you have PIM data stored in an application capable of exporting in a suitable format. |