| Using an e-mail client (such as Mail or Entourage) isn't the only way to access your .Mac e-mail account. Your .Mac account comes with a full featured Web-based e-mail client that lets you send and receive e-mail, organize your e-mail, and even use the addresses stored in Mac OS X's Address Book and you can do it from anywhere that you have access to a Web browser. To open .Mac Webmail 1. | Open your Web browser and go to http://webmail.mac.com.
The .Mac login page loads.
| 2. | In the Member Name field, type your .Mac member name.
| 3. | In the Password field, type your .Mac password (Figure 2.20).
Figure 2.20. You'll be seeing a lot of this page. This is the .Mac login page, and you'll use it to enter your .Mac member name and password to access the members' area of the .Mac Web site. 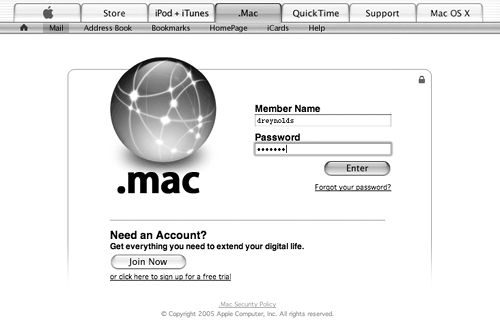
| 4. | Click Enter.
The Web interface for your .Mac e-mail account opens (Figure 2.21). This interface looks and behaves a lot like ane-mail client, and if you've ever used a Web interface for other e-mail accounts, you'll probably feel right at home. The interface features a toolbar across the top, a message count and search field, a list of messages, and a message count at the bottom everything you need to work with your e-mail.
Figure 2.21. The main .Mac Web e-mail interface looks and behaves a lot like an application-based e-mail program. Icons across the top act like buttons in a program, causing actions to happen. E-mail messages are listed below the buttons. 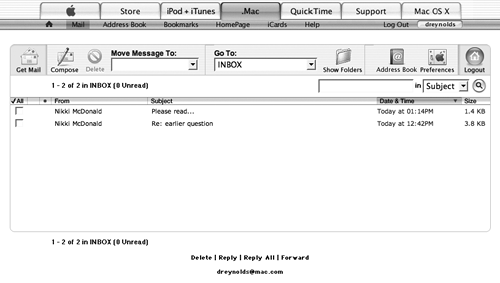
|
 Tips Tips
You can also visit www.mac.com, log in to your .Mac account, and then click the Mail button. This will take you to the Web interface for your .Mac e-mail account. If you're using IMAP with your .Mac account, you can manage your mail by logging in to your .Mac account's Web interface. This includes moving and deleting mail, and creating and deleting folders. These changes will show up in your IMAP e-mail client the next time you synchronize your mail.
To read a message - Click the subject line of the message you want to read (Figure 2.22).
Figure 2.22. Click the subject line of a message to open and read it. Because this is a Web page and not an e-mail program, the message will not be highlighted when it is clicked but your pointer will change to indicate that it is over something you can click. 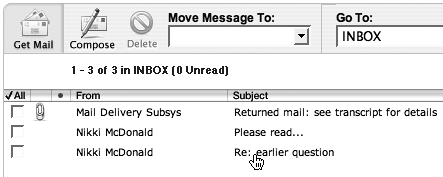
or
Click the name of the person who sent the message.
The message loads in your Mail window.
Tips When reading a message, you can move to the previous message or next message by using your arrow keys, or you can move back to the list of messages by clicking the Mail button. To sort the messages in a list, click the column header above what you want to sort by (such as date, message size, or subject).
To delete a message 1. | Click the subject line of the message you want to delete.
The message loads in your Mail window.
| 2. | Click the Delete button (Figure 2.23).
Figure 2.23. Click the Delete button to delete the message you're reading. 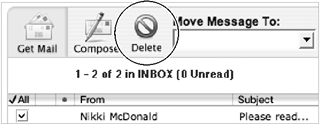
The message is moved to the Deleted Messages folder and the next message is displayed.
|
Emptying the Deleted Messages Folder When you delete a message, it doesn't actually get deleted. Rather, it gets moved to the Deleted Messages folder, where it awaits its final fate including a reprieve, if you change your mind. If you don't change your mind, you'll need to empty the Deleted Messages folder. To empty this folder, choose Show All Folders from the Go To pop-up menu. This loads all available mail folders. To the right of the Deleted Messages item, click the Empty Now link to delete all of your messages for good. |
To reply to a message 1. | Click the subject line of the message to which you want to reply.
The message loads in the Mail window.
| 2. | Click the Reply button (Figure 2.24).
Figure 2.24. Click the Reply button to move to .Mac's reply-composition pane, letting you pen a reply to a message you've received. 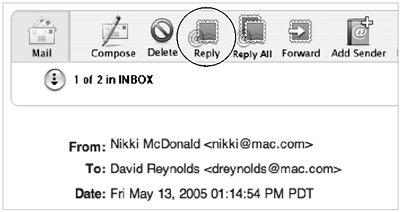
This takes you to the message-composition page, where you can write your reply in the text field (Figure 2.25).
Figure 2.25. When you compose a reply to a message, you'll see a few key things the recipient's e-mail address, the subject line, and your reply text. 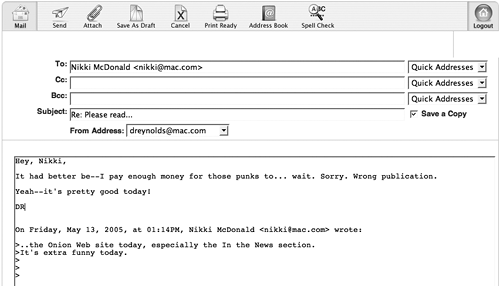
| 3. | Type your reply and click the Send button (Figure 2.26).
Figure 2.26. Click the Send button to send your message. 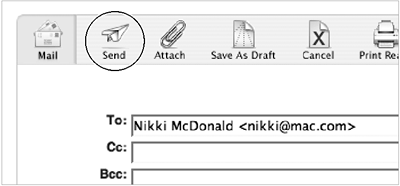
Your reply is sent to the person who sent you the original message.
|
Tips You can add a message's sender to your Address Book by first clicking the message in the Mail window and then clicking the Add Sender button in the toolbar. The sender of the message is now added to your .Mac Address Book, and if you use iSync, it will be synchronized with other devices as well. To reply to all of the people included on an e-mail message, instead of just the person who sent you the message, click the Reply All button. You can change or add any e-mail addresses just be sure to separate multiple addresses with a comma and a space (you@mail.com, me@mail.com).
To forward a message 1. | Click the subject line of the message you want to forward.
The message loads in your Mail window.
| 2. | Click the Forward button (Figure 2.27).
Figure 2.27. Click the Forward button to move to .Mac's forward-composition screen, where you can write a note at the top of a forwarded e-mail. 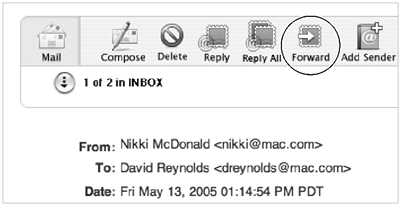
The message-forwarding pane loads (Figure 2.28).
Figure 2.28. When you write the introduction to a forwarded message, the original message's text appears below, including some basic e-mail headers (From, To, and so on). 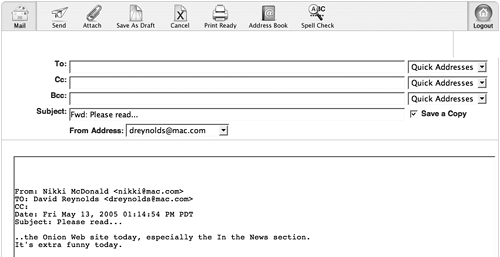
| 3. | In the To field, enter the e-mail address of the person to whom you want to forward the message.
| 4. | Click the Send button.
The message is forwarded.
|
To compose and send a message 1. | Log in to your .Mac Webmail account.
The Web interface for your .Mac e-mail loads.
| 2. | Click the Compose button (Figure 2.29).
Figure 2.29. To write an e-mail message from scratch, click the Compose button. 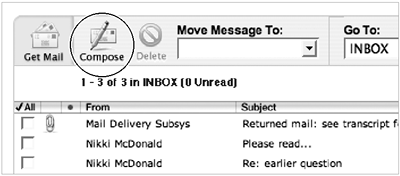
The message-composition form loads (Figure 2.30).
Figure 2.30. Blank screen not very inspiring. Here, you enter your recipients' e-mail addresses, a subject, and the text of your message. 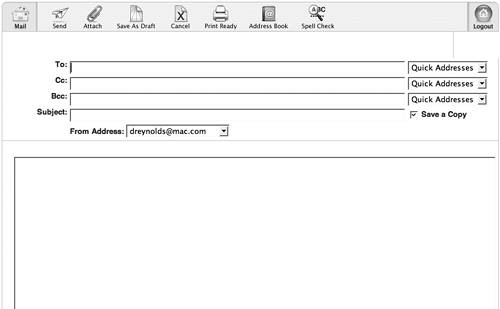
| 3. | In the To, Cc, and Bcc fields, enter one or more e-mail addresses.
| 4. | In the Subject field, enter a subject for your message.
| 5. | In the From Address pop-up menu, choose the e-mail address from which you want to send the message (if your .Mac account has more than one address associated with it).
| 6. | In the text field, type the message.
| 7. | In the toolbar at the top of the page, click Send.
The e-mail message is sent, and you're returned to the main Mail window.
|
Tips If you want to save a message as a draft while you're working on it, click the Save As Draft button on the message-composition page. The message will be saved in your Drafts folder. You can check to make sure your e-mail message isn't riddled with misspellings by clicking the Spell Check button before you send. Any misspelled words will be underlined in red, and the number of misspelled words will be shown. Click the Edit link at the bottom to return to the message-composition screen and change the misspelled words.
To attach a file to a message 1. | Log in to your .Mac Webmail account.
| 2. | Compose a new message to which you want to attach a file.
or
Click an existing message to which you want to attach a file.
The message opens.
| 3. | In the toolbar at the top of the .Mac Webmail page, click the Attach button (Figure 2.31).
Figure 2.31. To attach a file to an outgoing e-mail message, click the Attach button in the toolbar above the composition area. 
The file-attachment page loads.
| 4. | Click the Browse button (Figure 2.32).
Figure 2.32. Attaching a file using the file attachment page is an easy three-step process. 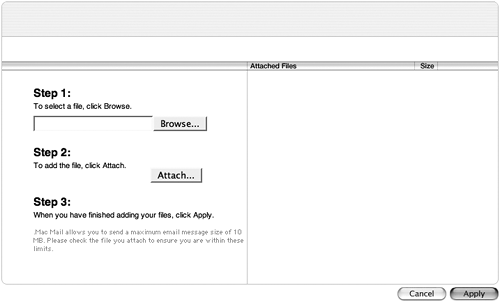
The File Upload window opens (Figure 2.33).
Figure 2.33. Click the Browse button to call up the File Upload window, from which you can choose a file to attach to an e-mail message. 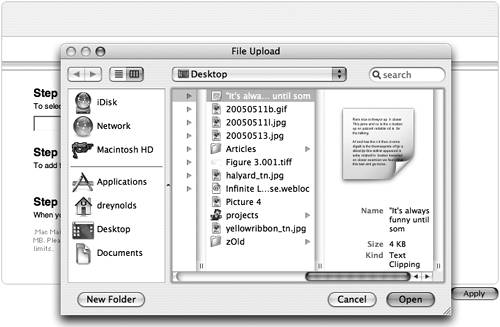
| 5. | Navigate to the file that you want to attach to your message, and click Open.
The path to the file that you chose appears in the field next to the Browse button (Figure 2.34).
Figure 2.34. Once you've selected a file to be attached, its file path shows up in the field to the left of the Browse button. 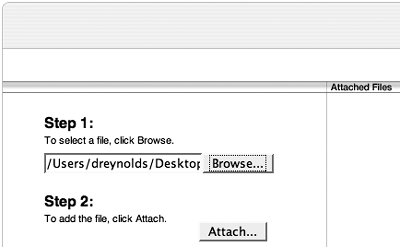
| 6. | Click the Attach button.
The file is uploaded to the .Mac e-mail servers, and its name appears in the Attached Files column (Figure 2.35).
Figure 2.35. Once you've attached a file, it appears in the Attached Files column. You can attach more than one file this way. 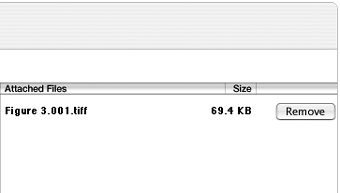
| 7. | Click Apply.
You're returned to the message-composition pane, and the name of the file you uploaded appears above the message text area (Figure 2.36).
Figure 2.36. An attached file appears to the right of the Attachments label, with a nifty paper-clip icon next to it. 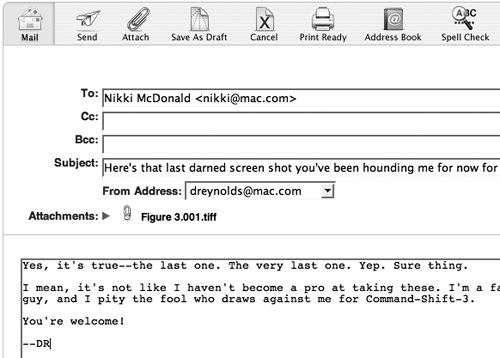
| 8. | Click the Send button.
The message and the attached file are sent, and you're returned to the main Mail window.
|
Tip To remove an attached file, click the Remove button to the right of the filename in the message-attachment page, or click the disclosure triangle to the right of the Attachments label in the message-composition page as shown in Figure 2.36. Here you can delete attachments and see other information about the files you've uploaded.
Printing a Message If you're reading a message you simply must have in paper form, you can print it in a format that your printer is more likely to appreciate or at least one that doesn't require so much paper or ink. Open the message that you want to print and click the Print Ready button. A new window will open that contains the e-mail headers and text with no extraneous graphics. From the File menu, choose Print to call up the Print dialog, where you'll choose Print again. |
Using .Mac's online Address Book One of the best reasons to have a .Mac account is that .Mac is so well integrated with Mac OS X that it makes tedious tasks less, well, tedious. A good example of this is how .Mac Mail uses e-mail addresses stored in your Address Book. After you've set up synchronization and synced your Address Book to your .Mac account (see Chapter 6, "Using Address Book," for instructions on how to do this), you can easily access all of your e-mail addresses from any Internet-enabled computer, anywhere, anytime. And if you use .Mac's Quick Address feature, entering e-mail addresses can be accomplished with a simple point and click. To use an address from Address Book 1. | Log in to your .Mac Webmail account.
| 2. | In the toolbar at the top of the .Mac Webmail page, click the Compose button.
The Compose page loads.
| 3. | In the toolbar at the top of the .Mac Webmail page, click the Address Book button (Figure 2.37).
Figure 2.37. Looking for an e-mail address? You can access your Address Book while using .Mac's Webmail by clicking the Address Book button. 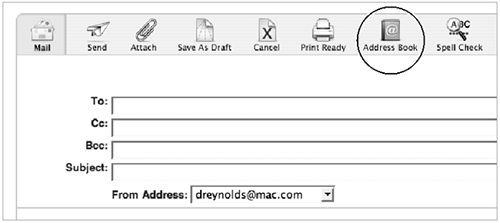
A page with the addresses in your online Address Book loads (Figure 2.38).
Figure 2.38. The addresses in your .Mac Address Book are ready for you to use in your e-mail messages. 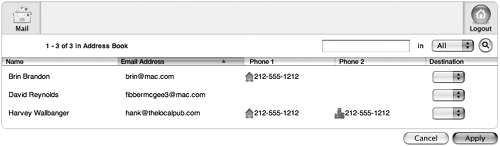
| 4. | From the pop-up menu next to each address, choose the addresses you want to use by selecting To, Cc, or Bcc (Figure 2.39).
Figure 2.39. To include an address in an e-mail message, select To, Cc, or Bcc in the pop-up menu to the right of the address you want to use. 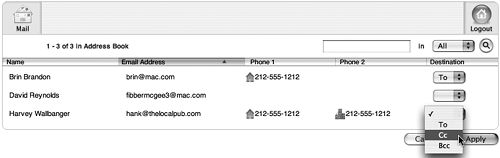
| 5. | Click the Apply button.
The addresses you selected appear in the appropriate address fields (Figure 2.40).
Figure 2.40. The addresses you indicated in the Address Book page appear in the appropriate e-mail address fields. 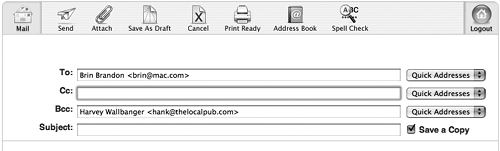
|
To add an address to the Quick Address menu 1. | Log in to your .Mac Webmail account.
The Web interface for your .Mac e-mail account opens.
| 2. | In the toolbar at the top of the .Mac Webmail page, click the Address Book button.
A page with the addresses in your online Address Book loads.
| 3. | Click the check boxes to the right of the addresses that you want to add to the Quick Address menu (Figure 2.41).
Figure 2.41. To add an address to the Quick Addresses menu, check the box to the right of the address in your online Address Book. 
| 4. | Click Save.
The addresses are added to the Quick Address menu, available for use when composing an e-mail message.
|
To use a Quick Address 1. | Log in to your .Mac Webmail account.
| 2. | In the toolbar at the top of the .Mac Webmail page, click the Compose button.
The Compose page loads.
| 3. | To the right of the To, Cc, and Bcc fields, click the Quick Addresses menu to select the address you'd like to add to that field (Figure 2.42).
Figure 2.42. Addresses you've selected appear in the Quick Addresses menu, ready and waiting. 
The address is automatically added to the field (Figure 2.43).
Figure 2.43. Once you've chosen an e-mail address from the Quick Addresses menu, it appears in the To, Cc, or Bcc field to its left. 
|
Working with folders You can use your .Mac Webmail interface to organize and sort your mail in folders. When you log in to your .Mac e-mail account through a Web browser, you're presented with your Inbox, which is your main folder. Every account also comes with a few additional folders that may show up Drafts, Sent Messages, and Deleted Messages and you can create more if you like. The Drafts folder appears only after you've saved an e-mail as a draft, and the Sent Messages and Deleted Messages folders appear only if you have the Save Sent Message To and Move Deleted Messages To check boxes checked. To view all folders 1. | Log into your .Mac Webmail account.
The Web interface for your .Mac e-mail account opens.
| 2. | From the Go To pop-up menu, choose Show All Folders (Figure 2.44).
Figure 2.44. From the Go To menu, choose Show All Folders to be taken to a list of your .Mac e-mail folders. 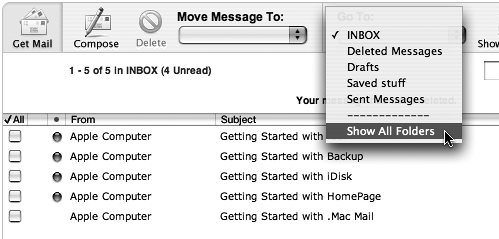
or
In the toolbar at the top of the .Mac Webmail page, click the Show Folders button (Figure 2.45).
Figure 2.45. You can also click the Show Folders button to see a list of all your .Mac e-mail folders. 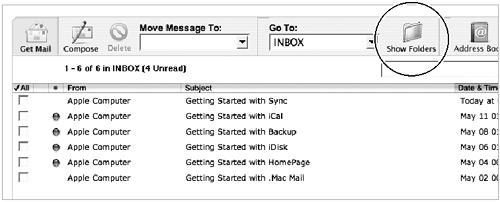
A page opens displaying all of your current e-mail folders, along with each folder's name, number of unread messages, total messages, and storage capacity (Figure 2.46).
Figure 2.46. The Show All Folders view displays all of the folders associated with your .Mac e-mail account. 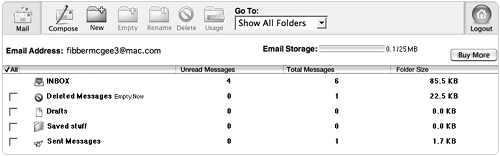
|
To create a folder 1. | Log in to your .Mac Webmail account.
The Web interface for your .Mac e-mail account opens.
| 2. | In the toolbar at the top of the .Mac Webmail page, click the Show Folders button as shown in Figure 2.45.
A page opens displaying all of your current e-mail folders.
| 3. | In the toolbar at the top of the page, click the New button (Figure 2.47).
Figure 2.47. Clicking the New button creates a new folder in which you can store your e-mail. 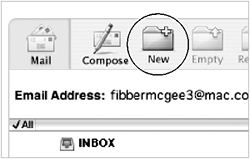
A new folder appears at the top of your current list of e-mail folders.
| 4. | In the folder-name field, type the name for your new folder (Figure 2.48).
Figure 2.48. You can name your folder something useful or memorable type it in the text field next to the folder and click Save. 
| 5. | Click Save.
Your new folder is added to your existing folder set and appears in your Webmail account, as well as in your e-mail client (provided you're set up to use your .Mac account as an IMAP account).
|
To rename a folder 1. | Log in to your .Mac Webmail account.
The Web interface for your .Mac e-mail account opens.
| 2. | In the toolbar at the top of the .Mac Webmail page, click the Show Folders button.
A page opens displaying all of your current e-mail folders.
| 3. | Check the boxes next to the folders you want to rename (Figure 2.49).
Figure 2.49. To flag a folder for renaming, check the box to the left of its name. 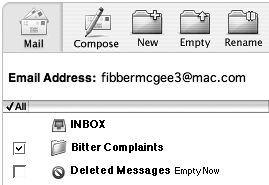
| 4. | In the toolbar at the top of the .Mac Webmail page, click the Rename button (Figure 2.50).
Figure 2.50. To rename checked folders, click the Rename button. 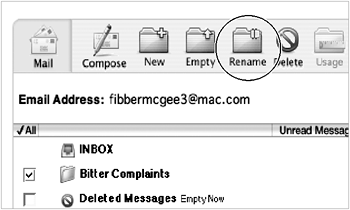
The names of all the checked folders are now editable.
| 5. | Type in a new name for each checked folder (Figure 2.51).
Figure 2.51. Rename your folder. 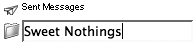
| 6. | Click Save.
Your folders should display their new names.
|
Tips You can rename any folder except your Inbox folder. You can rename your Drafts and Deleted Messages folders, but resist the urge to do so. If you rename your Drafts folder, you could run into an error the next time you try to save a message. Renaming Deleted Messages seems to work without causing any problems, but it's better to be safe than sorry.
To delete a folder 1. | Log in to your .Mac Webmail account.
The Web interface for your .Mac e-mail account opens.
| 2. | In the toolbar at the top of the .Mac Webmail page, click the Show Folders button.
A page opens displaying all of your current e-mail folders.
| 3. | Check the boxes next to the folders you want to delete (Figure 2.52).
Figure 2.52. To flag a folder for deleting, check the box to the left of its name. 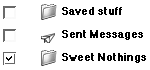
| 4. | In the toolbar at the top of the page, click the Delete button (Figure 2.53).
Figure 2.53. Clicking the Delete button deletes all flagged folders. 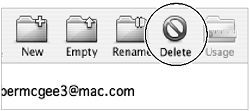
A page loads asking if you're sure you want to delete the selected folder or folders. If you've selected multiple items, you're only warned once (Figure 2.54).
Figure 2.54. Before you're allowed to delete a folder, you're asked if you want to follow through. Click Delete to continue. 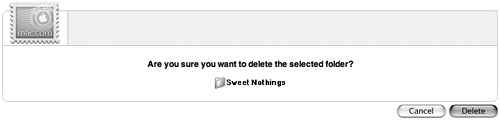
| 5. | Click Delete.
The folder is deleted.
|
Tip
Deleting all messages in a folder Sometimes you want to delete all of the messages in a folder, but keep the folder itself. Doing so is easy. Here's how. To delete all messages in a folder 1. | Log in to your .Mac Webmail account.
The Web interface for your .Mac e-mail account opens.
| 2. | In the toolbar at the top of the .Mac Webmail page, click the Show Folders button as shown in Figure 2.45.
A page opens displaying all of your current e-mail folders.
| 3. | Check the box next to the folder you want to empty (Figure 2.55).
Figure 2.55. To empty a folder, check the check box to the left of the folder you want to empty. 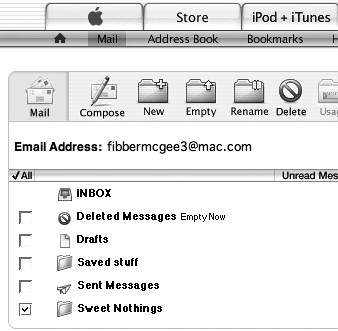
| 4. | In the toolbar at the top of the page, click Empty (Figure 2.56).
Figure 2.56. Click the Empty button in the toolbar to delete all of the messages in the folder. 
The messages will be removed from that folder.
|
Tip
Getting Organized If you have a ton of mail, it's important to keep it organized otherwise, you'll be pushing up against that storage limit in no time. Here are a few tips to help you reduce e-mail clutter and stay within your storage limits. Delete what you don't need sure, the temptation to keep an e-mail may be great, but unless you actually need it, get rid of it. Set up a group of folders and file messages in them accordingly. Trim attachments when possible messages with attached files eat up a lot of space, so be sure to download the attachments and delete the messages.
|
Moving messages The key to keeping an organized e-mail account is to trash the messages you no longer need and file the messages you want to hold on to for a while. Moving messages between folders is easy. To move an e-mail message 1. | Log in to your .Mac Webmail account.
The Web interface for your .Mac e-mail account opens.
| 2. | From the Go To pop-up menu, choose the folder that contains the message you want to move (Figure 2.57).
Figure 2.57. From the Go To menu, choose the folder that contains the messages you want to move (or to search for); the folder will load on your screen. 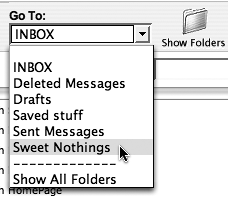
The folder opens, displaying all of its messages in a list.
| 3. | Check the boxes next to the messages you want to move.
| 4. | From the Move Message To pop-up menu, choose a destination folder for your selected messages (Figure 2.58).
Figure 2.58. From the Move Message To menu, choose a destination folder for your messages. 
The selected messages are moved to the new folder.
|
Using search If you're using your .Mac e-mail account as an IMAP account, you may be storing a lot of messages. Wading through those to find that one special message from the Bulwer-Lytton Fiction Contest, well, it may be daunting when you have 373 messages in your Filed Messages folder, and you can't quite remember the date when the message was sent. That's why your .Mac Web e-mail interface has a built-in search function. To find a message using search 1. | Log in to your .Mac Webmail account.
The Web interface for your .Mac e-mail account opens.
| 2. | From the Go To menu, choose the folder that contains the message you're looking for (Figure 2.57).
The folder opens, displaying all of its messages in a list.
| 3. | In the search field in the upper right corner of the page, type the term you want to search for (Figure 2.59).
Figure 2.59. Type your search term in the search field. 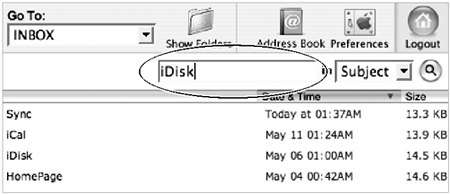
| 4. | From the pop-up menu next to the search field, choose Subject, From, To, or CC (Figure 2.60).
Figure 2.60. To choose what's searched, select Subject, From, To, or CC from the menu. 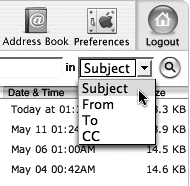
This setting determines whether the program will search subjects, From addresses, To addresses, or CC addresses.
| 5. | Click the magnifying glass button to the right of the two pop-up menus (Figure 2.61).
Figure 2.61. Click the magnifying glass icon to perform the search. 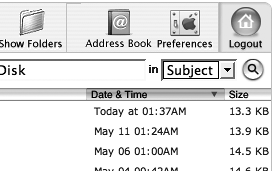
All messages matching the search term load in a new page (Figure 2.62).
Figure 2.62. After you perform a search, the results are shown in a list. 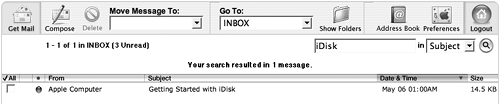
|
Tip
|