1. | Open the iWeb application.
The iWeb interface loads, showing the "Choose a template for your webpage" dialog (Figure 5.8).
Figure 5.8. When first loaded, iWeb asks you to choose a template for the page you're creating. 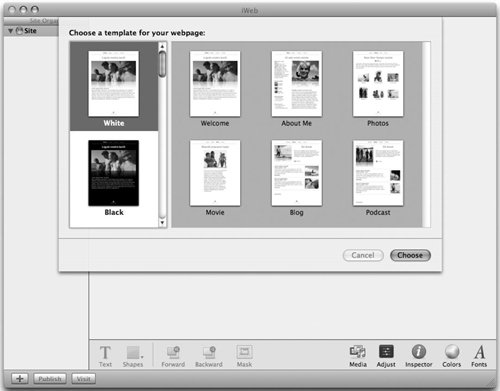
| 2. | If this dialog isn't displayed (as will be the case once you've already created a page with iWeb), choose File > New Page (or press Command-N).
| 3. | In the dialog that appears, choose a theme from the column on the left (such as Black, White, or Formal), choose the Welcome template, and then click Choose (Figure 5.9).
Figure 5.9. Pick a theme and the Welcome template, and then click Choose to get started. 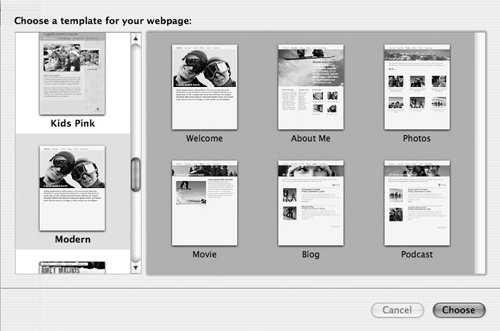
The template loads, complete with placeholder image and text.
| | | 4. | Click the Media button in the lower right corner of the window (Figure 5.10).
Figure 5.10. Click the Media button to access all of your iLife content, such as music, movies, and pictures. 
The Media Browser loads (Figure 5.11).
Figure 5.11. The Media Browser lists all of the music, movies, and photos available for posting on your Web page. 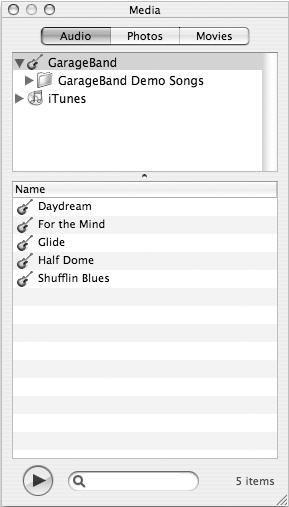
| 5. | If it's not already selected, click the Photos tab in the Media Browser window.
Your iPhoto library is displayed (Figure 5.12).
Figure 5.12. The Photos pane of the Media Browser displays all of the pictures in your iPhoto library. 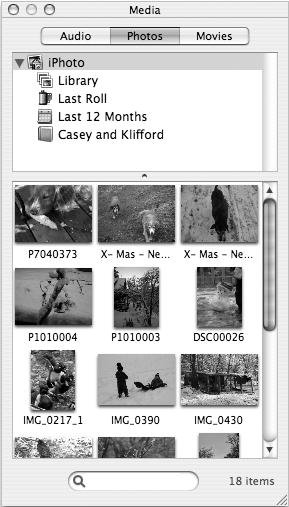
| | | 6. | Drag the picture you want to use from the Media Browser to the placeholder picture in the template (Figure 5.13).
Figure 5.13. To put an image on your Web page, drag it from the Media Browser to the placeholder picture. 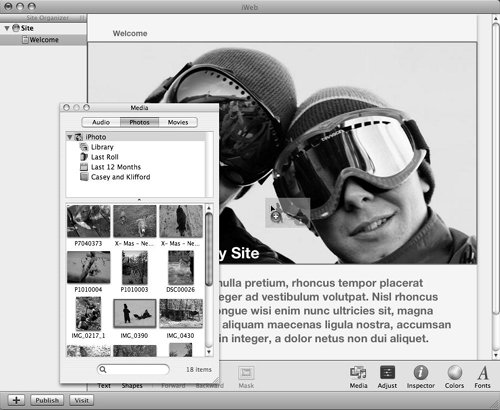
Your picture is added to the page (Figure 5.14).
Figure 5.14. When you drop a picture on the page, it takes the place of the placeholder image. 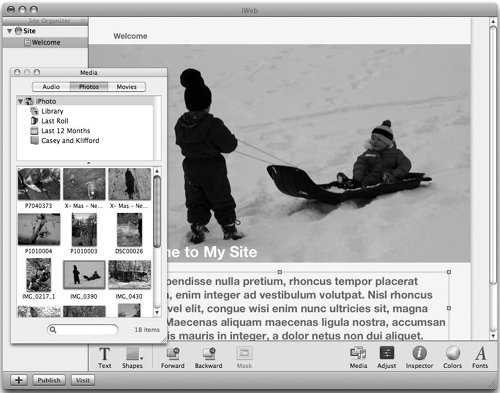
| 7. | Double-click the text block and type in the text for your page.
Your page is ready to go (Figure 5.15).
Figure 5.15. Once you've added your images and edited your text, you're ready to publish the page to your .Mac account. 
| 8. | In the lower left portion of the window, click the Publish button.
Your page is uploaded to your .Mac account, and a dialog slides down, offering three buttons: Announce, Visit Site Now, and OK (Figure 5.16).
Figure 5.16. After you've published a page to your .Mac account, you're given three options: Announce, Visit Site Now, or OK. Click the button for the option you want. 
| | | 9. | In the dialog, click one of the following buttons:
Click Announce to automatically generate an e-mail message that you can send out to announce your new page and site (Figure 5.17). Figure 5.17. When you click Announce, an e-mail message is automatically generated in your preferred e-mail client. You can edit it, add e-mail addresses for the people you want to send it to, and then send it. 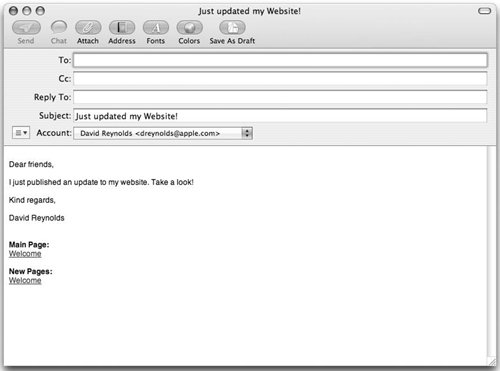 Click the Visit Site Now button to go directly to your new page (Figure 5.18). Figure 5.18. When you click Visit Site Now, your newly updated site is loaded in your Web browser. 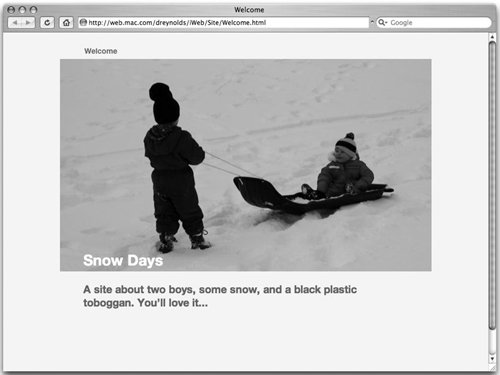 Click the OK button to return to work in iWeb (Figure 5.19). Figure 5.19. When you click OK after publishing a page, you are returned to iWeb where you left it. 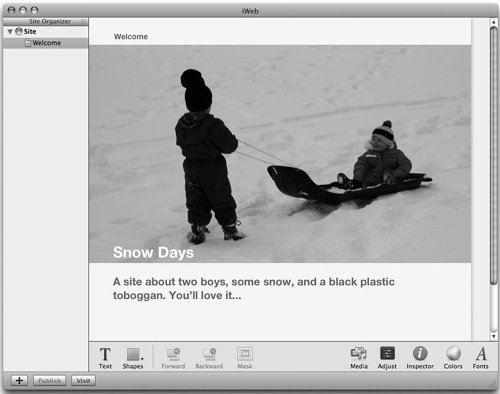
|
 Tips Tips
When you're working on a site that contains more than one page, clicking the Visit Site Now button takes you to that site's homepage, not necessarily the page you're working on. From there, follow links to the page you want to visit. The Visit button in the bottom-left corner of the iWeb window behaves the same way. You don't have to use the Media Browser to add pictures to your page; it just makes the job easier. You can, in fact, drag an image from a Finder window onto your page for the same effect. If you've set up your Mac with your .Mac account information, iWeb will automatically publish to your .Mac account with a click of the Publish button. iWeb automatically updates the site's navigation bar, depending on what pages are in the site, using the pages' names. You don't have to do a thing! To adjust your page to your liking (and control where the page is published), click the Inspector button to bring up the Inspector palette. (For more info on this, see sidebar, The Mysterious Inspector.)
The Mysterious Inspector iWeb has a powerful and somewhat mysterious tool that lets you control items on the pages you create: the Inspector palette (Figure 5.20). Figure 5.20. The Inspector palette lets you control everything from the title of your site to the positioning of a picture on a page. This portion of the inspector shows the site's name, the group to which the page is published, and how much iDisk storage is left. 
A complete discussion of iWeb and the Inspector is beyond the scope of this book (you'll find it covered in The Macintosh iLife '06, by Jim Heid). Still, it would be remiss to skip over the Inspector altogether. Consider this a brief introduction and an invitation to explore the Inspector in greater detail. To begin, click the Inspector button in the lower-right corner of the iWeb page (the one with an i on it). Then click an item on your page, and the selected item's attributes will be loaded into the Inspector window. The attributes governed by the Inspector vary, depending on the nature of the object you select; settings available for images differ from those for text objects or movies, for example. But generally, the Inspector controls seven aspects of your Web sites, the pages within them, and the objects embedded in those pages; each of these aspects corresponds to one of the seven buttons arranged along the top edge of the palette. Detailing all seven buttons, and the attributes they govern for various Web-page objects, would require a chapter unto itself, but the following list highlights the main functions of each button in the Inspector window, as they appear from left to right: Site (blue-orb icon) lets you give your site a name, choose whether your site is published to a group, and set a password for sites published to a .Mac account. This portion of the inspector also includes a Site tab for additional control over your site. Page (dogeared-page icon) allows you to set a name, fill color, and size for your page, as well as to decide whether the page is included in the site's navigation. Blog & Podcast ("RSS" icon) lets you choose how many excerpts (and the length of those excepts) are shown on a blog or podcast page, and lets you to specify podcast details (such as whether it requires a parental advisory and whether it should be listed in the iTunes Music Store). Text (capital "T" icon) provides fine-grained control over how the text on your page appears. Graphic (square-and-circle icon). controls image fill and stroke colors, and applies special image effects. Metrics (ruler icon) lets you control the exact size, rotation, and positioning of items on the page. Link (curved-arrow icon) permits you to quickly create hyperlinks on your pages.
Click around these buttons and study (or inspect) the attributes they govern, and before long, you'll get a feel for how the Inspector works. Note that the Inspector is just one of several tool palettes you'll find in iWeb. Others include: Media Browser. Used extensively for many tasks detailed in this chapter, this palette lets you incorporate pictures, audio, and videos into your pages. Adjust Image. This palette lets you make changes to images on a page. Colors. This palette is used to assign colors to elements on the page. and finally; Fonts. This palette lets you exercise some control over the fonts on your page.
You can get at these palettes by clicking the respective buttons at the bottom of the main window, or selecting the appropriate items from the Window menu. |
|