Input text boxes are limited to text-only information. HTML forms allow you to add check boxes, radio buttons , combo boxes, and more. Flash can now do the same, with the UI components included with the program. These UI components make it easy to create an interactive form.
In the next exercise you will add several UI components to guestbook1.fla, so make sure that file is still open .
-
Add a new layer above the Text Boxes layer, and name it Components. Lock the Text Boxes layer.
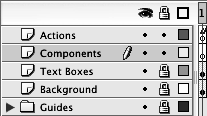
You don't want to accidentally mess up the contents of the Text Boxes layer, so lock the layer before you continue. In this exercise you are going to add the UI components to the new Components layer.
-
Drag an instance of the ComboBox component onto the stage. Use the Property inspector to set the Width of the ComboBox instance to 300. Then set the X and Y to 153 and 234, respectively. Type animal in the Instance Name text field.
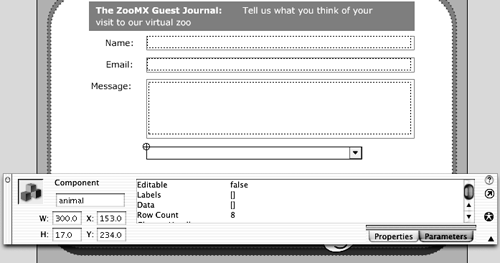
You'll find all of the components you need for this lesson in the Components panel. If you don't see the Components panel on the screen, choose Window > Components. It should be open if you haven't strayed from the panel set you created in Lesson 1.
When you add a component from the Components panel, you are actually adding an instance of a symboleach component is a special movie clip. Just click the ComboBox component in the Components panel and drag it onto the stage. When you release the mouse, an instance of the ComboBox should appear on the stage.
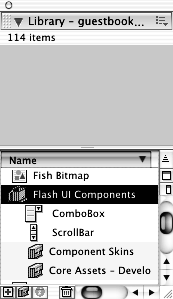
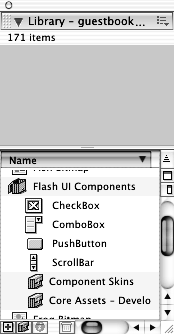
Take a quick look at the library after you add the ComboBox component. You should see a new Flash UI Components folder. When you add a UI component from the Components panel, it is automatically added to the folder. If you open the Flash UI Components folder in the library, you should see the ComboBox componentnotice the icon to its left, which indicates that it's a component, and not just a "plain" movie clip. Also notice a Component Skins folder inside the Flash UI Components folder. You'll take a look inside that folder later in this lesson.
When you select a component, the Property inspector should have two tabs on the right side: Properties and Parameters. You can set the width, height, X, Y, and instance name values regardless of which tab is selected. If you click the Properties tab, you should see that Flash knows the selected component is a movie clip, as shown in the figure below. Because this movie clip is "special" you can also set a number of additional values in the Parameters tab panel. You'll do so later in this lesson.
NOTE
You can set the width but not the height of the ComboBox component. The height is determined by the font used in the component.

The ComboBox you just added will eventually contain a list of animals. Users will pick their favorite animal from the list.
-
Drag an instance of the CheckBox component onto the stage, placing it under the ComboBox instance you just added. Set the CheckBox component's Width to 200. Set the X and Y to 153 and 265. Finally, type mailList in the Instance Name text box.
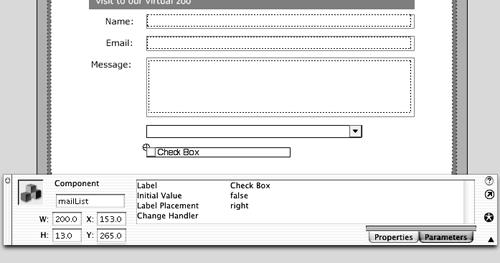
You can add the CheckBox component the same way you added the ComboBox component. Make sure the Components layer is selected, and drag the CheckBox component from the Components panel onto the stage.
As with the ComboBox component, the Property inspector displays both the Properties and Parameters tabs when the CheckBox component is selected. You'll modify the properties in the Parameters tab later in this lesson.
The CheckBox component you just added lets users indicate whether they want to be added to the zoo's mailing list.
-
Drag an instance of the PushButton component onto the stage. Set the X and Y for the instance of the PushButton component to 153 and 300, and type submit in the Instance Name text box.
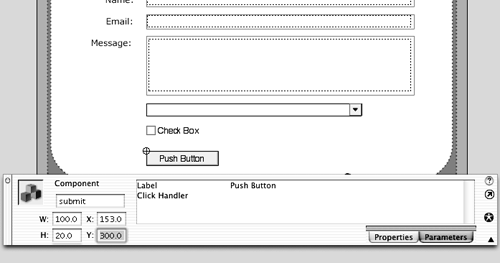
The PushButton instance you just added will act as a submit button for the form you're creating. You'll add a Clear button next.
Take a look in the libraryyou should see that there are now several components in the Flash UI Components folder.
-
Add another instance of the PushButton component to the stage, using the Property inspector to position it at X: 265 and Y: 300. Type clear in the Instance Name text box.
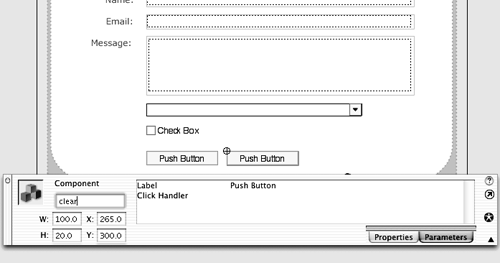
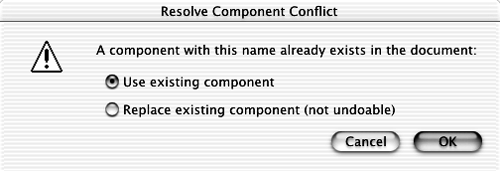
When you add a second instance of the PushButton component to the movie, Flash doesn't add another copy to the librarythere should still be just one PushButton component. But if you were to add a modified version of the PushButton component, for example a customized one, Flash would ask if you'd like to replace the existing component, as shown in the figure below.
This instance of the PushButton component will act as a Clear button for your form. It will reset all the values in the form to their initial settings.
-
Save the movie as guestbook2.fla.
Now that you have some components in your movie, it's time to set their parameters. Make sure to save the movie as guestbook2.fla in the FlashTFS folder on your hard drive before you continue.


