You can use ActionScript to create movement in Flash. Animation is simply a change in appearance over time, so now that you know how to change the appearance of movie clips in Flash, and you know how to make ActionScript run at a specified interval, this should be easy for you. In the next exercise you will add an ActionScript-generated animation, which will run while the preloader is loading all of the movies.
You should still have zoo38.fla open when you start this exercise.
-
Right-click (Windows) or Control-click (Macintosh) the Shape Animation symbol in the library, and choose Linkage. When the Linkage Properties dialog box opens, select the Export for ActionScript option and set the Identifier to plClip. Make sure the "Export in first frame" option is also selected, and click OK.
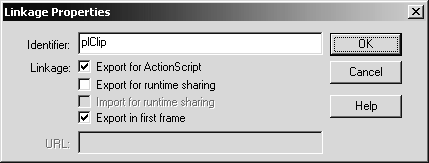
You are going to use the attachMovie method of the built-in MovieClip object to attach an instance of the Shape Animation movie clip to the stage. Before you can do that, you have to make sure that it's exported for ActionScript and has an identifier.
-
Add the following ActionScript to frame 1 of the Actions layer:
xSpeed = 10; ySpeed = 5;
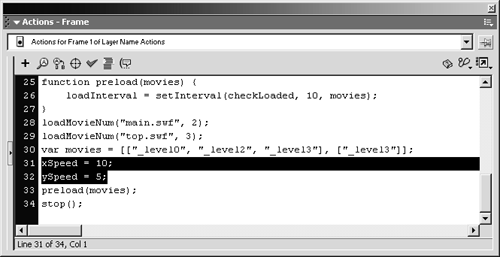
This ActionScript should be added after the movies array is created but before the preload function is called. This code initializes the values of xSpeed and ySpeed , which you will use in the function you'll create in the next step.
-
Now add a function named moveClip :
function moveClip(obj) { obj._x += xSpeed; obj._y += ySpeed; if (obj._x <= 0 obj._x >= 600) { xSpeed = - xSpeed; } if (obj._y <= 0 obj._y >= 400) { ySpeed = -ySpeed; } updateAfterEvent(); } 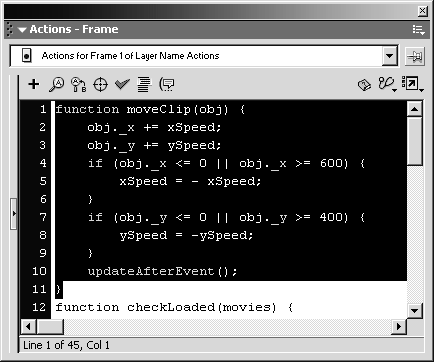
Add this function before any other ActionScript in frame 1 of the Actions layer. This might look like complicated code at first glance, but as you go through the function, line by line, you'll see that it's actually very simple.
The first line of code declares the function's name as moveClip . This new moveClip function will expect a single parameter, obj , from whatever movie clip, button, or frame calls it. That parameter will be used several times in the moveClip function, so it's important that it be included in the definition for the function.
The next two lines of code modify the x and y positions of obj :
obj._x += xSpeed; obj._y += ySpeed;
Remember, obj is passed to the function by whatever calls it. So if, for example, you have a button call this function, and you set the obj parameter to myClip , the code will modify the x and y positions of myClip . The code for this example would look like this:
on (press) { moveClip(myClip); } The addition assignment operator ( += ) assigns the value of the left side of the equation plus the value on the right side of the equation to the original value of the left side of the equation. It's sort of like typing obj._x = obj._x + xSpeed , but much shorter.
After the new values for the _x and _y properties are assigned, the code checks to see if obj is outside the "boundaries" of the movie. This is done with two if statements. The first if statement checks to see if obj._x is less than or equal to (the left side of the movie) or greater than or equal to 600 (the right side of the movie). If either of these conditions is true, the if statement reverses the value of the xSpeed variable, which you initialized in step 2, effectively reversing the direction that obj will move the next time through the function. The second if statement does essentially the same thing, but in the y direction.
The last line of code refreshes the screen using the updateAfterEvent action. This code simply lets Flash update the display independent of the frame rate when the function is called using the setInterval action, which is just what you're going to do in the next step. So if the interval for the setInterval function is greater than the frame rate for the movie, the speed at which obj moves is faster than the frame rate would allow.
-
Add this ActionScript to the preload unction:
this.attachMovie("plClip", "plClip", 1); moveInterval = setInterval(moveClip, 10, plClip); 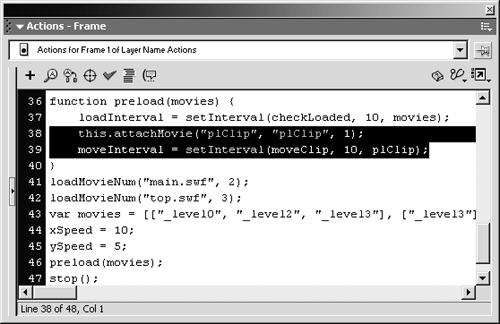
Add this code after the code already in the preload function. After you add the code, the preload function will look like the following:
function preload(movies) { loadInterval = setInterval(checkLoaded, 10, movies); this.attachMovie("plClip", "plClip", 1); moveInterval = setInterval(moveClip, 10, plClip); } This code simply attaches an instance of the Shape Animation movie clipyou already set its Identifier to plClip. Then the moveClip function is called by the setInterval function. The interval has the name moveInterval , which you can use to clear the interval when you no longer want the moveClip function to run. The argument that's sent to the moveClip function is plClip remember, moveClip expects an obj parameter, and in this setInterval action that parameter will have a value of plClip .
-
Add the following code to the checkLoaded function:
clearInterval(moveInterval); plClip.removeMovieClip();
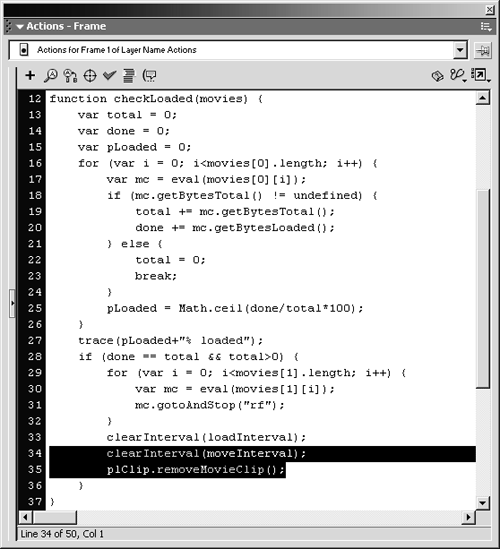
Add this code inside the if statement that clears the loadInterval interval. The finished checkLoaded function will look like this:
function checkLoaded(movies) { var total = 0; var done = 0; var pLoaded = 0; for (var i = 0; i<movies[0].length; i++) { var mc = eval(movies[0][i]); if (mc.getBytesTotal() != undefined) { total += mc.getBytesTotal(); done += mc.getBytesLoaded(); } else { total = 0; break; } pLoaded = Math.ceil(done/total*100); } trace(pLoaded + " % loaded"); if (done == total && total>0) { for (var i = 0; i<movies[1].length; i++) { var mc = eval(movies[1][i]); mc.gotoAndStop("rf"); } clearInterval(checkInterval); clearInterval(moveInterval); plClip.removeMovieClip(); } } This code clears the moveInterval interval, so the plClip instance will stop bouncing around on the stage. Then the code removes the movie-clip instance using the removeMovieClip method.
NOTE
The removeMovieClip method can only remove movie-clip instances that have been dynamically added to the movie using attachMovie or duplicateMovieClip .
-
Choose Control > Test Movie. Save the file as zoo39.fla in the FlashTFS folder on your hard drive.
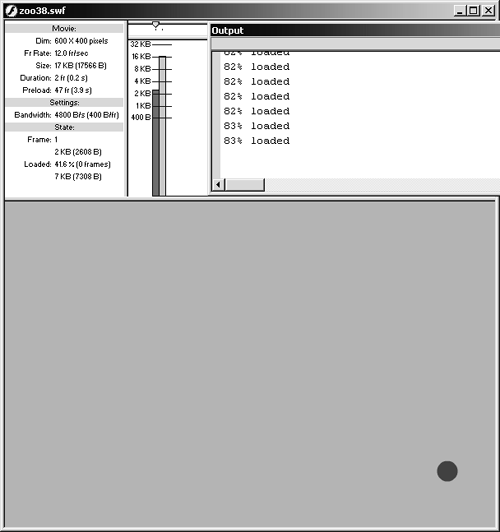
Be sure to choose View > Show Streaming, or the Output window will pop up saying "100% loaded." When you simulate streaming, the Shape Animation movie clip should appear. It will bounce around on the screen until the movies have finished preloading. It will then disappear, and top.swf, which was loaded into level 3, will start to play.
Close the Test Movie window when you're finished. Then save the movie as zoo39.fla in the FlashTFS folder on your hard drive. You're almost done! Keep the file open for now.


