Using Named Constants and Formulas
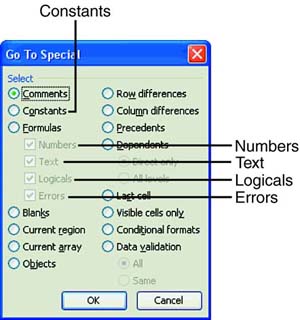
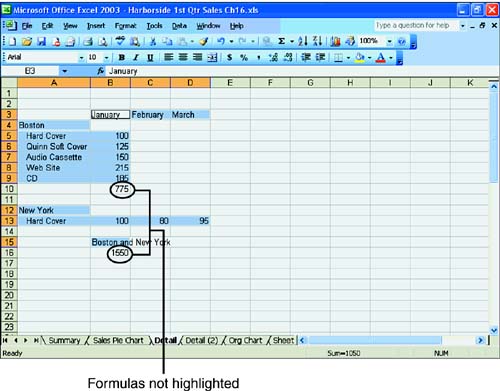
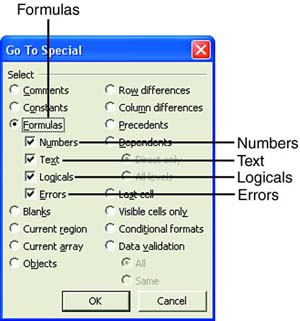
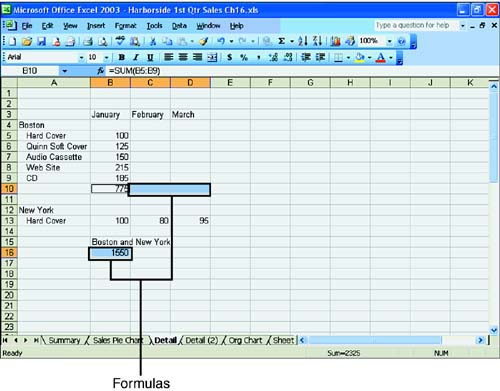
| Constants are cells whose contents are deemed not to be a formula, so those cells whose values do not begin with an equal sign are constants, whether they are numbers or text. The Formula option selects cells that meet the selection criteria of values returned as numbers, text, logical, or errors. Using ConstantsAs you learned at the beginning of this hour , you can use the Go To Special command to find constants. To do so, just press F5 (Go To) and click the Special button in the Go To dialog box. The Go To Special dialog box appears, as shown in Figure 16.10. Figure 16.10. Selecting constants in the Go To Special dialog box. In the Go To Special dialog box, select Constants (see Figure 16.10). Excel automatically selects (puts check marks in) all the check boxes under the Formulas option. Therefore, by default Excel finds all constants that are numbers, text, logicals, or errors. If you want to search for one or more of these constants, click in the check box to remove the check mark for the constants you don't want to find. Leave the check mark in the boxes for constants you want to find. Finally, click OK to confirm your choices. Excel highlights all the constants on your worksheet, as shown in Figure 16.11. Notice that the formulas are not highlighted. Now you know where the constants are located. Just click any cell to deselect the highlighting. Figure 16.11. Constants highlighted on the Detail worksheet. Using FormulasThe Go To Special command also finds formulas that meet a particular criteria you specify. To find formulas on your worksheet, press F5 (Go To) and click the Special button in the Go To dialog box. The Go To Special dialog box pops up. Select Formulas. Notice that Excel automatically selects (puts a check mark in) all the check boxes under the Formulas option, as shown in Figure 16.12. Figure 16.12. Selecting formulas in the Special Go To dialog box. By default, Excel finds all formulas that contain numbers, text, logicals, or errors. To search for one or more of these formulas, click in the check box to remove the check mark for the items you don't want to find. Leaving a check mark next to an item causes Excel to search for that type of formula. Then click OK. Excel should highlight all the formulas based on the criteria you specified in the Go To Special dialog box (see Figure 16.13). Figure 16.13. Formulas highlighted on the Detail worksheet. |
EAN: 2147483647
Pages: 279