32.5 Using SAM to Configure NIS
| |
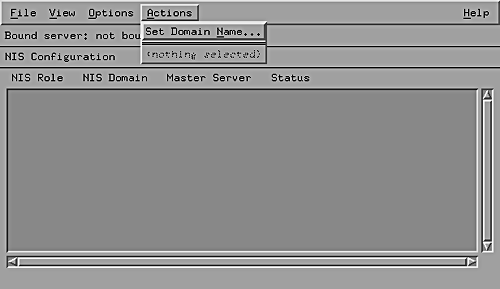
NIS can be configured using the NIS button from the Networking and Communications area of SAM. When you go to the NIS configuration window for the first time, you will see a blank screen as shown in Figure 32-1. The NIS configuration process starts with setting an NIS domain name using the Actions menu.
Figure 32-1. NIS window in SAM.

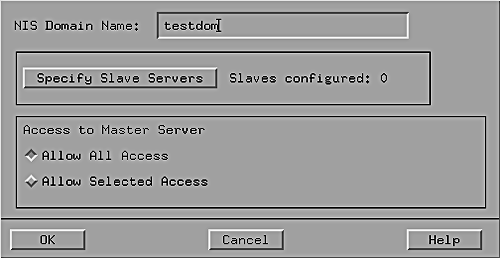
When you select Set Domain Name in the Actions menu, a small window shown in Figure 32-2, appears where you can enter a domain name. Here we have used testdom as the NIS domain name.
Figure 32-2. Setting an NIS domain name using SAM.

After you press the OK button in the window shown in Figure 32-2, you will return to the previous window shown in Figure 32-1. Now you will find a line showing the new domain name for the NIS client. The NIS client is disabled at this point. Again go to the Actions menu and select the Configure Master Server option, and you will find yourself in the window shown in Figure 32-3, where you will configure the master NIS server. After specifying information in this window, press the OK button to return to the previous window.
Figure 32-3. Configuring the master NIS server.

Go to the Actions menu once again and select the Enable Client option to enable the NIS client. On client-only machines, you will not configure any NIS server.
| |
| |
| Top |
EAN: 2147483647
Pages: 390