| Primarily, Web proxies are enabled to improve the performance of requests made to external Web sites by users on your local network. Many of your users visit the same Web sites throughout the day. A Web proxy caches this external Web site's content; Web browsers on your local network then read the cached content rather than use your slower Internet connection. Because all client traffic goes through the proxy, you can also use the proxy to restrict access to certain sites. To enable a Web proxy 1. | Within Server Admin, select Web from the Computers & Services list, and click the Settings tab.
| 2. | Click the Proxy tab to display your Web server's proxy settings (Figure 9.37).
Figure 9.37. Viewing the Proxy tab of Web services. 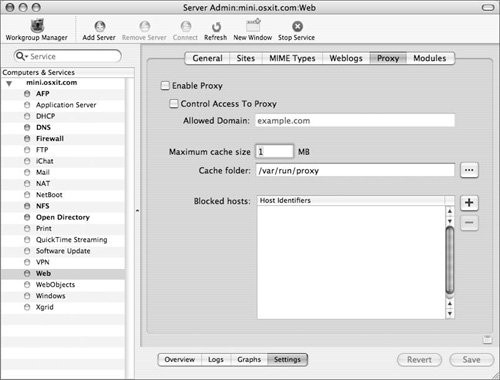
| 3. | Click the Enable Proxy check box.
| 4. | In the "Maximum cache size" field, set the maximum amount of space (in megabytes) your Web server will use for proxy cache files (Figure 9.38).
Figure 9.38. Enabling the proxy and setting various options. 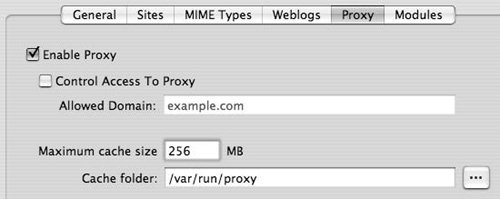
| 5. | To specify a cache folder other than the default Web proxy (/var/run/proxy) on the server's local drive, do either of the following:
- Enter the absolute path in the "Cache folder" field.
- Click the ellipsis button to use the browse dialog.
| 6. | When you've finished making changes, click Save.
|
 Tips Tips
When the cache reaches the maximum size, the oldest files are deleted from the cache folder. For your clients to use the Web proxy, you must configure them to use it. Client computers aren't configured to use a Web proxy by default. If you have a slower Web server and a fast Internet connection, you may be better off without the Web proxy.
To configure Web proxy use on Mac OS X 1. | Choose Apple > System Preferences to open the System Preferences application, and then choose the Network Preference pane.
| 2. | Select the appropriate network location and port configuration.
| 3. | Click the Proxies tab and select Web Proxy in the proxy list (Figure 9.39).
Figure 9.39. Using System Preferences to set the Web proxy on Mac OS X. 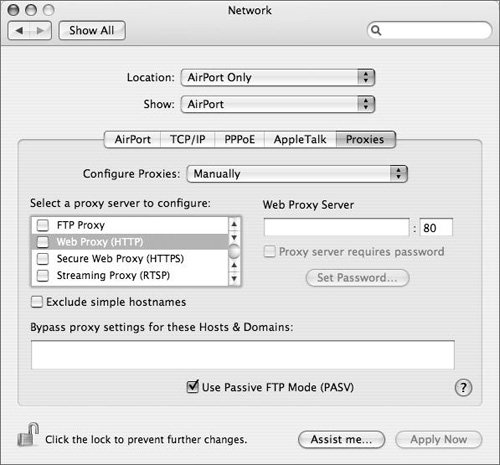
| 4. | Enter the address to your proxy in the Web Proxy Server field (Figure 9.40).
Figure 9.40. Entering the Proxy values in the Network preference pane on Mac OS X. 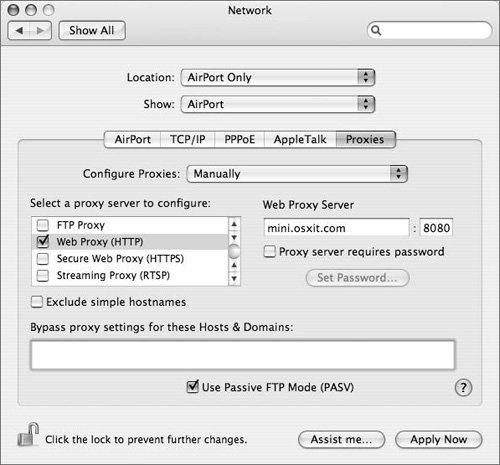
| 5. | Click Apply Now and quit System Preferences.
|
Configuring blocked Web sites When you're using a Web proxy, all the Web traffic from your client computers must pass through the proxy server. You can take further advantage of this situation by creating a list of blocked Web site hosts. Doing so prevents your users from going to any Web site that you've defined in the list. To block Web sites 1. | Launch Server Admin, select Web from the Computers & Services list, and click the Settings tab.
| 2. | Click the Proxy tab to display your Web server's proxy settings (as seen in Figure 9.37).
| 3. | If it isn't already checked, click the Enable Proxy check box.
| 4. | To add hostnames to the "Blocked hosts" list, do either of the following:
- Click the plus button, enter the fully qualified hostname, and press the Return key (Figure 9.41).
Figure 9.41. Entering names that will be blocked by the proxy. 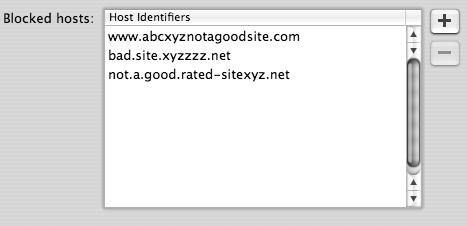
- Drag and drop a plain-text file listing the fully qualified hostnames separated by tabs or commas (Figure 9.42).
Figure 9.42. Dragging a text file into the Blocked hosts field. 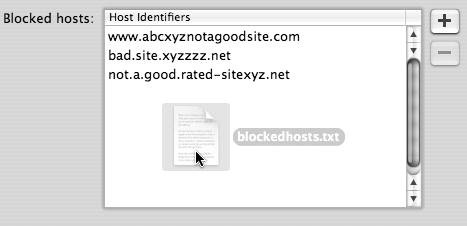
| 5. | When you've finished making changes, click Save.
| 6. | Once the blocked sites have been entered and saved, you should verify that the sites are indeed blocked to your users by testing access to these sites from a browser.
|
Tips When you're dragging a text file to the "Blocked hosts" window, make sure there is a carriage return at the end of the last hostname in the file. Otherwise, it will be ignored. Mac OS X computers aren't, by default, configured to use a Web proxy. See the "To configure Web proxy use on Mac OS X" task for more information. Any client that isn't configured to use your proxy server can bypass your list of blocked hosts. The best way to prevent this is to use a network firewall that only allows your proxy server to access external Web sites.
Enabling Weblogs Mac OS X Server now supports Weblogs, or blogs, which let users post items important to them in a log/diary fashion, allowing others to post and discuss them. When blogs are enabled, users with accounts on the server can access and manage their blogs directly from a browser. To enable blogs 1. | Launch Server Admin, select Web from the Computers & Services list, and click the Settings tab.
| 2. | Click the Weblogs tab to display your Web server's Weblog options (Figure 9.43).
Figure 9.43. Viewing the default values for the Weblogs tab. 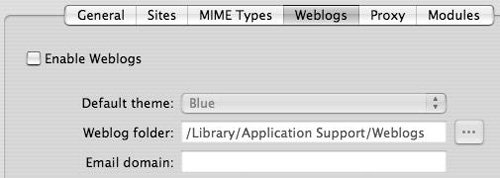
| 3. | Click the Enable weblogs check box, choose a color theme, and enter the folder and domain name for the blog users (Figure 9.44).
Figure 9.44. Changing values for the site's Weblog. 
| | | 4. | Click Save to save the changes and make sure that the Web service is running and that at least one Web site is active.
| 5. | In your favorite Web browser, enter the URL of the server and add "/weblog" to the end (Figure 9.45).
Figure 9.45. Initial connection from a browser to a site with Weblogs enabled. 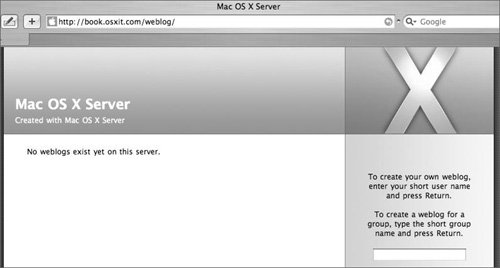
The screen will show that no blogs yet exist in this server.
| 6. | Enter a user's short name into the field on the right side of the screen and press Return (Figure 9.46).
Figure 9.46. Entering a user's short name to permit that user's blog to be created... 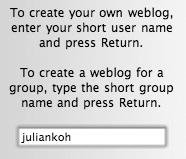
The window changes, showing a default Weblog page and a login option on the right side (Figure 9.47).
Figure 9.47. ...and viewed. Customization of the site is done via the Login box on the right that, when clicked... 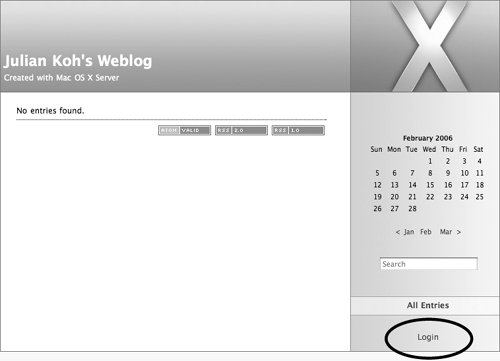
| | | 7. | Click Login and enter the Weblog user's username and password in the text fields provided; then click Login (Figure 9.48).
Figure 9.48. ...shows username and password entry fields. 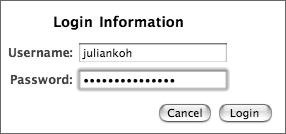
A default window appears, allowing the user to customize his or her blog (Figure 9.49).
Figure 9.49. Once authenticated, the user can manage their blog. 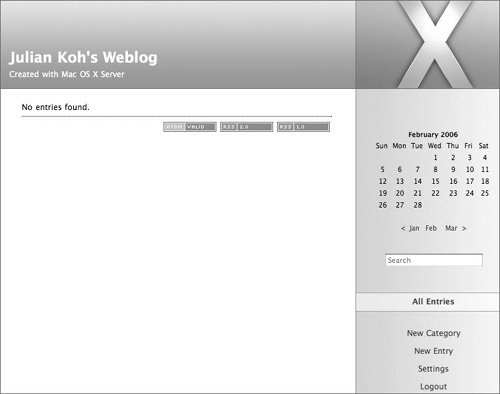
|
|