Multimedia Playback: QuickTime 7
| < Day Day Up > |
Basic Image and PDF Manipulation: PreviewFor viewing PDF files and images of all sorts, Tiger comes with the Preview application (path: /Applications/Preview). Preview can be launched by either double-clicking a supported file, or by selecting a group of files and then dragging them onto the Preview icon. Preview is also integrated into the printing system; clicking Preview in any Print dialog box opens it. Using the ViewerWhen you open an image or PDF document in Preview, it is automatically resized to fit the available window space and displayed in Preview viewer. Almost everything you'll want to do to control the viewing area or manipulate the document can be performed in the viewer toolbar. The first button, Drawer, (Shift-Command-D) is common to both image and PDF viewing. This button opens and closes a window drawer with thumbnail images of the pages or files open in the active Preview window, as shown in Figure 2.24. To change the thumbnail size and background of the viewing area, use the General application preferences pane. Figure 2.24. The Preview drawer displays thumbnails of each page or image loaded.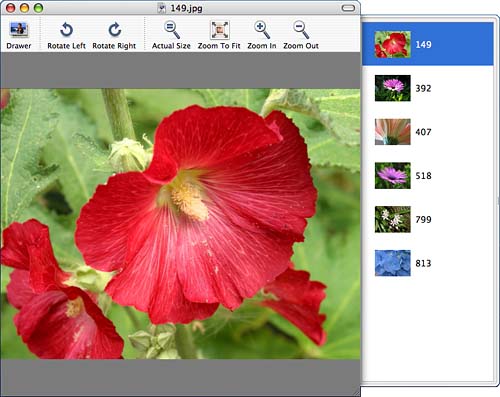 Clicking a thumbnail displays the full image in the main viewing area. The rest of the toolbar functions change depending on whether you are viewing a PDF or an image file.
Viewing and Editing PDFsWhen viewing a PDF, Preview will automatically open the window drawer to display the PDF Table of Contents if one is available. Toggle between the TOC and thumbnail views using the icons at the top left corner of the window drawer. If the PDF does not contain a table of contents, you can still click the Drawer toolbar icon to display thumbnails of all the pages. Clicking an item in the drawer will jump you to the appropriate page in the PDF.
The PDF toolbar provides features best suited for moving through a multi-page document (see Figure 3.26 as an example). Use the following icons to navigate your PDF files:
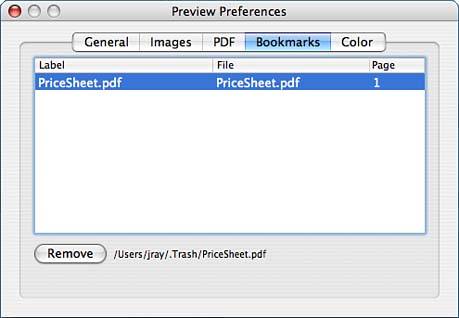
Cropping and Scaling functions also can be added to the Toolbar by choosing View, Customize Toolbar. Several additional PDF viewing features can be found under the View, PDF Display menu, including the ability to display two pages simultaneously and view the entire PDF as a continuous scrolling document rather than jumping from page to page. Functions to rotate pages to the left or right (if oriented incorrectly in the PDF, for example), can be found under the Tools menu. Increasing PDF Viewer SpeedIf you find that viewing a PDF is a bit slower than you'd like, the PDF application preferences contain a few settings to help speed things up. First, the Greeking Threshold sets a minimum size at which Preview will render the text in a PDF. If a page is shrunk smaller than the size, it will be greeked that is, displayed as meaningless blocks. You can also turn off anti-aliasing. Anti-aliasing cleans up text and graphics by removing the jaggies along their edges, but at a cost of significantly slower display speed. Searching PDFsPreview can search through the PDF text much like you would search through a word processor document. To search, first open the Preview window drawer. Type a text string into the Search field and then press the Return key. The results are returned in the drawer. Each page is listed, along with each instance found on the page. Click on a search result line to highlight that line in your document. To clear the search results, click the X icon at the end of the Search field. Adding BookmarksIf you've ever found yourself browsing a several hundred page PDF document and wishing you could stick a post-it in to mark your place, you'll be pleased with Tiger's new Bookmark feature. To bookmark any page, choose Bookmarks, Add Bookmark from the menu. Preview will prompt you to enter a label for the bookmark, and then will add it to the Bookmark menu. Bookmark management is simple you can delete them. To delete a bookmark, open the Bookmarks application preferences pane, as shown in Figure 2.25. Find the bookmark you want to remove, highlight it, and then click the Remove button. Figure 2.25. Your options for bookmark management are Remove and, well, that's it.
Copying Content from PDFsIf you find content that you would like to "lift" from a PDF, you can copy and paste styled text using the Text tool (the A icon near the upper right corner of the viewer window). After the Text tool has been selected, just copy and paste as you would from any other program. Keep in mind that you should always have permission to use content that is not your own and you should always cite your sources. In fact, some PDFs might be protected to disable copying of text altogether. Opening and Saving Password-Protected PDFsPDFs can be password protected to provide control over viewing, printing, and copying of content. If you attempt to open a PDF that is "viewing" protected, Preview will display a password prompt before rendering any of the pages. In some cases, a PDF might allow viewing but require a password for advanced functions such as copying text or printing in these cases, Preview will not force you to enter a password. Instead, choose File, Password to open a password dialog box and unlock the additional functions. To set a password on your own PDFs, first create the PDF file (see Chapter 6, "Automating Native Applications with Automator and AppleScript," for information on printing directly to a PDF), open it in Preview, and then choose File, Save As. In the Save dialog, click the Encrypt check box. Preview will prompt for a password, and then create a new protected version of your file.
Annotating PDFsThe ability to annotate documents can be helpful when content needs to be passed between several individuals for approval. Each person can add her own markup without changing the original contents of the document. Preview supports two types of PDF annotations: ovals and text. You can draw ovals around content or type text into a small rectangular note. Both types can be seen in Figure 2.26. Figure 2.26. Add notes or oval highlights to PDF documents using the annotation tools.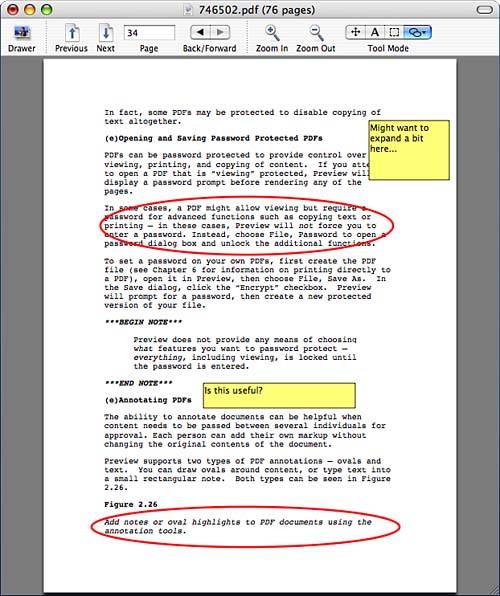 To create an annotation, click and hold on the annotation tool icon (by default, a pencil for text) at the far right of the Preview toolbar. Choose the pencil to create a text note, or the oval to draw an oval-shaped highlight. After the tool has been selected, click and drag where you want the oval or text to appear. The Oval tool will, obviously, draw an oval. The Text tool, on the other hand, will draw a yellow box (think Post-It) that will contain your comments. Double-click the yellow box to begin typing. Viewing and Editing imagesWhen you open images one at a time in Preview, they will each open in a separate window. To open images together in a single window, select them and use the Finder File, Open menu item, or drag them onto the Preview icon. You can use the Images pane within the application preferences to adjust this behavior. Just as with PDF viewing, image viewing has its own special toolbar with functions more appropriate to images. The default controls are
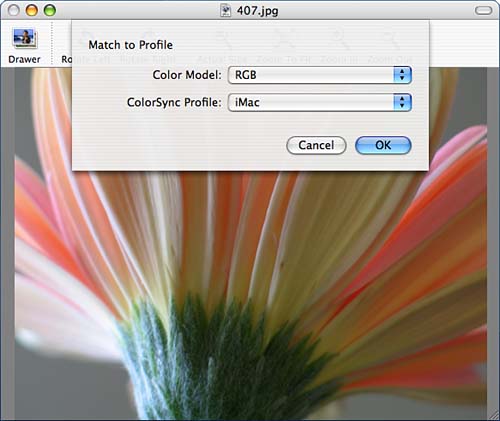
Images can also be viewing in a slideshow format, the same as the Spotlight slideshow discussed in the previous chapter. To start a slideshow, choose View, Slideshow (Shift+Command+F). In addition, horizontal and vertical image flips can be selected in the Tools menu. Basic image cropping can be accomplished by clicking and dragging anywhere in the image to draw a crop rectangle, and then choosing Tools, Crop (Command+K). Image Color CorrectionPreview in Tiger now offers simple color correction capabilities for any open image. To use the image correction feature, choose Tools, Image Correction (Option+Command+C); a floating window will appear, as seen in Figure 2.27. Figure 2.27. Use Preview to make basic color adjustments to an image.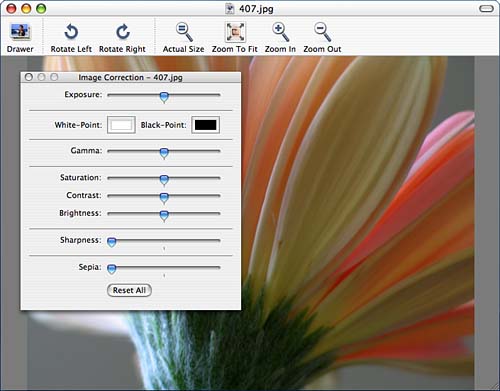 Use the sliders to change the appearance of the image the changes you make are immediately visible in the viewing area. To undo any changes you've made, click Reset All. Even if you close the window after making adjustments, the changes are not permanent until you save the image. You can always reopen the Image Correction window and reset the sliders. Assigning ColorSync Profiles and Color ModelsIf you have an image that you would like to force into a specific color model (such as RGB to CMYK), you can use the Tools, Match to Profile function. The Match to Profile dialog is seen in Figure 2.28. Figure 2.28. Choose a color model and ColorSync profile for your image.
Changing the color model will alter the image potentially losing color information, but will make it conform to the model chosen. Use the pop-up menus to choose the color model and a ColorSync profile to assign to the image to ensure proper color reproduction throughout your workflow. If you just want to assign a ColorSync profile without changing the color model, use Tools, Assign Profile instead. You'll learn more about ColorSync in Chapter 5, "Printer, Fax, and Font Management." Taking ScreenshotsTo take a screenshot directly within Preview, choose File, Grab, and then select the type of screenshot you'd like. Preview can capture the entire screen, individual windows, or take picture of the screen after a short (roughly eight second) pause. After taking the picture, the image will be opened in a new Preview window.
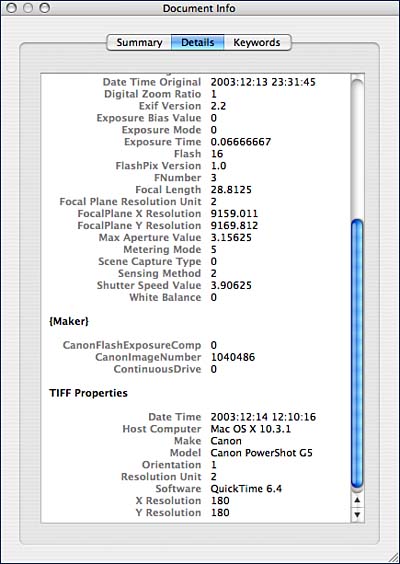
Saving Images in Other FormatsOne of the most useful features of Preview is its ability to save in over ten different image formats even PDF documents can be saved as images. To save an image in a new format, choose File, Save As from the menu bar. Use the Format menu to choose your output format, enter a filename, and then click Save. Viewing and Setting Image and PDF MetadataAs you know, Spotlight helps you locate files on your system based on attributes (metadata) that have been recorded as part of the file (such as the camera that took an image), or added to the file manually such as keywords. Preview can display the detailed metadata for any file that you are viewing. In addition, Preview can set keywords in PDFs and Images that may help them be found by future Spotlight searches. To view information about a file, choose Tools, Get Info (Command+I) when the file is active in the Viewing area. The Get Info window appears, as shown in Figure 2.29. Figure 2.29. Get and set file metadata in Preview.
Use the buttons at the top of the window to view summarized or detailed information about the file. To enter keywords, click the Keywords button, and then use the Add and Remove buttons that appear to add and delete keywords from the file's metadata.
|
| < Day Day Up > |
EAN: 2147483647
Pages: 251