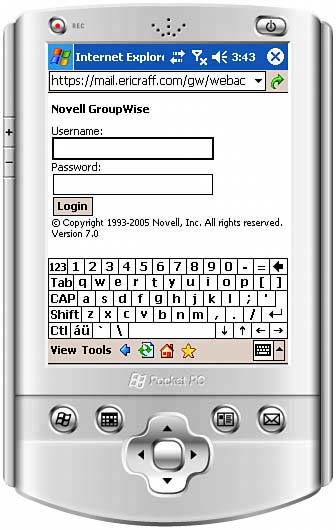
Accessing Your GroupWise Mailbox
| To access your GroupWise mailbox with your handheld device, follow these steps:
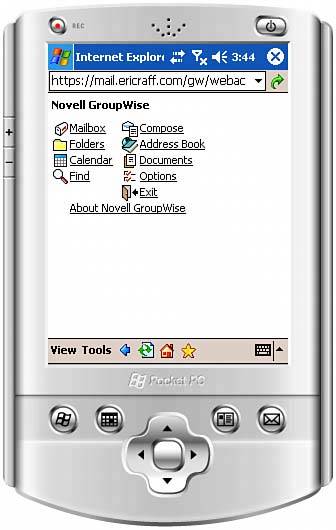
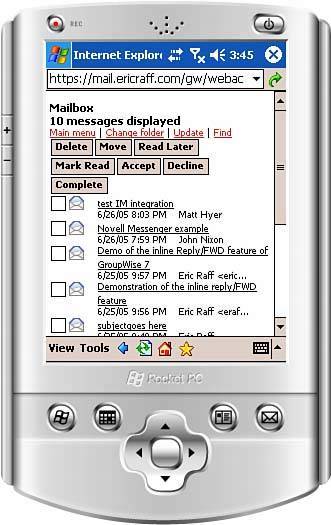
On the main GroupWise screen, you can access the major GroupWise features. The features corresponding to each of the icons shown in Figure 12.9 are described in the following sections. TIP Every screen that you access from this main screen has a link at the top labeled Main Menu. This link always returns you to the main GroupWise screen shown in Figure 12.9. MailboxTap the Mailbox link to open your GroupWise mailbox, as shown in Figure 12.10. Figure 12.10. The PDA WebAccess mailbox enables you to manage your GroupWise messages.
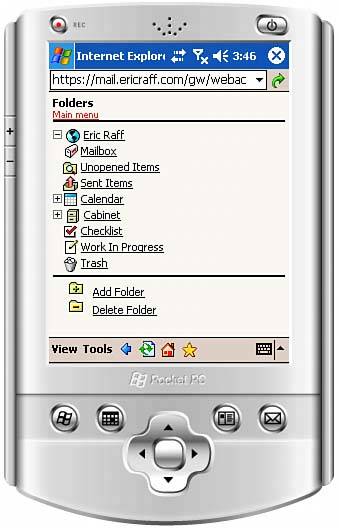
You can open any message simply by tapping the Subject line. You can perform other operations by tapping in the check box and then tapping on the button at the top of the screen. NOTE If you use the Change Folder option to access a folder other than your Mailbox folder and later return to the main menu, the last folder you accessed will be listed on the main screen, instead of the main Mailbox folder. If you use the Back button on your browser, the main Mailbox folder will still be displayed. FoldersThe Folders link takes you to a view of your GroupWise system folders and also your Cabinet, as shown in Figure 12.11. Figure 12.11. Tap the Folders link to view your GroupWise system and Cabinet folders.
You can expand and collapse the Folders view by tapping the plus or minus icon or the up or down arrow (depending on your WebAccess configuration). To access the items in a folder, simply tap that folder. When you are viewing the contents of a folder, you can return to the folder display by tapping the Change Folder link at the top of the screen. CalendarThe Calendar link takes you to the Calendar view for the current day and displays the day's appointments, notes, and tasks, as shown in Figure 12.12. Figure 12.12. The Calendar view shows the current day's appointments, notes, and tasks.
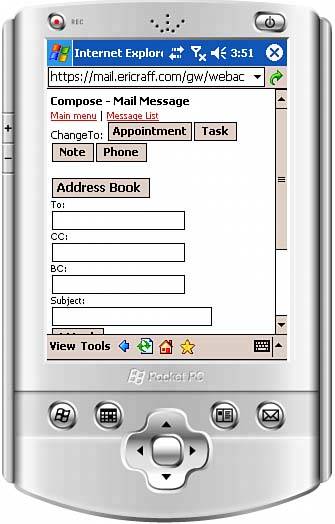
Click the Goto Date link to access the appointments, notes, and tasks for a different date. FindThe Find option is a very useful tool for the wireless WebAccess client. It allows you to quickly locate information contained in your GroupWise mailbox based on text in the Subject line, names in the From line, the item type, the item source (received, posted, or sent), or the folder or folders in which the item might be located. ComposeThe Compose button enables you to create GroupWise messages. When you tap Compose, you see the screen shown in Figure 12.13. Figure 12.13. The Compose link allows you to create GroupWise appointments, tasks, notes, and phone messages.
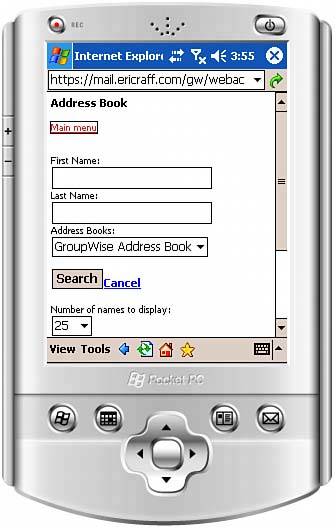
By default, you create a mail message when you tap Compose. Tap a different item type button to compose a different GroupWise message type. You can tap the Address Book to locate the message recipients. Tap any of the text fields to input the subject and message using your handheld device's preferred text-entry method. Tap the Send button to send the message. Address BookThe Address Book option brings up a search screen that allows you to search for individuals in the GroupWise system or personal address books, as shown in Figure 12.14. Enter a first name and/or a last name (the asterisk is acceptable as a wildcard character). Then select the Search option or scroll down and specify how many names to display in the results. Figure 12.14. The Address Book option enables you to search the GroupWise system or personal address books.
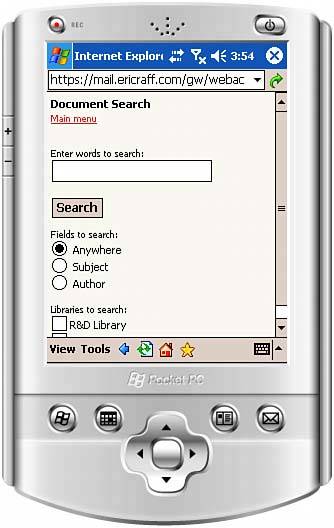
You can tap the down arrow in the Address Books field and select any of your personal address books you have configured. When a personal address book (such as Frequent Contacts) is active, you can tap the Add Entry icon at the bottom of the screen to add contacts to the personal address book. DocumentsThe Documents option on the main menu brings up the Document Search function, which enables you to search for documents in all available document libraries, as shown in Figure 12.15. Figure 12.15. Use the Document Search option to find documents in GroupWise document libraries.
You can search in all document fields by selecting the Anywhere option, or you can search by subject or author. You display all available document libraries by scrolling down the screen. Place a check mark in the box next to any library that might contain the document you want to locate. NOTE Your PDA must have document manipulation software to view or edit documents. OptionsThe Options link allows you to set a new GroupWise password on your mailbox. To do so, you enter your old password, enter a new password, and then confirm your new password. ExitThe Exit button on the main GroupWise screen terminates your GroupWise session and returns you to the main GroupWise WebAccess login screen. |

EAN: 2147483647
Pages: 213