Lesson 4: Creating a Database Maintenance Plan
3 4
SQL Server 2000 provides two separate ways to automate all of the core maintenance tasks a database administrator needs to perform. In this lesson you learn to use the Database Maintenance Plan Wizard to configure the performance of core maintenance tasks at scheduled intervals. You will also be introduced to the Sqlmaint utility, which performs the same functions from a command prompt.
After this lesson, you will be able to
- Create a database maintenance plan using the Database Maintenance Plan Wizard
- Describe the use of the Sqlmaint utility
Estimated lesson time: 15 minutes
Using the Database Maintenance Plan Wizard
The Database Maintenance Plan Wizard allows you to configure the following tasks to execute automatically according to specified schedules.
- Rebuilding indexes using a specified fill factor
- Shrinking a database to a specified size
- Updating distribution statistics
- Performing DBCC consistency checks (covered in Chapter 14)
- Backing up database and transaction log files
- Setting up log shipping (covered in Chapter 16)
To start the Database Maintenance Plan Wizard, from the Tools menu, click Database Maintenance Planner, or in the console tree, right-click Database Maintenance Plans, in the Management container, and then click New Maintenance Plan to display the Welcome To The Database Maintenance Plan Wizard page. See Figure 13.40.
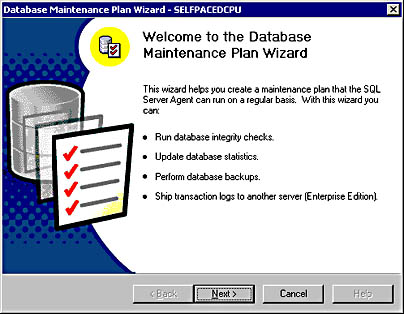
Figure 13.40
Starting the Database Maintenance Plan Wizard.
Click Next. If this is a master server, the Select Servers page is displayed, where you select one or more target Servers on which this maintenance plan will be carried out. Multiserver jobs are covered in Lesson 5 of this chapter. See Figure 13.41.
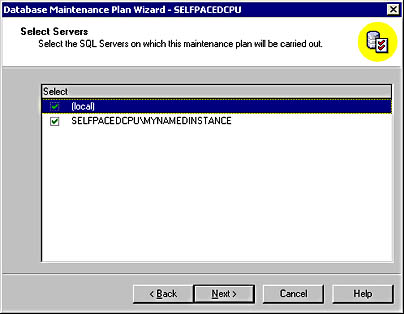
Figure 13.41
Selecting an instance.
Next, in the Select Databases page, you can select one or more database(s) for which to create a maintenance plan. You can create a single maintenance plan for all databases, or separate plans for specific databases and user and system databases. See Figure 13.42.
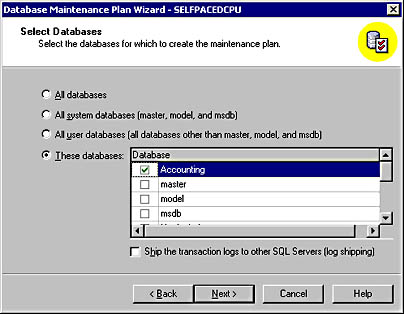
Figure 13.42
Selecting a database.
After selecting one or more databases, you can include several types of data optimization in this database maintenance plan, which you select in the Update Data Optimization Information page. See Figure 13.43.
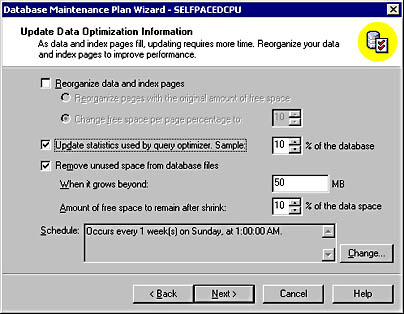
Figure 13.43
Choosing types of data optimization.
You can choose to have indexes rebuilt or distribution statistics updated. Indexes can be rebuilt using the original fill factor, or you can supply a new fill factor. Statistics can be updated using a sample of 10 percent of the database, or you can supply your own sampling value. SQL Server 2000 generally determines an adequate sample size automatically. The higher the sampling percentage, the more accurate the statistics; however, the higher sampling rates will take more time and use more resources. You can also choose to shrink the database whenever it grows above a certain size and specify the amount of free space that will be left in the data file after the shrink operation. This option is generally used only for small databases sharing hard disk space with other server applications. Finally, you can specify a single schedule for these tasks. Notice that the default is every Sunday at 1:00 A.M.
Next, in the Database Integrity Check page, you can include database integrity checks as part of this database maintenance plan. You can choose to have these checks perform minor repairs and have them performed before backups (recommended). The default schedule for these tasks is every Sunday at 12:00 A.M. See Figure 13.44.
Next, in the Specify The Database Backup Plan page, you can include full database backups as part of this database maintenance plan. Defaults include verifying the integrity of the backup, storing the backup to disk, and performing the backup every Sunday at 2:00 A.M. Notice that this backup takes place after any database optimization and integrity checks have been completed. See Figure 13.45.
Next, in the Specify Backup Disk Directory page, you specify database backup information. For example, if backup to disk is selected, you can use the default location or specify a custom location. You can create subdirectories for each database and choose to remove any backup files older than a specified amount of time. Finally, you can choose the backup file extension. The default is BAK. See Figure 13.46.
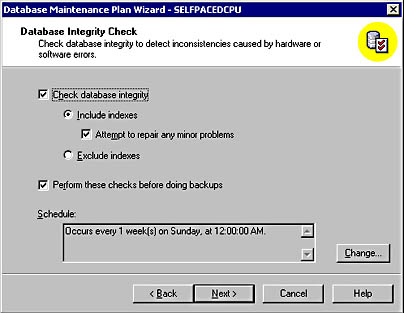
Figure 13.44
Including database integrity checks.
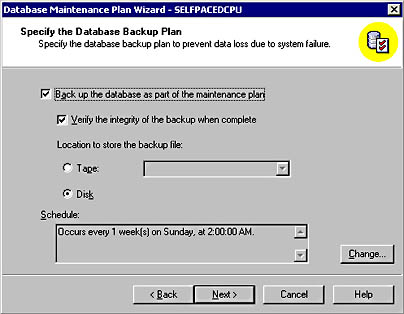
Figure 13.45
Specifying a database backup plan.
Next, in the Specify The Transaction Log Backup Plan page, you can also back up the transaction log file as part of this database maintenance plan. If you include transaction log backups, the defaults include verifying the integrity of the backup, storing the backup to disk, and performing the backups every night (except Sunday) at 12:00 A.M. See Figure 13.47.
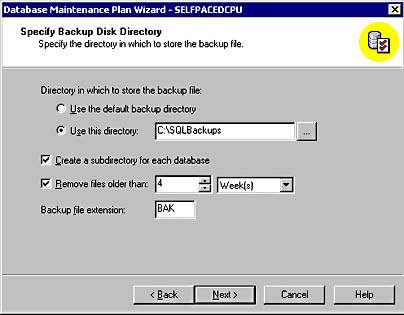
Figure 13.46
Specifying database backup information.
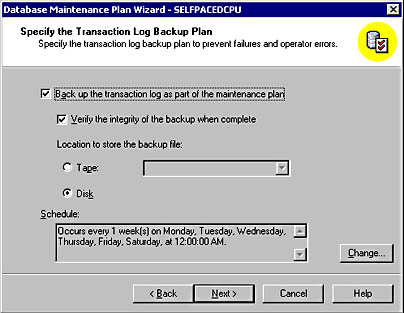
Figure 13.47
Selecting options for backing up the transaction log file.
Next, in the Specify Transaction Log Backup Disk Directory page, you specify transaction log backup information. For example, if backup to disk is selected, you can use the default location or specify a custom location. You can create subdirectories for each database and choose to remove backup files older than a specified amount of time. Finally, you can choose the backup file extension. The default is TRN. See Figure 13.48.
Next, in the Reports To Generate page, you can specify a file path for a report text file containing details of steps executed by this database maintenance plan, including error information. Each report will add a date to the filename in the form of MaintenancePlanName _YYYYMMDDHHMM. You can store the report text file in the default location or specify a custom location. You can choose to remove any report text files older than a specified amount of time and to e-mail each report to a specified operator. See Figure 13.49.

Figure 13.48
Specifying transaction log backup information.
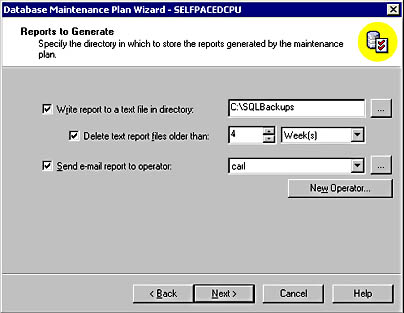
Figure 13.49
Specifying options for reports.
Next, in the Maintenance Plan History page, by default, the history of activity of this database maintenance plan is written to the sysdbmaintplan_history table in the msdb database. After 1000 rows have been filled, by default, older rows are deleted as new rows are added. You can also choose to have all history added to a remote server that functions as a central store for collecting report information. See Figure 13.50.
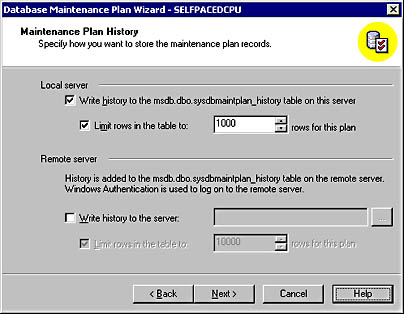
Figure 13.50
Choosing options for maintaining history of the maintenance plan.
Finally, in the Completing The Database Maintenance Plan Wizard, you can provide a name for this plan and review the selections you have made. Click the Back button to review and modify any choices. Click the Finish button to create the plan. See Figure 13.51.
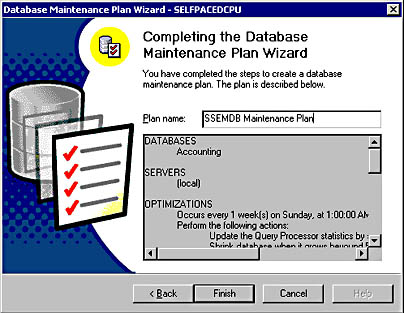
Figure 13.51
Completing the Database Maintenance Plan.
Viewing and Modifying Database Maintenance Plans
After the database maintenance plan has been created, you can view and modify it in one of two ways. First, you can expand the Management container in the instance, expand the SQL Server Agent container, and then click the Jobs container. In the details pane, one or more database maintenance jobs will appear. See Figure 13.52.
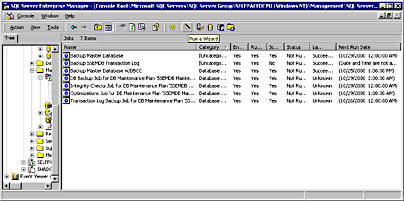
Figure 13.52
Viewing and modifying a plan.
In Figure 13.52, notice four new database maintenance jobs that are part of the SSEMDB Maintenance Plan, including the next run date. You can double-click any job to review the details of the job.
You can also view database maintenance plans by clicking the Database Maintenance Plans container in the console tree. The details pane displays all database maintenance plans. Double-click a plan to view or modify the details of the plan. Right-click the Database Maintenance Plan container or any specific maintenance plan, and then click Maintenance Plan History to view the history of the execution of the entire maintenance plan. See Figure 13.53.
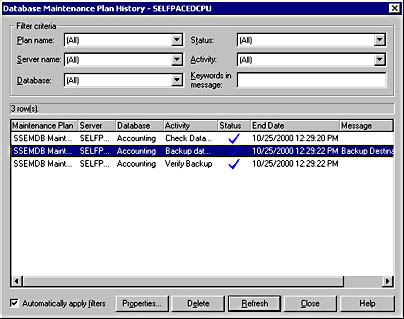
Figure 13.53
Viewing database maintenance plan history.
Using the Sqlmaint Utility
The Sqlmaint command-prompt utility can also be used to create and execute a database maintenance plan. Generally, you will use the Database Maintenance Plan Wizard to create and modify database maintenance plans because of its ease of use. However, the jobs that are created by the Database Maintenance Plan Wizard actually execute the Sqlmaint utility using specified parameters. In SQL Server Enterprise Manager, expand SQL Server Agent, double-click a maintenance plan job in the Jobs container, click the Steps tab, and then click the Edit button to view the actual Sqlmaint command that is being executed. See Figure 13.54.
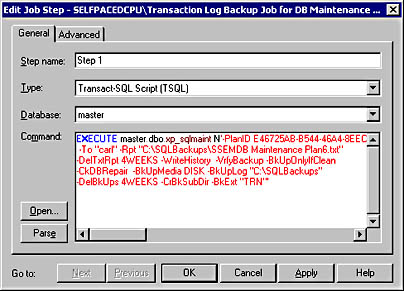
Figure 13.54
Viewing a specific Sqlmaint command.
To use the Sqlmaint utility, refer to SQL Server Books Online.
Lesson Summary
The Database Maintenance Plan Wizard provides an easy way to automate core maintenance tasks by creating jobs and schedules for these tasks. SQL Server Enterprise Manager also maintains a Database Maintenance Plan History log to view the execution history of all plans in one location. Finally, the Sqlmaint utility is the utility that is run in the background for actually performing these tasks.
EAN: N/A
Pages: 126
- Structures, Processes and Relational Mechanisms for IT Governance
- Linking the IT Balanced Scorecard to the Business Objectives at a Major Canadian Financial Group
- Measuring and Managing E-Business Initiatives Through the Balanced Scorecard
- Governance in IT Outsourcing Partnerships
- The Evolution of IT Governance at NB Power