| Servers running in Terminal Server mode require a Terminal Services License server to allocate client access licenses. To install a Terminal Services License server, follow these steps: 1. | Log on to the desired server with Local Administrator privileges.
| 2. | Insert the Windows Server 2003 CD in the CD-ROM drive and close any autorun pop-up windows that open.
| 3. | Click Start, Control Panel.
| 4. | Locate and double-click the Add/Remove Programs icon.
| 5. | Select the Add/Remove Windows Components button.
| 6. | In the Windows Component Wizard window, scroll down and check Terminal Server Licensing and click Next.
| 7. | In the Terminal Server Licensing Setup page, choose whether the Terminal Server will allocate licensing for current domain or workgroup or for the entire enterprise if this machine is a member of a Active Directory Forest by selecting the correct radio button.
| 8. | Note the location of the Terminal Services licensing database, change the location if necessary, and click Next to install the Terminal Services License server.
| 9. | When the installation is complete, click Finish in the Windows Component Wizard window.
| 10. | Close the Add/Remove Programs window.
|
Activating the Terminal Services License Server A Terminal Services License server can be activated automatically if the server has Internet access, through a Web page from any computer with Internet access, or by the administrator calling a Microsoft Clearinghouse using an 800 number. The License server is activated by contacting the Microsoft Clearinghouse server that will send the Terminal Services server a digital certificate. To activate a Terminal Services License server, follow these steps: 1. | Log on to the desired server with Local Administrator privileges.
| 2. | Click Start, All Programs, Administrative Tools, Terminal Server Licensing.
| 3. | Right-click the Terminal Services License server and select Activate Server.
| 4. | Click Next on the Welcome screen.
| 5. | Choose the proper connection method and click Next.
| 6. | If the Web browser or Phone connection method is chosen, follow the instructions in the window to complete Terminal Services licensing activation. Click Finish when done.
| 7. | If Automatic activation is chosen, enter the appropriate Company information to send to the Microsoft Clearinghouse and click Next at each window.
| 8. | After the server is activated, uncheck the Start Terminal Server Client Licensing Wizard Now check box and click Next to return to the Terminal Services Licensing console.
|
The Terminal Services License server should now be activated and ready for installing client access licenses. Installing Client Access Licenses After the Terminal Services License server is activated, client access licenses must be installed. Windows 2000 comes with a built-in Terminal Services CAL, so Windows 2000 CALs are already installed. To provide CALs for other operating systems, follow these steps: 1. | Log on to the desired server with Local Administrator privileges.
| 2. | Click Start, All Programs, Administrative Tools, Terminal Server Licensing.
| 3. | Right-click the Terminal Services License server and click Install Licenses.
| 4. | Click Next on the Welcome screen and the Terminal Services Licensing Server screen, and depending on the default connection method, the CAL Installation Wizard will try to connect to the Microsoft activation server.
| | | 5. | When the wizard connects to the activation server, choose the license program that the organization participates in and click Next. For example, select Retail, Open, or Select Licensing from Microsoft, as shown in Figure 27.10.
Figure 27.10. Choosing the license option for activation. 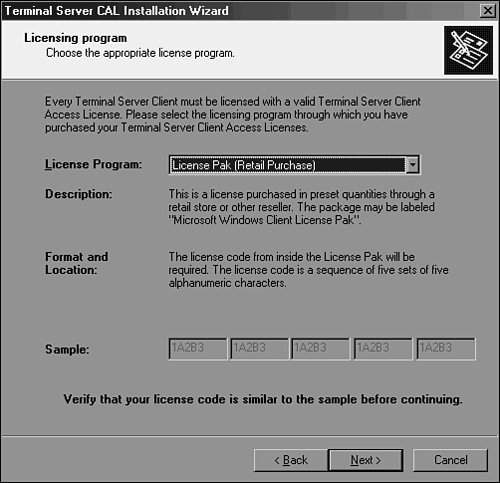
| 6. | On the Licensing Program page, enter the license number or agreement number for your licensing pack and click Next.
| | | 7. | In the Program and License Information page, choose the Windows Server 2003 or Windows 2000 product version; then choose the correct license type as described in the following options:
- Windows Server 2003 Per User CAL Allocates licenses on a per-user basis.
- Windows Server 2003 Per Device CAL Allocates licenses to each device that connects to a Terminal Server session.
- Windows 2000 Per Device CAL Allocates licenses to each device that connects to a Terminal Server session.
- Windows 2000 Internet Connector CAL Allows nonemployees to connect to the Terminal Server from the Internet.
| 8. | Enter the quantity of licenses and click Next.
| 9. | After the licensing information is verified and the CALs are installed, click Finish to close the CAL Installation Wizard.
|
Now that the licenses are installed, you must configure each Terminal Server to use the correct licensing type. Configuring the Licensing Type on a Terminal Server In Windows Server 2003 Terminal Services, there are two methods of licensing. One option is setting the licensing based on a per-device basis, and the other option is setting the licensing on a per-user basis. To set the licensing type of a Terminal Server, follow these steps: 1. | Log on to the Terminal Server with Administrative rights.
| 2. | Click Start, All Programs, Administrative Tools, Terminal Server Configuration.
| 3. | Select Server Settings in the left pane.
| 4. | In the right pane, double-click the Licensing setting.
| 5. | Under Licensing Mode, choose the correct licensing type, per device or per user, to match the type of client access license purchased.
| 6. | Click OK to update the Terminal Server.
|
|