Managing Printers with Print Management Component
| The Print Management Component (PMC) was added to Windows 2003 R2 as an add-in component to help organizations better manage and administer printers on an enterprise basis. Prior to the Print Management Component, a network administrator would have to point to each network printer or printer server individually to manage and administer the device. For a large enterprise with hundreds of printers and dozens of printer servers, selecting print servers each time a printer needed to be managed was a very tedious task. Furthermore, if the administrator didn't remember which printer was attached to which print server, finding the printer and print server that needed management could take a while. The Print Management Component provides a single interface where an administrator can open the Print Management utility and view all printers and print servers in the enterprise. Furthermore, PMC can be configured to group printers together so that certain administrators can manage and administer only certain printers. As an example, if an organization has an administrator for a particular building, the PMC interface can be filtered to list only the printers within the building. This allows the administrator to see only certain printers for which he is responsible, as well as consolidate multiple print server groups of printers into a single interface for management and administration. The Print Management Component needs to be installed only on the system from which the administrator is managing; it does not need to be installed on all print servers or systems in the enterprise. Functionally, PMC could be installed on just one system. Installing the Print Management ComponentTo install the Print Management Component, the Windows 2003 R2 components need to be installed on the system (see the section, "Preparing a System and Installing the Windows 2003 R2 Components," in Chapter 3 for installation instructions). Perform the following steps to enable the Print Management Component option on the system:
Configuring the Print Management ComponentAfter the Print Management Component has been installed on a system, the utility needs to be configured to identify the printers and print servers in the enterprise. Printers can be manually added to the Print Management tool for administration and management, or the network can be scanned to attempt to automatically identify printers in the enterprise. To configure print management resources, launch the Print Management utility by doing the following:
Adding New Printers as Network Shared ResourcesThere are two ways to add new printers to a Windows 2003 R2 network. One way is the standard Windows printer installation method of using the Add Printer option. The other option is using the new Print Management utility and adding a printer within the utility. Both methods return the same result, so the main reason to use the Print Management utility method is to simplify all print management tasks of adding, modifying, and managing printers from a single utility. Using the Add Printer Option in Windows to Add a Local PrinterTo add a new printer that is locally attached to a Print Server using the standard Windows Add Printer option method, do the following:
Using the Add Printer Option in Windows to Add a Network-Attached PrinterTo add a new printer that is attached directly to the network backbone using the standard Windows Add Printer option method, do the following:
Using the Add Printer Option in the Print Management ComponentAnother option of adding a printer to the network is to use the Print Management Component utility to add the printer. This process is identical to adding the printer using the Windows Add Printer option addressed in the previous section. However, instead of using two separate interfaces for adding and managing printers, using the Print Management Component option can centralize the tasks into a single interface. To start the Add Printer Wizard within the Print Management Component, do the following:
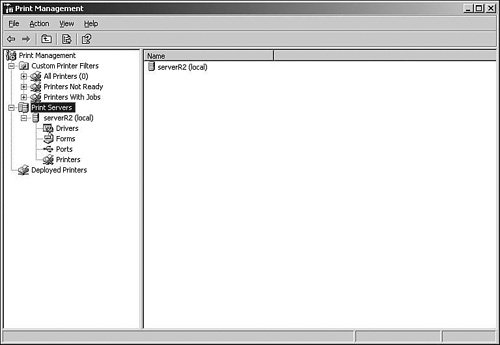
Adding Print Servers to the Print Management ComponentAfter printers and print servers have been added to the network, as noted in the previous sections, an administrator can begin to add print servers to the Print Management Component to centrally view, manage, and maintain the printers on the network. Adding a print server to the Print Management Component will allow the administrator to manage the print server and all the printers the print server hosts. To add a print server to the Print Management Component, do the following:
Using the Print Management ComponentWith printers added to the network and print servers added to the Print Management Component, an administrator can begin to centrally view, manage, and administer the printers and print servers. Some of the tasks that an administrator can perform from the Print Management Component are tasks that an administrator would normally do right on the print server, such as change printer ports, add or modify forms, or view the status of printers whether the printers are online or not. Other tasks are new to the Print Management Component, such as creating custom printer filters that allow multiple administrators to view and manage selected printers based on their site, rights, and roles. Performing General Printer Administration TasksFrom within the Print Management Component, the administrator can perform general printer administration task. Some of these tasks include
Note One might wonder when someone would ever create a new printer form or worry about being notified when a print job has been completed, especially when most print jobs are simple 1-page emails or a handful of pages of a Word document. However, a creative use of this feature is used by accounting departments, publishers, or other individuals that print large print jobs. One would want to know when a 400-page document has finished printing, or when 100 sets of a 15-page document are finished printing, collating, and stapling. By creating a custom form, which may just be a simple 8 1/2 x 11-inch form with advanced notifications enabled to notify the user that job has been completed, a user who chooses that form instead of the normal 8 1/2 x 11 form will be notified when the print job has been completed. Creating Custom Printer FiltersA unique function of the Print Management Component is the Custom Printer Filters function that enables an administrator to group printers typically for the purpose of distributing the administration of printers in the environment. For large organizations that might have multiple buildings, sites, and administration boundaries of devices such as printers, the administrators can perform a filter view to see only the printers that fit within their administrative responsibilities. First of all, to view all printers in the environment, an administrator can click the All Printers section of the Custom Printer Filters section of the Print Management interface. All the printers for the network will be listed here. Note If printers on the network are not listed in the All Printers view, please refer to the section, "Adding Print Servers to the Print Management Component." To create a custom printers view, do the following:
By clicking on the newly created filter, the filter rule is applied and the printers noted in the filter will be displayed as shown in Figure 19.13. In this figure, you will notice a designation that there are six printers in the environment; however, the filter is searching only for printers in Building 11, and thus only four printers are displayed for this administrator to view and manage. Figure 19.13. Sample custom printer filter.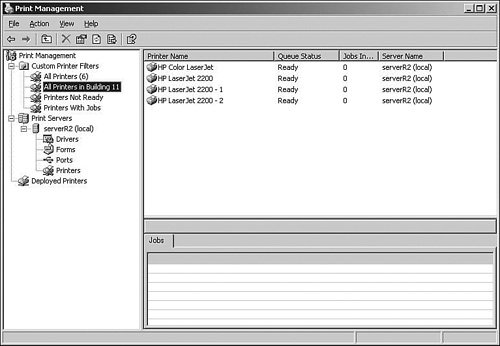 Virtually an unlimited number of printer filters can be created to show different groupings of printers to be managed or administered. Organizations have created custom printer filters by printer manufacturer, such as HP, Xerox, and Sharp, or by printer type, such as laser, color laser, and plotter, to be able to view assets by make, model, or configuration. |
EAN: 2147483647
Pages: 499
- Assessing Business-IT Alignment Maturity
- A View on Knowledge Management: Utilizing a Balanced Scorecard Methodology for Analyzing Knowledge Metrics
- Measuring ROI in E-Commerce Applications: Analysis to Action
- Governing Information Technology Through COBIT
- Governance Structures for IT in the Health Care Industry