Bouncing
| < Day Day Up > |
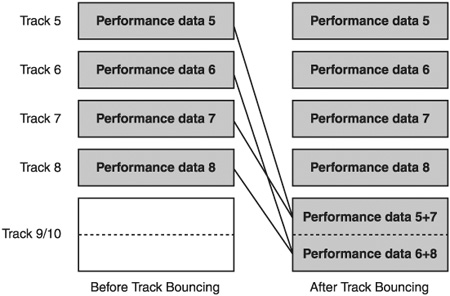
| You can take the performance data of several tracks and combine them into one track or a two-track stereo pair. This is called bouncing. You can bounce tracks dry (without effects) or wet (with effects) while controlling the amount of effect(s) for each track. A stereo bounce will also retain all individual pan settings. Bouncing can be a real asset if you run out of free playback tracks and need some space for additional recording. In the following example, we will bounce tracks 5, 6, 7, and 8 to stereo pair 9/10 as shown in Figure 9.7. Figure 9.7. Tracks 5, 6, 7, and 8 are being combined together into stereo tracks 9/10 In this example, tracks 5, 6, 7, and 8 are called the source tracks. Tracks 9/10 are called the destination tracks. All panning, EQ, levels, and effects should only be applied to the source tracks. Do not add any effects or EQ to the destination tracks or the bounce will sound different than the source tracks. To set up the bounce, route the source tracks to the destination tracks as follows :
You may now monitor the source tracks 5 “8 through the destination tracks 9/10.
Monitor the recording levels on the Pre Level screen as described earlier in this chapter under "Setting the Recording Level." Record your bounce by changing the STATUS button for the destination tracks from orange to red. Press ZERO to rewind to the beginning of your song. Press PLAY to begin recording. Any changes you make in real time to the source tracks or effects returns will be reflected in your destination tracks. Press STOP when finished. To hear your bounce, rewind to the beginning of the song. Change the source tracks status to MUTE (STATUS to CLEAR) to retain the levels in case needed again. Change the STATUS of the destination tracks from red to green. Press PLAY. |
| < Day Day Up > |