Markers
| < Day Day Up > |
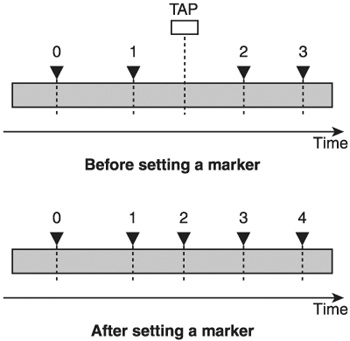
| Markers are similar to locators, except that you can't directly jump to a particular marker by pushing a button. You can have up to 1,000 markers per song. The TAP, PREVIOUS, and NEXT buttons are used to set and navigate between markers. These buttons are just below the four dedicated LOCATOR buttons . When the VS is in the Play Condition, you can set a marker by pressing the TAP button. Markers are kept in sequential order relative to the timeline, starting with zero. If you place a new marker before an existing marker, all subsequent markers automatically get incremented, as shown in Figure 5.1. Figure 5.1. Markers are assigned sequentially relative to the timeline To navigate to the previous or next marker, press the PREVIOUS or NEXT button. If the song is positioned to a specific marker, you can clear that marker by holding the CLEAR button and pressing TAP. Any subsequent markers after that point in time automatically get decremented. If the song is not positioned to a specific marker and you hold CLEAR and press TAP, then the previous marker in the timeline is removed. To clear all markers, hold SHIFT, hold CLEAR, and press TAP. The VS will prompt you with Clear ALLMarker? in the display. Press YES to confirm that you want to clear all markers.
I typically use markers to set specific points of interest within a song. For example, when listening back to my recorded tracks, I might drop in markers when I hear a bit of sibilance in a vocal track, or when I hear some unwanted background noise before the guitar player starts a solo. I can then scroll through each marker and decide what action I want to take to fix these problems. |
| < Day Day Up > |