Use Case Three: WebLogic Integration Features
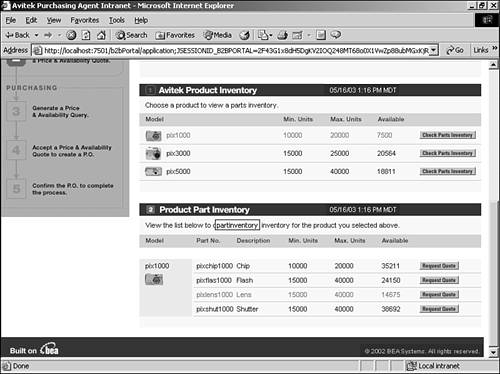
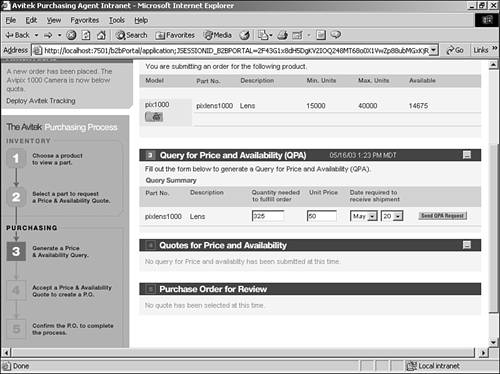
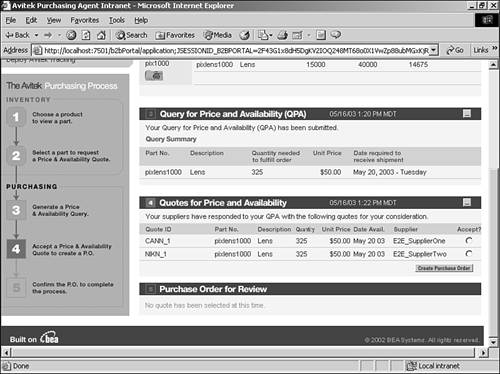
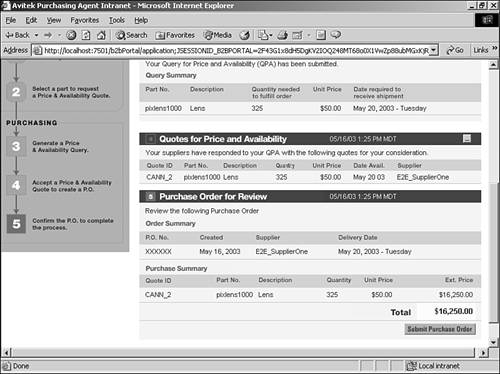
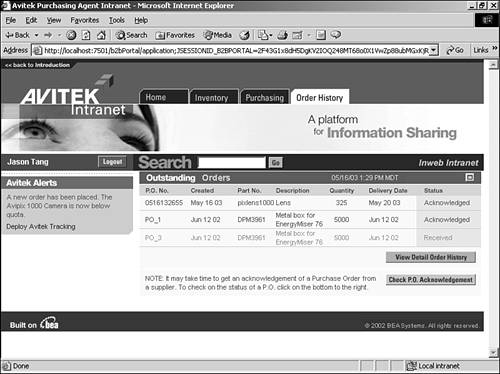
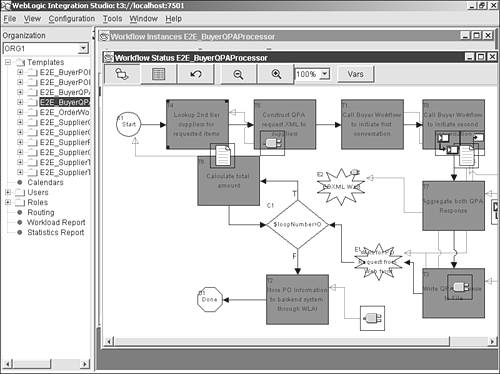
| The use case for the third use case of the example explores the implementation of the Avitek InWeb portal, which uses WebLogic Integration to communicate with Avitek's back-end inventory management systems and partner supply networks. This communication enables Jason, in his role as purchasing agent, to view existing inventory. In this scenario, Jason is notified that the quantity of AviPix 1000 cameras in the inventory is below the minimum required stock level. He needs to figure out why the stock is low and how he can best fix the problem. To get to the third use case, use the same process you used in the second use case: Click the Visit the Site link under the Intranet section on the main page. Log in as username jtang with the password of password . At the bottom of the window, notice that the AviPix 1000 camera is highlighted. Click the Check Parts Inventory button to determine why the stock is low on this camera (see Figure A.21). Figure A.21. The Avitek purchasing process, showing the low inventory. From this view of the Product Parts Inventory, you can see that the lens for the AviPix 1000 is below the minimum quantity needed. Jason decides to get a quote from his suppliers to bring the inventory up to a safe level. He clicks the Request Quote button to the right of the pixlens1000 line to get a price and availability quote (see Figure A.22). Figure A.22. Getting a price and availability quote after clicking the Request Quote button. As shown in Figure A.22, after you click the Request Quote button, the system determines that Jason needs at least 325 lenses. He decides he is willing to pay $50 for the lenses, so acting as Jason, enter 50 in the Unit Price text box, select a date that falls after the current date, and click the Send QPA Request button. (You might have to wait a few seconds after clicking Send QPA Request before a quote is available.) The request is sent to the suppliers who can handle a request for the lenses. The suppliers then decide if they will accept the price and delivery date. If so, they respond with their bid. Click the Check for Quotes button under the Quotes for Price and Availability section. The resulting page shows you that two suppliers have bid on the order (see Figure A.23). Figure A.23. Reviewing the information in the Quotes for Price and Availability section. As the next step in this process, Jason would select one of the suppliers and create an electronic purchase order. Acting as Jason, select either supplier and then click the Create Purchase Order button. An order is automatically created and displayed in the Purchase Order for Review section, as shown in Figure A.24. Figure A.24. Creating a purchase order. The purchase order page shows information about the purchase order; Jason would use this page to submit his purchase order. Acting as Jason again, click the Submit Purchase Order button to send the purchase order to the vendor. This action takes you to a page showing your outstanding orders (see Figure A.25). The system might take a few seconds to display your new purchase order. To check whether the purchase order has been received and accepted, click the Check P.O. Acknowledgement button. Figure A.25. The Outstanding Orders page, showing the new purchase order. Under the Covers of the Third Use CaseThe third use case relies on the features of WebLogic Integration (WLI) to translate between the Avitek inventory system and the suppliers. The communication takes place via Electronic Business using Extensible Markup Language (ebXML). ebXML is a standard business-to-business communication protocol created by the United Nations Center for Trade Facilitation and Electronic Business (UN/CEFACT) and OASIS. OASIS is a nonprofit , global consortium that drives the development, convergence, and adoption of e-business standards. To view the work that WLI is doing, run WebLogic Integration Studio. From the Windows Start menu, choose BEA WebLogic Platform 7.0, WebLogic Integration 7.0, Studio. A dialog box opens, asking for login information. Enter admin for the username and security for the password. Also, you must change the URL to use port 7501, so change t3://localhost:7001 to t3://localhost:7501 . In WebLogic Integration Studio, you might have to change the setting in the Organization drop-down list from CDExpress to ORG1. Select ORG1 in the drop-down list to get the initial WebLogic Integration Studio window shown in Figure A.26. Figure A.26. The initial WebLogic Integration Studio window. Next, you should examine the instance of the template used for the third use case. In the tree view on the left, open the Templates item. Right-click on E2E_BuyerQPAProcessor and select Instances to display a window with the instances of the E2E_BuyerQPAProcessor template. Double-click the instance shown to see the flowchart view of the process (see Figure A.27). Figure A.27. WebLogic Integration Studio showing the flowchart of the service behind the third use case. It is also interesting to see the workflow required to run this instance. Click the Display as a List icon (second from the left on the icon bar, showing the mouseover text Display as list ) to see the steps involved (see Figure A.28). Figure A.28. WebLogic Integration Studio showing the workflow of the service behind the third use case. |
EAN: 2147483647
Pages: 360