Contributing to a Project Team
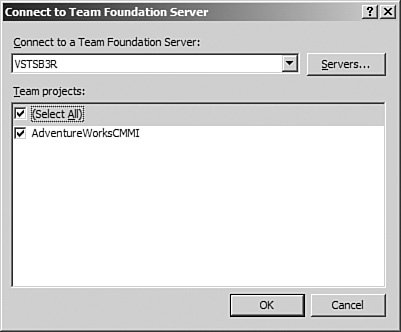
| Team members interact with a team project in a variety of ways that will differ depending on the unique role of that user. The following sections cover how team contributors can use the Visual Studio Team Explorer to interface with a Team Foundation Server. Connecting to a Team Foundation ServerBefore using the Team Explorer tool, you will first need to connect to a Team Foundation Serverspecifically, an application tier server. From the Tools menu in Visual Studio, select Connect to Team Foundation Server. This will launch a dialog box that shows any "known" TFS instances (see Figure 18.20). You can either select from this list or, if your intended server isn't shown, you can add it to the list by clicking on the Servers button. Figure 18.20. Connecting to a Team Foundation Server. To add a new TFS server to the dialog box, click on the Add button and fill out the HTTP connection properties: server name, port, and protocol. Select one of the listed servers, select one or more of the projects hosted on that server, and then click OK. Assuming that the project administrator has added your credentials to that project's groups, you are now wired into the selected TFS team projects and can use Team Explorer to access the items within those projects. Using Team ExplorerYou have already had a decent look at the Team Explorer tool; it provides an interactive, organized view of items within a particular project. As a project contributor, you can edit or view those items or create new items within the various categories (for example, work items, reports, documents). Using Team Explorer isn't complicated: By right-clicking on a node, you get a context-sensitive menu with the various actions that correspond to the folder's content. For instance, you can upload a document in this fashion by right-clicking on one of the document folders. Or you can create a new work item. Dedicated chapters following this one discuss work item, build, and source control management. Using the Project PortalAs we stated previously, the project portal is the nexus of all the various components of a project. Because it is a SharePoint Servicesbased site, it follows the standard composition theme for a SharePoint site: It is composed of a mix of standard web partssuch as links, announcements, and so onand TFS-specific web parts to provide users a holistic view of the current state of the project (see Figure 18.21). Figure 18.21. Connecting to projects on a Team Foundation Server.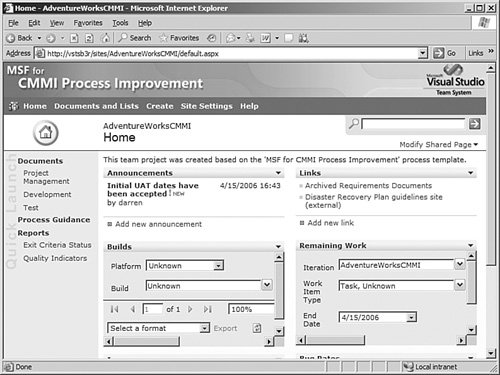 You can visit the project portal from a web browser by manually navigating to the site; by default, it is located at http://<tfs app server>/sites/<project name>/default.aspx. You can automatically navigate there by right-clicking on a project in Team Explorer or selecting the Team menu. Both have a Show Project Portal option, which will launch a new browser window pointed at the portal site. Contributors will typically use the portal site to gain access to team project documents from outside Visual Studio and check on announcements, general progress reports, and the like. The portal site will also be heavily used by users in the "reader" role because it represents the only way to access team project information without using Team Explorer. Default web parts are available for viewing build information, checking on remaining work, seeing bug rates, and looking at the open issues list. You can also gain access to the entire roster of reports (served up from SQL Server Reporting Services) or look at process guidance. Process GuidanceProcess guidance refers to a collection of HTML-based material that describes and documents the SDLC process. For each team project, guidance specific to the process used by that project is made available within the project portal site: Just click on the Process Guidance link in the left navigation bar. Figure 18.22. Project process guidance. Figure 18.22 shows the process guidance material for an MSF Agile-based project. Using Microsoft OfficeMicrosoft Office is the third tool that you can use to work with items stored in a Team Foundation Server. Through various add-ins and templates, you can use Office applications such as Word, Excel, and Project to talk directly to a TFS server and update items stored there. The use of Microsoft Word is limited to working with the various document templates (.dot files) that are included with the MSF Agile and MSF for CMMI process templates. Microsoft Project and Microsoft Excel offer actual integration with TFS and allow you to manage work items directly from these Office applications. Managing Work Items with Project and ExcelAfter the Team Foundation Server client software is installed, a new toolbar and Team menu will appear in the Office application. Figure 18.23 shows Microsoft Project with the TFS add-in installed. Using the toolbar or the Team menu, you can connect to a Team Foundation Server (using the same process you saw in Figure 18.19) and then import work items from TFS into project. After editing the project plan in Microsoft Project, you can then push those work item changes back into TFS by using the Publish button. Figure 18.23. Microsoft Project working with TFS. You also can access several custom project views via the MS Project View menu. Similar capabilities are present with Microsoft Excel. You can use the Team menu to retrieve a list of work items, import them into Excel, and even make round-trip changes back to the TFS database (see Figure 18.24). We will cover both Excel and Project integration in more depth in Chapter 20, "Work Item Tracking." Figure 18.24. Using Microsoft Excel to manage work items.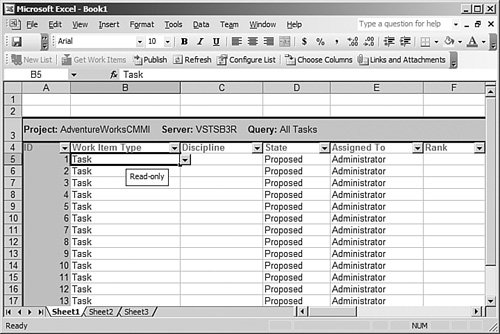 Note Microsoft also provides a centralized project collaboration server called Project Server. Currently, Team Foundation Server does not integrate at all with Project Server. Using Project AlertsAlerts are email notifications that are sent from the TFS server whenever a specific event occurs. Project team members can subscribe to the alerts that they need to react to by using the Project Alerts dialog box. From the Team menu, select Project Alerts. The dialog box that is displayed shows all the possible alert categories; from there, you can type in your email address (or someone else's) to receive a notification when that event transpires (see Figure 18.25). Figure 18.25. Managing project alerts.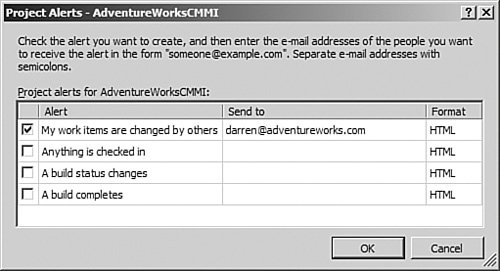 You can elect to receive alerts in HTML or plain-text format. When an alert arrives in your Inbox, you can view the basics of the alert and then follow the embedded links to get more detail. As an example, if you receive an alert because someone has changed one of your work items, you can actually retrieve information about exactly who changed the work item and what items were changed. Working with Project ReportsFor the most part, you handle project reports in the same way as any of the other project artifacts such as documents or work items: You can double-click on a report within Team Explorer (or select a report from the project portal) to view its content. Figure 18.26 shows a report on work items opened within Visual Studio. Figure 18.26. Viewing a TFS report in Visual Studio.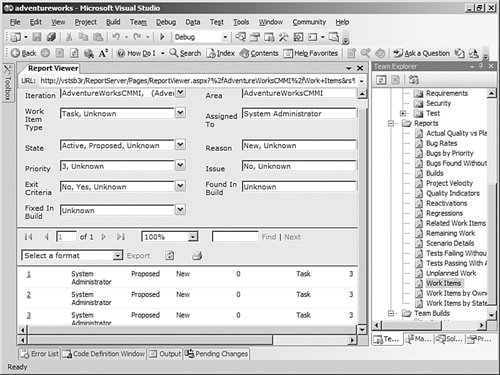 Remember that the reporting feature of TFS relies on SQL Server Reporting Services. We cover some of the basics in the following sections. Using the Data WarehouseReports are generated directly from an OLAP cube that is derived from the TfsWarehouse relational database (see Figure 18.27). This allows reports to deliver information across several different sources and aggregate information on builds, tests (including test cases, code coverage, and load testing), source control, and work items. Figure 18.27. The reporting database relationship. Designing ReportsTeam members can take an existing canned report and alter it to suit their needs. You can also build custom reports from scratch. Again, owing to the SQL Server Reporting Services dependency, the best way to do this is to actually use the Report Designer inside Visual Studio. Create a new Report Server project (under the Business Intelligence Reports category) in Visual Studio (see Figure 18.28). If the Business Intelligence Reports category isn't visible to you, you will need to install the SQL Server Business Intelligence Server Studio from the SQL Server install media. Figure 18.28. Creating a new report project.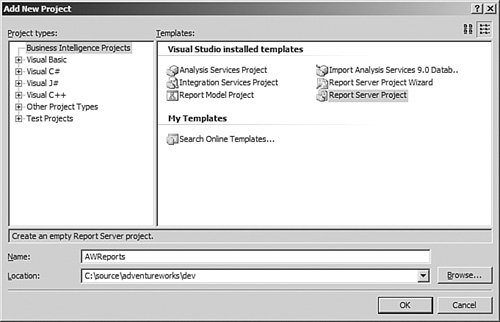 After creating the project, you can then add a new Report project item and use the Report Wizard to graphically build your report. Figure 18.29 shows a report being built to disseminate build information for the project. Figure 18.29. Building a custom report.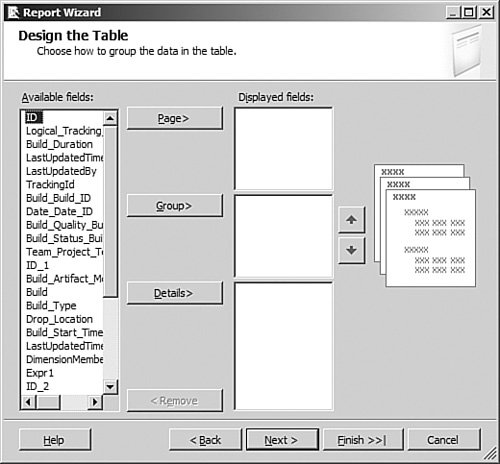 |

EAN: 2147483647
Pages: 195
- ERP Systems Impact on Organizations
- ERP System Acquisition: A Process Model and Results From an Austrian Survey
- Enterprise Application Integration: New Solutions for a Solved Problem or a Challenging Research Field?
- The Effects of an Enterprise Resource Planning System (ERP) Implementation on Job Characteristics – A Study using the Hackman and Oldham Job Characteristics Model
- A Hybrid Clustering Technique to Improve Patient Data Quality