Using Image Lists
| I l @ ve RuBoard |
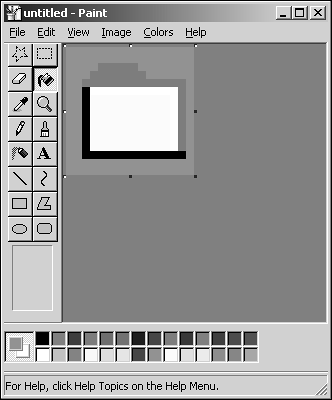
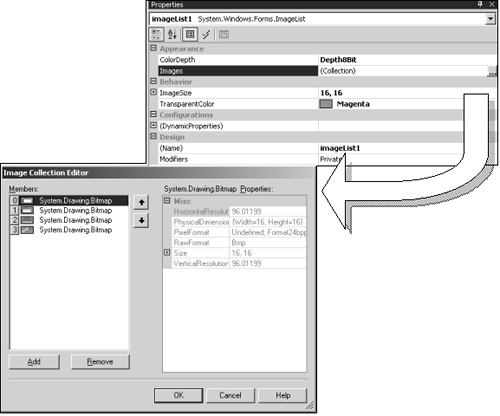
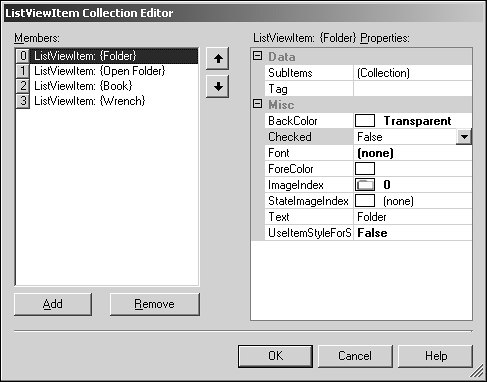
| Many components require images for their user interface. The ListView and TreeView classes can use images to enhance their appearances . Image lists are collections of bitmap images held in a single file. These images can have a transparent background keyed from a chosen color so that only the chosen portion of the image is shown. The demo code for this section will be created as we go. Using Visual Studio, create a new C# application and call it imagelistdemo . Follow along for the rest of the chapter to complete the job. To create an image list with Visual Studio, you should first drag an ImageList component from the toolbox onto the form. Now create some images. MS Paint is suitable for this task, just remember to save the images into a common directory. Figure 3.4.5 shows a 16x16 icon being edited in MS Paint. Figure 3.4.5. Editing an icon image. NOTE For the purposes of this example, we have prepared four small icons, icon1.bmp through icon4.bmp , available from the Web site. The background of the icon is filled with magenta . This is a color that does not appear anywhere on the actual icon image, so it is safe to use it as the transparency key. To add a collection of images to the ImageList object, you can select the Images collection in the object properties and click the Browse button. This brings up a dialog, as shown in Figure 3.4.6, that can be used to add as many images as you need to the list. Note that it is important to keep all images in an image list the same size ”in this instance, 16x16. Figure 3.4.6. Adding images to an image list. You can see from the image collection editor dialog that the four images are numbered from 0 “3, and each has properties that can be viewed within the editor. Now, to use these images in your ListView object, from the toolbox, drag a ListView object onto the form. For the moment, we'll simply get the ListView to display small icons. So select the listView1 object and show its properties. The property called SmallImageList can now be set to use the imageList1 that we just created. Let's take a sneak peek at the InitializeComponent code (see Listing 3.4.5) right away to see how these tasks have affected the code. Listing 3.4.5 Form1.cs: InitializeComponent 1: private void InitializeComponent() 2: { 3: this.components = new System.ComponentModel.Container(); 4: System.Resources.ResourceManager resources = 5: new System.Resources.ResourceManager(typeof(Form1)); 6: this.listView1 = new System.Windows.Forms.ListView(); 7: this.imageList1 = new System.Windows.Forms.ImageList(this.components); 8: this.SuspendLayout(); 9: // 10: // listView1 11: // 12: this.listView1.Location = new System.Drawing.Point(8, 8); 13: this.listView1.Name = "listView1"; 14: this.listView1.Size = new System.Drawing.Size(272, 200); 15: this.listView1.SmallImageList = this.imageList1; 16: this.listView1.TabIndex = 0; 17: // 18: // imageList1 19: // 20: this.imageList1.ColorDepth = System.Windows.Forms.ColorDepth.Depth8Bit; 21: this.imageList1.ImageSize = new System.Drawing.Size(16, 16); 22: this.imageList1.ImageStream ((System.Windows.Forms.ImageListStreamer) Lines 4 and 5 created the ResourceManager for the form. Lines 12 “16 create the ListView and sets up the SmallImageList property to use the imageList1 component. Lines 20 “24 initialize the image list by getting the image list streamer, setting the transparent color and the image size. To use the resources in the ListView , select the properties for the ListView object, select the Items collection property, and click the button marked with ellipsis ( ). This brings up the dialog shown in Figure 3.4.7 that lets you add and edit items in the list box. Figure 3.4.7. Using resource-based images in ListViewItem objects. NOTE Note that your programs can also accomplish adding items to components dynamically. Visual Studio provides an additional RAD way of doing things. Each of the items added to the tree can be given some text and an image to display. The ListView also provides events similar to those seen in the tree view demonstration from Chapter 3.2, "User Interface Components," when list items are selected, edited, and so on. Handling these events allows you to interact with the list. Let's take a look now at the final InitializeComponent listing for the example shown (see Listing 3.4.6). Listing 3.4.6 Form1.cs: InitializeComponent 1: private void InitializeComponent() 2: { 3: this.components = new System.ComponentModel.Container(); 4: System.Resources.ResourceManager resources = new 5: System.Resources.ResourceManager(typeof(Form1)); 6: System.Windows.Forms.ListViewItem listViewItem1 = new 7: System.Windows.Forms.ListViewItem("Folder",0); 8: System.Windows.Forms.ListViewItem listViewItem2 = new 9: System.Windows.Forms.ListViewItem("Open Folder", 1); 10: System.Windows.Forms.ListViewItem listViewItem3 = new 11: System.Windows.Forms.ListViewItem("Book", 2); 12: System.Windows.Forms.ListViewItem listViewItem4 = new 13: System.Windows.Forms.ListViewItem("Wrench", 3); 14: this.imageList1 = new System.Windows.Forms.ImageList(this.components); 15: this.listView1 = new System.Windows.Forms.ListView(); 16: this.SuspendLayout(); 17: // 18: // imageList1 19: // 20: this.imageList1.ColorDepth = System.Windows.Forms.ColorDepth.Depth8Bit; 21: this.imageList1.ImageSize = new System.Drawing.Size(16, 16); 22: this.imageList1.ImageStream = ((System.Windows.Forms.ImageListStreamer) 23: (resources.GetObject("imageList1.ImageStream"))); 24: this.imageList1.TransparentColor = System.Drawing.Color.Magenta; 25: // 26: // listView1 27: // 28: listViewItem1.UseItemStyleForSubItems = false; 29: listViewItem2.UseItemStyleForSubItems = false; 30: listViewItem3.UseItemStyleForSubItems = false; 31: listViewItem4.UseItemStyleForSubItems = false; 32: this.listView1.Items.AddRange(new System.Windows.Forms.ListViewItem[] { 33: listViewItem1, 34: listViewItem2, 35: listViewItem3, 36: listViewItem4} ); 37: this.listView1.Location = new System.Drawing.Point(8, 8); 38: this.listView1.Name = "listView1"; 39: this.listView1.Size = new System.Drawing.Size(272, 200); 40: this.listView1.SmallImageList = this.imageList1; 41: this.listView1.TabIndex = 0; 42: this.listView1.View = System.Windows.Forms.View.SmallIcon; 43: // 44: // Form1 45: // 46: this.AutoScaleBaseSize = new System.Drawing.Size(5, 13); 47: this.ClientSize = new System.Drawing.Size(292, 273); 48: this.Controls.AddRange(new System.Windows.Forms.Control[] 49: { this.listView1} ); 50: this.Name = "Form1"; 51: this.Text = "Form1"; 52: this.ResumeLayout(false); 53: } Now, lines 6 “13 create the ListViewItem objects and set the text and image offset within the ImageList to use. Lines 32 “36 add the items to the ListView . |
| I l @ ve RuBoard |
EAN: 2147483647
Pages: 204