Organizing Your Journal Entries
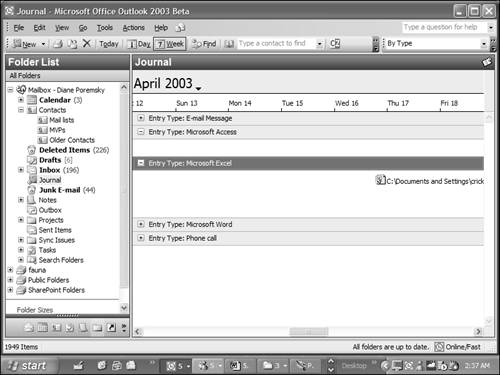
| When you open the Journal folder, you'll see the default By Type view: a timeline grouped by entry type. This view has the date running left to right across the top of the pane, with the journal entries listed under the dates. The timeline view default shows seven days, as shown in Figure 13.8. Figure 13.8. The default view for the Journal folder is a Timeline view. To move around the journal, in addition to scrolling, you can right-click on the row with the month and year to display the date picker or right-click on the date scale and choose G o to Date. Although the Outlook bar has a link for opening shared journals, only Exchange Server users will be able to open or use shared Journal folders. One of the first changes you might want to make in a Timeline view is to reduce the size of the font used for the month and year. Right-click on the bar where the month and year are displayed, choose Other Sett i ngs, and then adjust the size of the U pper Scale Font in the Format Timeline View dialog, as shown in Figure 13.9. Figure 13.9. Change the timeline display options using the Format Timeline View dialog. Other options you can change from the Format Timeline View dialog include showing week numbers and changing the maximum width of the labels displayed with the icons. You can also control whether the icon label displays when viewing a month in the timeline. Use the View menu to select different views of your Journal folder, including timelines grouped by contact or by category, Table views showing all items or filtered by the last seven days, or limiting the display to phone calls only. The Preview Pane is turned off on the Journal folder by default; however, you can turn it on using the V iew, Preview Pa n e menu selection. You can use the Preview Pane with any view, including the timeline, and can see all the journal fields in the Preview Pane. For security reasons, you can't open attached Outlook items from the Preview Pane, but you can open attached documents without opening the journal entries. In most views, you'll want the Preview Pane on the bottom of the window to maximize the viewing area for Timeline views, if you use it at all. Using ViewsAfter you create journal entries, you can use views to organize your journal in these ways:
You might prefer to view your journal in a traditional calendar format. If so, you can create a custom view using a day/week/month format layout.
The journal comes with six predefined views, using Timeline or Table layouts. You can customize these views or create your own custom views. You aren't limited to using Timeline or Table views with the journal: Day/Week/Month views also work well, although Icon and Card views do not. These Timeline views group the journal entries:
Each of these views defaults to showing the journaled items for the week. You can change this to one day, segmented by the hour , or one month by clicking the Da y or M onth toolbar button. You can return to a seven-day view by clicking the W eek button. The remaining preconfigured views use a Table view with filters controlling what you see:
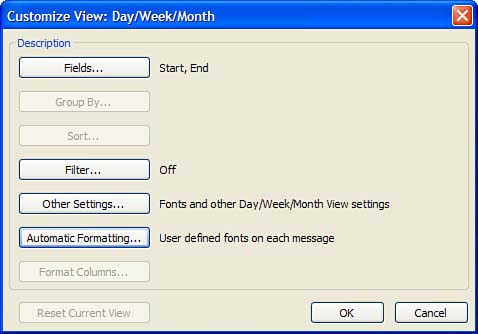
You can customize any of these views and create new views using your own criteria. Customizing the Journal ViewJournal comes with several views, all of which are customizable: Right-click on the top row of the journal and choose C ustomize Current View. The Custom View Organizer opens, enabling you to customize the current view to your liking. If you want to restore the default settings for the view, select the R eset Current View button at the bottom of the dialog.
If you don't like the predefined views or need more views, you can create new views:
The options available to customize your view depend on the type of view you're creating. To use the view now, select Apply View when you're finished customizing it. You can apply the view at any time by selecting it by name from the Current View toolbar button or the V iew, A rrange By, Current V iew menu selection.
Viewing Journal Items for a ContactContacts provide an additional way to view journal entries: from the Activities tab of an opened contact form. In fact, many frequent journal users never use the Journal folder; they use only the Activities tab. When you want to view the journaled items associated with a contact, open the contact and select the Activities tab. Select Journal from the Show: list to show only journal items. |
EAN: 2147483647
Pages: 228