18.6. Disk Images Thanks to a handy iDVD 6 feature, you can save your project as a computer file called a disk image . You may have run into the disk-image (.dmg or .img) format before; it's a popular storage format for software you download. It's so popular because you get a single, self-contained file that contains many other files, arrayed inside exactly as though they're on a disk. When you open a disk image file, in fact, it turns into a little harddisk icon on your desktop, with all of its contents tucked inside.
Note: Don't confuse a disk image with a project archive; they're two very different beasts. A disk image is a virtual disk, a bit-for-bit copy of the data that would appear on an actual, physical DVDit just happens to be stored on a hard drive rather than a DVD.Project archives, in contrast, contain all the source project material used by iDVD. The only thing that can read or "play back" a project archive is iDVD itself.
To turn an iDVD project into a disk image, save it. Then, choose File  Save as Disc Image (Shift- -R). Choose a file name (for example, Summer Fun.img ) and a location, and then click Save. Now wait as iDVD compresses your movie data and saves it to disk. All of this takes just as long as an actual DVD burning, so now's your chance to catch up on some magazine reading. Save as Disc Image (Shift- -R). Choose a file name (for example, Summer Fun.img ) and a location, and then click Save. Now wait as iDVD compresses your movie data and saves it to disk. All of this takes just as long as an actual DVD burning, so now's your chance to catch up on some magazine reading. Figure 18-7. Apple's DVD Player utility (in your Applications folder) can play back disk images as well as physical DVDs. In the Finder, double-click the disk image to make the virtual DVD appear on your desktop. In DVD Player, choose File Open DVD Media, as shown at top. In the dialog box that appears, choose the Video_TS folder you want to play. Navigate into the disk image, choose the Video_TS folder, and click Choose. Press the Space bar to start playback. 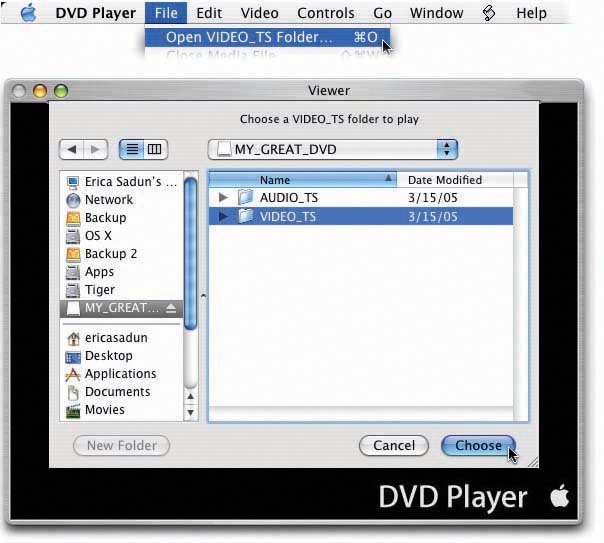
When it's all over, you'll find a new .img icona disk imageon your desktop. Disk images are amazingly high-octane, cool stuff for two reasons: -
You don't have to burn a disc to watch your movies . Mac OS X's DVD Player program can play back a disk image just as though it's a real DVD. You see all the menus , slideshows, and other iDVD features you've grown to love. As shown in Figure 18-7, the trick is to open the Video_TS folder. Never heard of it? Well, it's an important folder on every DVD ever made it's where all the video files resideand there's one on your disk image, too.
Tip: This is a handy way to test a DVD before you use up a perfectly good blank. The tip doesn't work for dual-layer discs, though, because disc images don't indicate where the "break" is between dual layers .
-
You can burn a new copy whenever you want, without waiting . You can use Roxio Toast (a beloved, commercial burning program) or Mac OS X's own Disk Utility program to burn the disk image onto a real DVDwithout having to wait for the excruciating multi- hour encoding process again. Figure 18-8 provides the amazingly simple instructions for this long-sought solution. Figure 18-8. Double-click your disk image in the Finder to make its virtual disk appear. Then open Disk Utility (in your Application Utilities folder), click the virtual disk, and choose Images Burn. Disk Utility prompts you to insert a blank DVD. Do so, and then click Burn. 
 |