Flylib.com

Books Software


Zooming In to and Out of the Timeline

team bbl


Zooming In to and Out of the Timeline

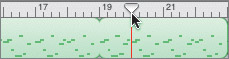
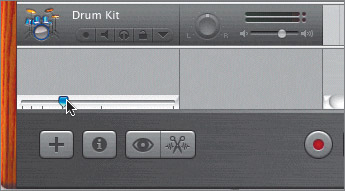
Now that you have identified the different regions and tracks, let's zoom in for a closer look.

You can zoom in to and out of the Timeline using the Zoom slider, located in the lower-left corner of the window, or by using a keyboard shortcut.

GarageBand zooms in to your current playhead position in the Timeline. For this exercise, let's start by zooming in to the beginning of the song.

1.

Press the Z key to move the playhead to the beginning of the Timeline (if it is not there already).

2.

Press and hold the Ctrl key, located on the far left and far right of the spacebar.

Note

The shorthand for the Control key is Ctrl. In this book, if you read instructions that ask you to press Ctrl-right arrow, that indicates that you need to press the Control and right arrow keys together.

3.

While you hold down the Ctrl key, press the right arrow key several times to zoom in to the Timeline.

As you zoom in, the tracks in the Timeline get longer, and you can see more detail within a track.

Notice that you can see the waveform (recorded audio that is graphically displayed) in the Wind Chime track.

Wind Chime region before zooming in to the Timeline

Wind Chime region after zooming in to the Timeline

4.

Press Ctrl-right arrow several more times to zoom further in to the Timeline.

5.

Press Ctrl-left arrow several times to zoom out of the Timeline until you can see the entire song again.

6.

Click the Beat Ruler around the 20th measure to move the playhead.

You may need to zoom in to or out of the Timeline to clearly see the 20th measure in the Beat Ruler.

Now let's zoom in to the 20th measure of the song using the Zoom slider. The Zoom slider works the same as pressing the Ctrl key and tapping the left and right arrows.

7.

Locate the Zoom slider in the lower-left corner of the window.

8.

Click and drag the blue arrow on the slider toward the left to zoom out of the Timeline.

9.

Click and drag the blue arrow on the slider toward the right to zoom in to the Timeline at the playhead position.

10.

Click and drag the blue arrow to the middle position on the slider.

team bbl

team bbl


Exploring the Track Editor

Now that you're zoomed in to the Timeline, look at the regions on the top three tracks of the Timeline.

Notice that the green regions have a series of dashes and lines to represent the musical note events. The blue regions, on the other hand, show a waveform that illustrates the digital recording.

The Track Editor is a tool that lets you magnify and edit a particular region or track.

Let's start by opening the Track Editor for a Software Instrument region.

Opening the Track Editor

The Track Editor can be used to edit an entire track or a specific region within that track.

The Track Editor differs depending on the type of region that you open. If you're working with a Software Instrument, you will use the Track Editor for Software Instruments. If you're working with a Real Instrument, you will use the Track Editor for Real Instruments. You can have only one Track Editor open at a time because they occupy the same space in the lower third of the GarageBand window.

Let's start with the Track Editor for Software Instruments. Remember that the green regions are created by Software Instruments and can be edited in the Track Editor.

There are four ways to open the Track Editor:

  • Double-click the region you wish to edit in the Track Editor.

  • Click the Track Editor button located in the lower-left corner of the window.

  • Go to the Control menu at the top of the screen and choose Show Editor.

  • Press Cmd-E (the Command key and the E key at the same time).

Since we haven't used any of the menus in this lesson, this is a good time to try out the menus at the top of the screen.

1.

Locate the Control menu.

2.

Choose the Control menu by clicking and holding it with your mouse.

3.

Continue holding your mouse on the Control menu and scroll down to choose Show Editor.

Note

The shorthand for steps that involve menus will be written as "Choose Control > Show Editor." In other words, Control is the title of the menu, and Show Editor is the selection within that menu.

The Track Editor appears in the lower third of the GarageBand window. Its appearance varies depending on the type of region you open.

Software Instruments allow you to record input from a MIDI input device, like a MIDI keyboard, as a Software Instrument region. Software Instrument regions don't contain sounds from actual musical instruments, nor do they display the sounds, or notes, as waveforms, as do Real Instrument regions (purple or blue). Green Software Instrument regions represent individual notes as "note events" that look like a series of bars, lines, or dashes, which can be assigned to any Software Instrument, before or after it is recorded.

MIDI note events in Software Instrument regions can have their pitch, timing, velocity, and duration edited in the Track Editor. While in the Track Editor, you can view and edit the MIDI note events in either graphic view (bars) or notation view (musical notes).

Here's a quick tour of the Track Editor controls:

  • Name field Shows the name of a selected track or region, and can be used to change the names of both tracks and regions.

  • Pitch slider and field Enables you to transpose (change the key of) the selected Software Instrument region up or down by up to 36 semitones (3 octaves).

  • Velocity slider and field Lets you change the velocity of selected notes to make them play harder or softer, which translates to louder or quieter.

  • Zoom slider Enables you to zoom in to or out of the region in the Track Editor.

  • Graphic/Notation View buttons Allows you to change the editor display to graphic view or notation view.

  • Display pop-up menu Allows you to choose whether to show notes or controller data in the Track Editor.

  • Fix Timing button Allows you to fix the timing of selected notes in a selected region. This works by moving each note to the nearest grid line.

  • Beat Ruler Corresponds to the Beat Ruler in the Timeline, and can be used to navigate to specific locations within the selected track.

  • Playhead Plays the track or region in the Track Editor and corresponds to the playhead position in the Timeline.

  • Notes/Controller data display Shows the individual note events of Software Instrument regions in a graphical or notational format. Can be used to change a note's pitch, position, size , and length of play. Can also show MIDI controller data such as pitchbend and sustain.

  • Scroll bar Allows you to move to a different portion of the track in the editor.

team bbl