Creating "Credits" for Each Still Now that we have created all of our still images, we need the identifying credits to match. We'll create these in Premiere Elements Titler. Once we have all of our pieces in place, we'll be ready to animate them using the Motion effect on the Properties panel, which we'll begin to do in the upcoming tasks. Create "Credits" for the First Actor  Move the CTI to 00;00;10;00, which is the beginning of the retrotitle_FF.bmp clip in the Video 1 track on the Timeline. Move the CTI to 00;00;10;00, which is the beginning of the retrotitle_FF.bmp clip in the Video 1 track on the Timeline.
 On the Monitor panel, click the Add Text button. On the Monitor panel, click the Add Text button.
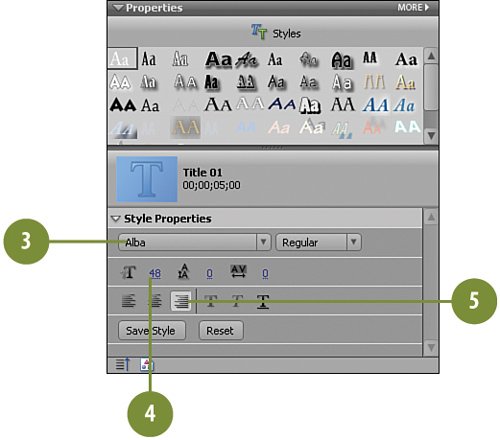
  In the Properties panel, change the font to Alba. In the Properties panel, change the font to Alba.
 Change the font size to 48. Change the font size to 48.
 Click the Right Align Text button to change the alignment to right-aligned. Click the Right Align Text button to change the alignment to right-aligned.
  Drag your mouse across the Add Type text in the Titler and type Miles W as "Sketch" to replace it. Drag your mouse across the Add Type text in the Titler and type Miles W as "Sketch" to replace it.
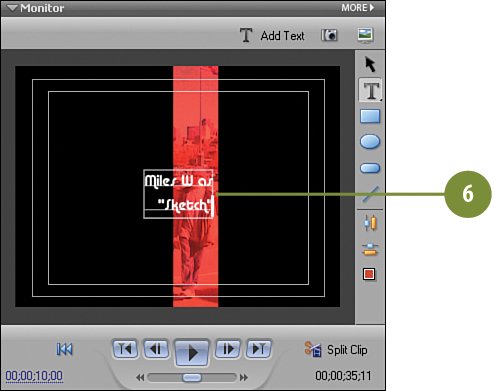
 Move you cursor after as and before "Sketch" and press the ENTER key on your keyboard so that your text looks like the text in the illustration to the right. Move you cursor after as and before "Sketch" and press the ENTER key on your keyboard so that your text looks like the text in the illustration to the right.
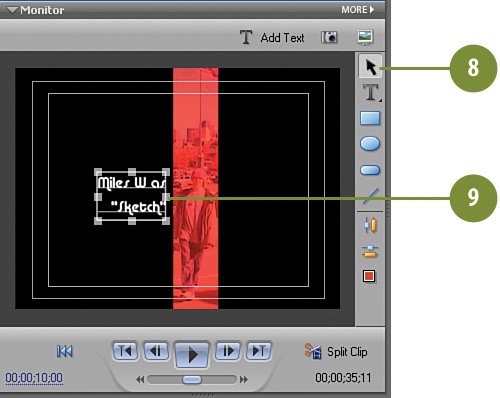
 Click the Selection Tool (the arrow). Click the Selection Tool (the arrow).
 Grab the text box and drag it so that it is on the left side of the screen. Grab the text box and drag it so that it is on the left side of the screen.
Create "Credits" for the Second Actor - Move the CTI to 00;00;18;00, the beginning of the retrotitle_FF_1.bmp clip in the Video 1 track on the Timeline.
- On the Monitor panel, click the Add Text button.
- In the Properties panel, change the font to Alba, the font size to 48, and the alignment to left-aligned.
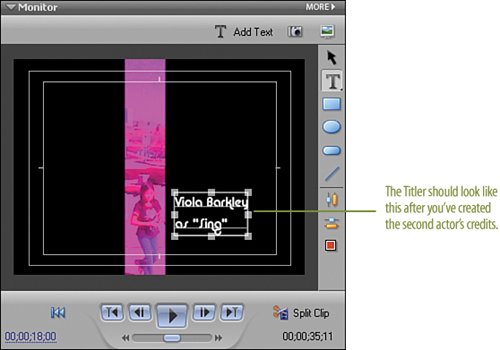
- Drag your mouse across the Add Type text in the Titler and type Viola Barkley as "Sing" to replace it.
- Move you cursor after Barkley and before as and press the ENTER key so that your text looks like the text in the illustration.
- Click the Selection Tool (the arrow) and move the text box so that it is on the lower right side of the screen, next to the actor.
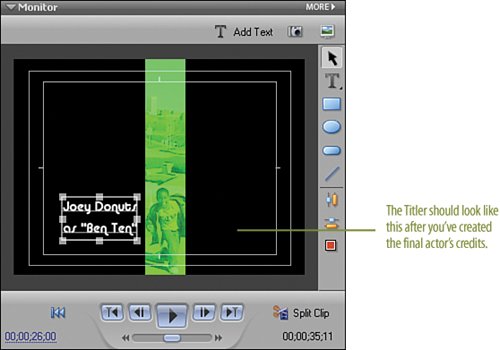
Create "Credits" for the Third Actor - Move the CTI to the beginning of the third clip, retrotitle_FF_2.bmp, at 00;00;26;00.
- Click the Add Text button on the Monitor.
- In the Properties panel, change the font to Alba, 48, right-aligned.
- Drag your mouse across the Add Type text in the Titler and type Joey Donuts as "Ben Ten."
- Move you cursor after Donuts and before as and press ENTER.
- Click the Selection Tool and move the text box so that it is on the lower right side of the screen, near the actor (as shown in the illustration to the right).
|