| Dreamweaver offers several ways to create framesets. The different options that Dreamweaver offers you may be better suited to use in different situations. You'll have to review each of these techniques and decide which one is better suited for you and your current project. You may become partial to one way over the other and find yourself using that specific technique more often than the rest, which is also fine. Creating a New Frameset Document The easiest way is to create a set from the predefined offerings in the New Document dialog box. Create a new document by choosing File, New. This launches the New Document dialog box. In the dialog box choose the frameset category, as shown in Figure 7.4. Figure 7.4. The New Document dialog box offers several options for creating new documents based on framesets.
In the framesets column, choose the layout you prefer. On the right side you'll get a preview of what the frameset will look like as well as a description. When you're happy with your choice, click the Create button. This creates a new document in the appropriately divided frameset. Create a New Frameset with Menus and the Mouse If you already have a document open and then decide you want to work with framesets, you can always add one after the fact. The first thing you need to do is choose Modify, Frameset, Split Right (you also have options for left, up, or down) as shown in Figure 7.5. This divides the page visually to represent the direction you asked Dreamweaver to split the page; in this case, it splits the page in two, as shown in Figure 7.6. Figure 7.5. Choose Modify, Frameset, Split Frame (right, left, up, or down) to create a frameset in a new basic HTML document.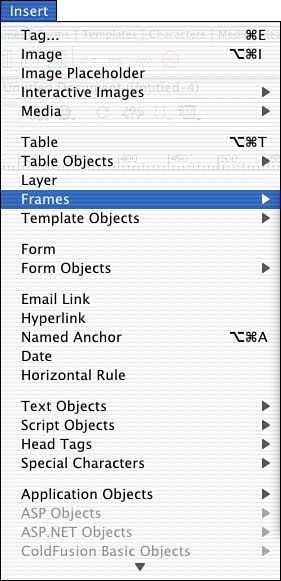
Figure 7.6. The document has been split in two.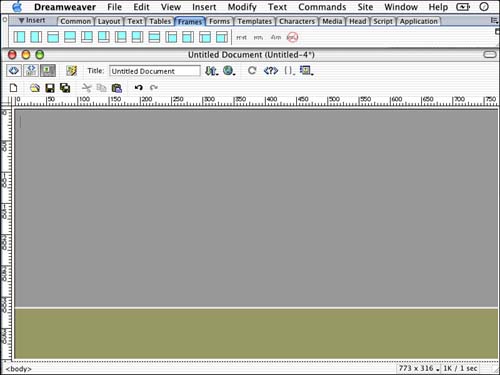
Creating Additional Frames To create additional frames, make sure your frame borders are visible by choosing View, Visual Aids, Frame Borders. You can then click any of the frame borders that surround the document and hold down the Option (Mac) key or Alt (Windows) key while dragging. I'm going to click and drag down from the top of the document. This creates another split, dividing the document into additional separate frames as pictured in Figure 7.7. Figure 7.7. The document is divided even further with the addition of another row.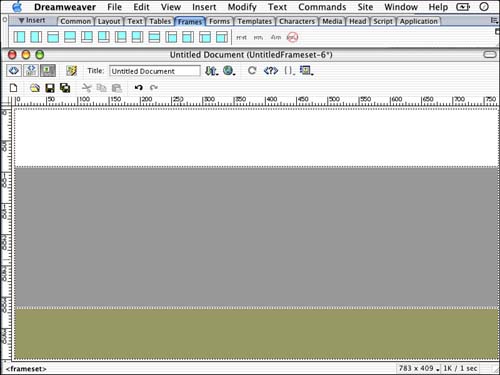
Using the menu and the mouse will offer you the freedom to make framesets after you've already inserted a document. However, this is my least favorite way to create a frameset; I find that this way creates more problems later as I develop, yet that is my personal experience. You may like this way just fine. Create a Frameset with the Insert Panel Again, if you already have a document open, you can insert a frameset after the fact. Under the Frames tab of the Insert Panel, there's a series of predefined framesets you can create, as shown in Figure 7.8. Figure 7.8. Under the Frames tab of the Insert panel, you can choose from several frameset styles.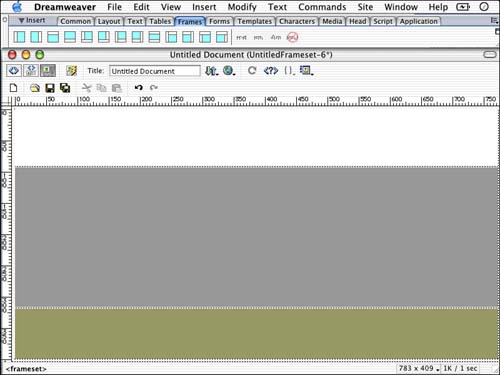
You can click any one of the frameset styles and the page will automatically divide into the appropriate frames. The small icons on the panel represent how the page will be split. The icons that split the page into several documents that are not parallel will create what's called a nested frameset. By nesting a frameset, you can divide the page visually again by adding additional frames in a new frameset inside an existing frameset. Here's an example of what the code looks like for a nested frameset: <frameset rows="80,*,80"> <frame src="/books/4/291/1/html/2/red.html"> <frameset cols="379,379"> <frame src="/books/4/291/1/html/2/blue.html> <frame src="/books/4/291/1/html/2/green.html"> </frameset> <frame src="/books/4/291/1/html/2/yellow.html"> </frameset> Code like the preceding example gives you a result similar to what is pictured in Figure 7.9. Figure 7.9. This figure represents a common layout for nested frames.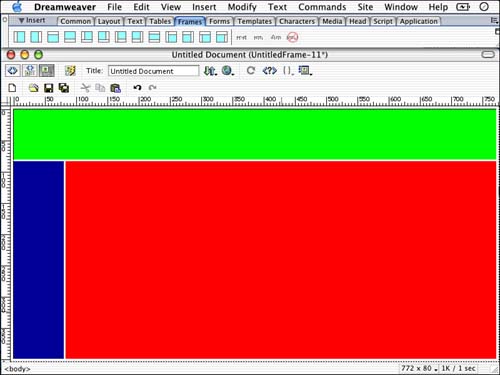
A common nested frameset is the Top and Nested Left Frames option, available from the Insert panel. The great thing about the frame object in the Insert panel is that with a single click of the mouse, you can insert a frameset that otherwise would take several key strokes and a mouse click to achieve using the techniques mentioned earlier. These are the three ways you can create framesets in Dreamweaver. If you have a good plan, the fastest and easiest way to do it is from the New Document dialog box. If you have to create the frameset in a document that's already been opened, your next best bet is to use the Insert panel. One thing I stress when using framesets is that you should be sure you have a plan. Having a good idea as to how you want your site structured will not only ensure a successful site, but it will make working with frames a lot easier. I notice that many of my students in a Dreamweaver class will overwrite certain documents when working with framesets, and many of these problems can be avoided by setting up and saving your frameset properly from the beginning. | 
