| The hidden field is a common way to store information on the page that the end user may not necessarily have to see. It's commonly used in conjunction with CGI scripts. In the last section of this chapter, we'll be creating a form that contains hidden fields to add functionality to our form. Real World Forms, Building Forms That Work Now that we know how all the different form elements work, we'll put together a form that actually uses a CGI script and we'll make our form visually pleasing. The first thing we need to look at is how we can incorporate a form into a structured table. The trick is to make sure the table is placed between the red dashed form delimiter. If you try to place a form tag within the table, you'll only be able to place a form within one cell. A form cannot span across multiple cells, that's why you need to place the entire table between the form tags, this way you can place different form elements in different cells, yet they'll all be apart of the same form. For the final exercise in this chapter, you may want to download the supporting files from the companion Web site located at http://www.dreamweavermxunleashed.com. Formatting a Form with a Table In this exercise you'll create a form that you'll design using a table. -
Create a new document by choosing File, New. This launches the New Document dialog box. Choose a basic HTML page and click OK. -
In the new document choose Modify, Page Properties. Set the background color to a gray or black color. Choose OK to exit the Page Properties dialog box. -
When you're back inside the document, click the Insert Image button in the Insert panel under the Common tab. Navigate to the top_banner.gif file you downloaded from the Web site. Select that file and choose OK to place the graphic in your document. Finally, with the image selected, click the Align Center button in the Properties Inspector to center the image in the document, as shown in Figure 6.20. Figure 6.20. The graphic is centered in the document.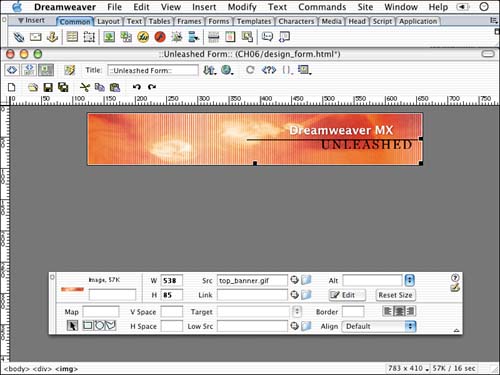
-
Next, with a blinking cursor after the banner graphic, press Shift+Return (Mac) or Shift+Enter (Windows) to enter a line break. If you're having trouble getting a blinking cursor in the right location, select the graphic and then press the right arrow key on your keyboard. Then choose Insert, Form Object, Form. This places the form delimiter into your document. -
Place a blinking cursor between the red, dashed lines and choose Insert, Table. This launches the Insert Table dialog box. -
In the Insert Table dialog box, type in the following values: 2 columns, 5 rows, 450 pixels for the width, 0 pixels for spacing, 0 pixels for padding, and 0 for a border. Choose OK. Notice in Figure 6.21 that a table has been inserted into your page. If it's not centered automatically, highlight the table and choose Center from the Align drop-down menu in the Properties Inspector. Figure 6.21. A table has been inserted into your document.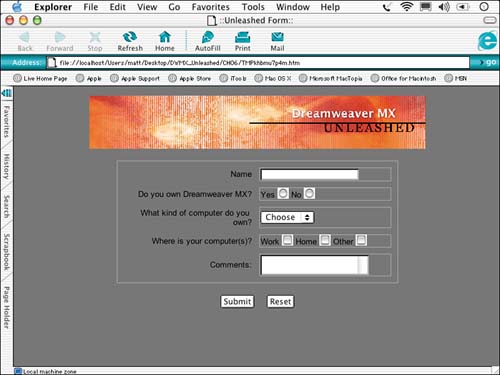
-
Type questions on the left side of the table. Align the text to the right. -
Add form objects on the right side of the table. Align the form objects to the left. -
Name all your form objects accordingly; avoid spacing and special characters in your naming conventions. -
When the table is completely filled with objects and questions, place a blinking cursor outside the table on the right and press Return or Enter. Underneath the table insert a Submit and Reset button. -
Save the form as form_design.html. You'll use the form later to add a CGI script, so the form will actually work. |
When the table is complete, the form looks well designed, as shown in Figure 6.22. You can also test the form to see how it will appear in the real world. Figure 6.22. The form looks well designed, in comparison to the earlier forms we built.
The next step is to add functionality to this form by sending it to an email account. You're going to do this in two ways. The first way is to send it through using an email client, and the second is by sending it using a CGI script. Sending Form Data Through Email Sending a form through email is by far the easiest way. Depending on your site's needs, it may be sufficient as well. To send a form through an email client, follow these steps: -
Open the form_design.html document you worked with in the previous exercise. -
With the form open, make sure the Properties Inspector is visible; if not, choose Window, Properties Inspector. -
In the Tag Inspector, located at the bottom-right corner of the document window, click the form tag to select the form. -
In the Properties Inspector, for the action, type in mailto:yourname@yourdomanin.com. Of course substitute your email address after the mailto:. -
For the method, be sure to select POST. That's it! -
Test the page in a browser, fill out the form, and press Submit. Check your email! Sending a Form with a CGI Script Although the previous method is acceptable, you may want something a bit more professional. A more standard way of submitting forms like the one you built is with a CGI script. A Note About CGI CGIs are scripts that get executed on the server side. In the next exercise you'll be using a CGI script, which lives in the CGI-BIN of this book's companion Web site. CGI scripts are typically written in PERL or Java and most hosting companies offer free CGI script in the hosting plan's CGI bin. You can learn more about server-side scripts and how they work in Part IV of this book. Sending a Form with CGI In this exercise, you'll be using a CGI script on this book's companion Web site. There is nothing to download; all you need to do is source the CGI script that is located on the Unleashed Web server. This exercise is for testing only and should not be used in a real production environment. -
Open the form_design.html page. Toward the right of the table, still inside the form tag, insert three hidden fields as shown in Figure 6.23. Figure 6.23. There are three hidden form fields inserted into the document.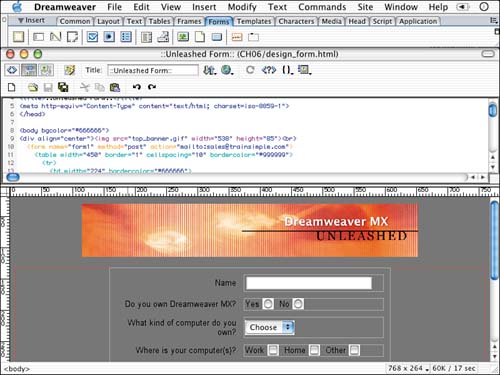
-
The CGI script is looking for three variables, and you're going to give those variables values by using these hidden form fields. -
Highlight the first hidden field, and in the Properties Inspector name it _MAILTO. _MAILTO is the variable the CGI script is looking for, which is going to provide the email address to send the form value to. For the value, enter your email address; for example, yourname@yourdomain.com. -
Highlight the second hidden field and name it _SUBJECT. This is another variable, which is going to add whatever value you enter in the subject line of the email. In the value text field, enter whatever you want to show up in the subject line. -
Select the third hidden field and name it _THANKS. This variable is going to send an HTML page to the browser after the form has been processed. I have created a document that is already on the server, called thanks.html. So, in the value field type in thanks.html. You could have a different document, but I'm not going to give you access to my server…heh, so you'll have to use my page. -
Next, highlight the <form> tag in the Tag Inspector to select the form. In the Actions field of the Properties Inspector, you have to source the location of the script. In this case type this source: http://www.dreamweavermxunleashed.com/cgi-bin/tmail/tmail.cgi. -
When you're done, preview this in a browser. As long as you have a connection to the Internet, fill it out and submit it. After submitting, the thanks page will appear, as shown in Figure 6.24. Check your email; the form will be there. Figure 6.24. After you submit the form, the thanks page will appear.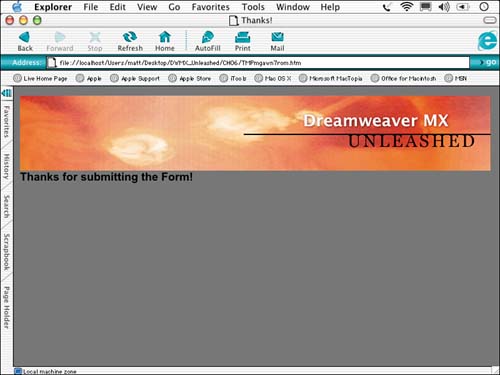
|
|

