| Dreamweaver MX is a powerful authoring environment that provides the developer with a feature-rich set of controls, objects, behaviors, and commands. As you progress in your Web application development, however, you may come to a point when Dreamweaver MX simply cannot do what you need it to accomplish. One example is the capability to read and write to text files or the capability to automatically generate emails. These are two fairly popular tasks Dreamweaver simply has no way of handling. In instances like these, you will need to go beyond Dreamweaver MX and into the world of coding. Sending Email with ASP Suppose for a moment that you wanted to send an email confirmation to your customers regarding an order that they had just placed. You could have an interface that looks similar to the one in Figure 22.12. Figure 22.12. A simple interface that could generate an email to a customer.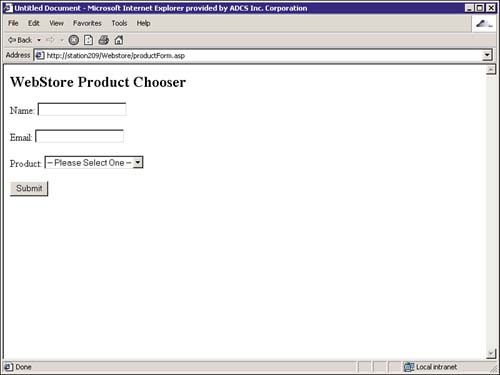
The interface includes a simple text box for users to input their names and email addresses and a drop-down list that includes products that the user can choose from. All in all, the code could resemble the following: <%@LANGUAGE="VBSCRIPT" CODEPAGE="1252"%> <html> <head> <title>WebStore Product Chooser</title> </head> <body> <h2>WebStore Product Chooser<h2> <form name="form1" method="post" action=""> Name: <input name="name" type="text" ><br><br> Email: <input name="email" type="text" ><br><br> Product: <select name="product" > <option selected>-- Please Select One --</option> <option value="Shirt">Shirt - $12.99</option> <option value="Pants">Pants - $34.99</option> <option value="Shoes">Shoes - $79.99</option> <option value="Hat">Hat - $12.00</option> </select><br><br> <input type="submit" name="Submit" value="Submit"> </form> </body> </html> Obviously, if the user clicked Submit, it wouldn't do much, but if the code were to be modified slightly, it could be very much dynamic. First, make the form post to itself by adding the name of the file to the action attribute: action="productForm.asp". Second, add the following code just after the first line to generate the email: <% Dim strName, strEmail, strProduct, body, objMail strName = Request.Form("name") strEmail = Request.Form("email") strProduct = Request.Form("product") If (strName <> "") Then Set objMail = Server.CreateObject("CDONTS.NewMail") objMail.From = "sales@webstore.com" objMail.To = strEmail objMail.Subject = "Your order has been confirmed" objMail.body = strName & " Your order has been confirmed for: " & strProduct objMail.Send Set objMail = Nothing Response.Write("Thank you for ordering") Else %> Don't forget <% End If %> as the very last line in the document. Stepping through the code, you can see that the If statement performs a check to see whether the strName variable is empty. If it is, it will show just the HTML code until the user submits the form for the first time. When the form is submitted, the variable then becomes populated and the send mail code gets called. The code instantiates a set of server objects known as collaboration data objects (CDO) and goes through the motions populating the From, To, Subject, and Body fields. The final step is performed with the email being sent and a Thank You message is presented to the user. Sending Email with ASP.NET You can tweak the preceding code slightly to generate the same results with ASP.NET. Rather than the HTML code looking like it did in the following example, it could look a bit more like the following: <%@ Page Language="VB" ContentType="text/html" ResponseEncoding="iso-8859-1" %> <html> <head> <title>WebStore Product Chooser</title> </head> <body> <h2>WebStore Product Chooser</h2> <form action="productForm.aspx" method="post" name="form1" runat="server"> Name: <asp:textbox Columns="30" runat="server" TextMode="SingleLine" /> <br><br> Email: <asp:textbox Columns="30" runat="server" TextMode="SingleLine" /> <br> <br> Product: <asp:dropdownlist runat="server"> <asp:listItem value="shirt" text="Shirt - $12.99"></asp:listItem> <asp:listItem value="pants" text="Pants - $39.99"></asp:listItem> <asp:listItem value="shoes" text="Shoes - $79.99"></asp:listItem> <asp:listItem value="hat" text="Hat - $12.99"></asp:listItem> </asp:dropdownlist> <br><br> <asp:button onClick="Button_Click" runat="server" Text="Submit" /> </form> </body> </html> To generate the email, first you need to add the mail namespace. You can select the Import Namespace object from the Insert, ASP.NET Objects menu. Make sure you add it as the very first line of code: <%@ Import Namespace="System.Web.Mail" %> Next, add the subroutine that will handle the click event for the button control: <script runat="server"> Sub Button_Click(s As Object, e As EventArgs) Dim objMail = New MailMessage objMail.From = "sales@webstore.com" objMail.To = email.Text objMail.Subject = "Your order has been confirmed" objMail.Body = name.Text & " your order has been confirmed for: " & product.selectedItem.Text SmtpMail.SmtpServer = "localhost" SmtpMail.Send(objMail) End Sub </script> Figure 22.13 shows the email message that was sent to me from our example. Figure 22.13. A new email from sales@webstore.com confirms that the code works.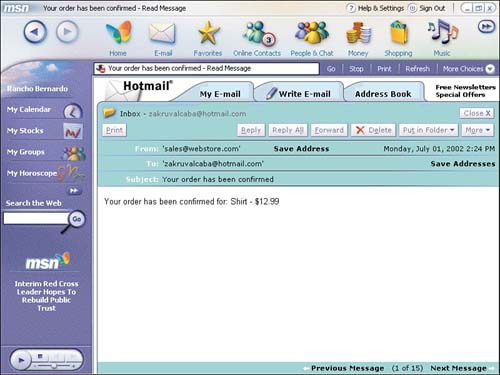
Notice that in this example, the code was placed into a subroutine with two parameters being passed in. "s As Object" treats the controls as objects going in and "e As EventArgs" handles the arguments that they raise. Also, notice that a new MailMessage was instantiated and its properties are set. The final step sends the email message. One item to consider before actually testing your code is that you will receive an error if you do not configure IIS to allow relay access to the localhost. To do this, follow these steps: -
Run IIS and right-click the default SMTP server. -
Select the Access tab. -
Select Relay. -
Click to limit access to the "List Below," and then add your computer as 127.0.0.1. -
Uncheck the Allow All Computers. The results should look similar to Figure 22.14. Select OK and close IIS. -
Now test the product form. Figure 22.14. Configure IIS to allow the email to be sent through the localhost.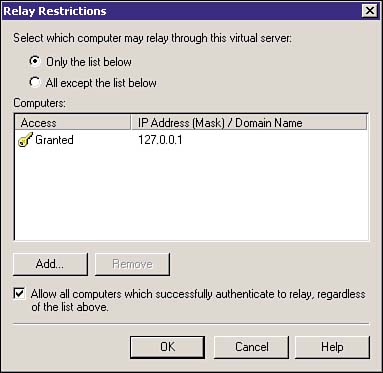
Code Snippets Code snippets are a good way of saving and reusing chunks of code that you have previously written. For instance, now that you have created the form mailer in both ASP and ASP.NET, you may want to save it so that when you want to accomplish a similar task in the future, you know it will be in a handy place. In the Snippets panel, you can create snippets, create snippet folders, move snippets to a specific folder, or share snippets with other members in your collaborative environment. To create a new snippet for the email code you created previously, follow the steps outlined next: -
Create a new folder by selecting the New Folder icon in the Snippets panel. Call it ASP.NET. -
Highlight the entire subroutine that you created. -
Right-click and select Create New Snippet. Figure 22.15 shows the highlighted code with the menu. Figure 22.15. A new snippet can be created by highlighting the code and right-clicking.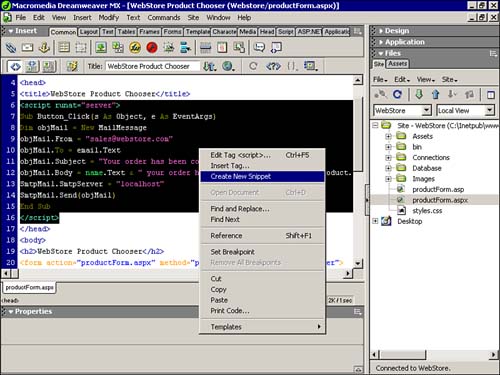
-
Give your snippet a name and description as shown in Figure 22.16. Figure 22.16. The new snippet appears within the Snippet panel.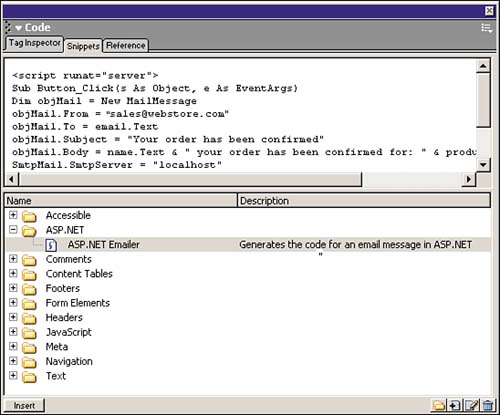
-
Select OK. -
Your new snippet will appear in the Snippet panel. | 
