| In 1997, Microsoft introduced Active Server Pages (ASP) as a means of competing with then-popular CGI for creating dynamic and scalable Web applications. Because of its relative simplicity and learning curve, ASP has grown to be one of the top server-based scripting languages used by Web developers. Unlike CGI, which required complex object-oriented programming languages (PERL/C++) to be used, ASP used a simple subscript of Visual Basic known as VBScript. Because VBScript closely models the constructs of plain English, it was found to be easy to write and manipulate, giving it a definite advantage over Perl and C++. Another major advantage to using ASP was that it came prebundled with IIS. Web developers needed only to have a running Windows server environment with IIS and they were ready to begin creating ASP, in contrast to competitor products such as ColdFusion, which required ColdFusion Server to be installed before CFML could be run adequately. The ASP Object Model ASP is simple to write after you know its object model. Basically, ASP consists of five major objects that can be used to perform any task from handling user requests to delivering user responses. The five objects are The request object The response object The session object The application object The server object The Request Object Applications do not simply function as standalone programs, they require input from an external location. For every action to be taken on the application side, a request has to be made. The request object handles the request from the client-side application. The request object has specific methods that a developer can program against, such as Cookies Cookies represents a collection of cookie values that will be sent to the system as a request. The following is an example: <% strTown = Request.Cookies("SavedLogin")("Town") %> In this example, "SavedLogin" is the cookie name and "Town" is the value contained within the cookie. Form Returns the value of a specified form object. The following is an example: <% myValue = Request.Form("TextBox1") %> The Response Object With every request coming into the application, the response object accesses the response that is to be sent back to the client. It also makes available a series of methods that the developer can program against. Some of these methods are Write Write does exactly what it says. It writes code or markup wherever you specify within the page. An example may resemble the following: <% Response.Write("Hello World") %> Redirect Redirect immediately sends the user to a new URL. An example may resemble the following: <% Response.Redirect("sample.asp") %> Cookies Cookies represents a collection of cookie values that will be sent back to the user in the response. The following is an example: <% Response.Cookies("SavedLogin")("Town") = Request.Form("City") %> In the preceding example, the value "Town" which is contained within the "SavedLogin" cookie is being set to the value of the form object "City". Expires Expires sets a flag on the cookie, letting the server know when this cookie will expire. The following is an example: <% Response.Cookies("SavedLogin").Expires = Date + 30 %> In the preceding example, the cookie "SavedLogin" expires in 30 days. The Session Object The session object provides a place for variables and object references to be available for a single person during the life of the session. By default, sessions time out within 20 minutes. The session object makes available a series of methods that the developer can program against. Some of these methods are Abandon Clears all available sessions. An example may resemble the following: <% Session.Abandon %> Contents Contents return the names and values that are contained within the session object. Timeout Timeout defines the timeout period for the particular object. Even though the default is 20 minutes, a different timeout can be specified at any time. The Application Object The application object provides a place for variables and object references to be stored and used by all files available within the application. The application object makes available a series of methods that the developer can program against. The Server Object The most obvious purpose for the server object is for the instantiation of objects. The server object also makes available a series of methods that the developer can use. Some of these methods are CreateObject CreateObject is used in the instantiation of new COM objects or Windows APIs. The following is an example: <% Set objMail = Server.CreateObject("CDONTS.NewMail") %> MapPath MapPath provides a developer with the opportunity to return the full physical path of a file. Typically, MapPath is used when you are pointing to a UDL file that resides in the project folder. When moving the application to a new machine, developers do not have to comb through all of their code to make the changes globally. The following is an example: <% myLocation = Server.MapPath("sample.asp") %> myLocation could return: c:\InetPub\wwwroot\Project\sample.asp Transfer Transfer stops execution of the page that the user is currently on and sends the user to a new URL. The following is an example: <% Server.Transfer("sample.asp") %> Other ASP Objects and Components Aside from the five basic objects available in ASP, you are also able to use other objects to accomplish specialized tasks. For instance, if you wanted to read from and write to a text file, you could use the file system object. If you wanted to continuously rotate banner advertisements, you could implement the AdRotator component. ASP offers many other objects and components that can be quickly instantiated using the CreateObject method of the server object. The list of additional objects and components is as follows: ActiveX Data Objects (ADO) ADO is an API from Microsoft that allows developers building Web applications access to databases. Typically, ADO program statements, combined with SQL statements, are written within an HTML file identified as an ASP page. The user sends a request and a response is sent back with the appropriate data from the database. Collaboration Data Objects (CDO) CDO is an API from Microsoft that enables developers building Web applications to include messaging services within their applications. Using ASP with CDO, a developer could write code that sends email to clients and allows employees to schedule meetings, review appointments, schedule events, and so on. File System Object The file system object is an API from Microsoft that allows developers building Web applications to access drives, folders, and directory information from the server. Using the file system object, a developer could allow users to create folders and write to and read from files within those folders. Dictionary Object The dictionary object provides developers the opportunity to store names and values within a list similar to an array. Unlike an array however, a dictionary's values can be referenced by name rather than by index, as is the case with arrays. ASPError Object The ASPError object provides a developer with a series of objects to use when debugging and catching errors within code. Configuring the Web Store to Run ASP Dreamweaver MX provides excellent integration for ASP, including drag-and-drop objects from the Objects panel, ASP objects from the Insert menu, recordsets from the Bindings panel, and many server behaviors to help you get started producing dynamic content. To configure the Web Store application to run under ASP, follow the three steps outlined next: -
Define a new site for the Web Store application. -
Choose a document type. -
Configure the application testing server. Define a New Site for the Web Store Application One of the most important things you can do with any Web application, whether it is dynamic or static, is to define a new site for it. Creating a new site ensures link integrity, helps when performing global find and replaces and link changing, and provides the benefits of site reports. You can define a new site for the Web Store application by following the steps outlined next: -
Start Dreamweaver MX and open the Application panel. Figure 22.1 shows the three steps to creating an application within Dreamweaver MX. Figure 22.1. Creating a new site involves three steps: defining the location of the site, choosing a server technology, and picking a testing server.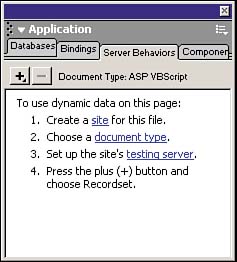
-
From either the Database, Binding, or Server Behaviors panels, select Site from step one. -
After you have selected the Site link, select the Advanced tab from the Site Definition window. Figure 22.2 shows the site definition information. Figure 22.2. Use the Site Definition window to define properties for your Web application.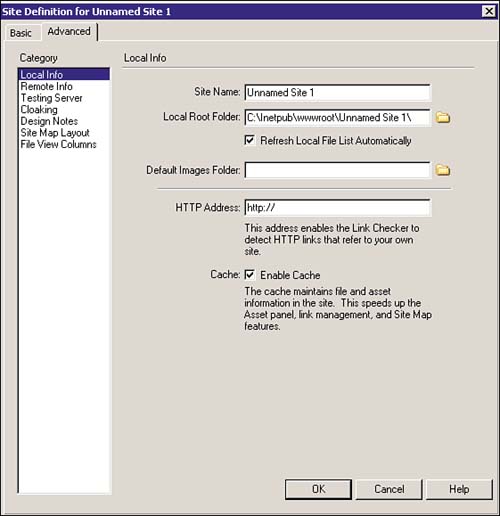
-
Enter Web Store for the Site Name. -
Navigate to your local root folder where your application resides. If you have not already done so, create a Project folder somewhere on your computer called Web Store and another folder within that called Images. This folder will serve as the repository for all the files that will reside in your application. -
Refresh File List Automatically should be checked. -
Navigate to the Images folder within the Web Store folder. -
Enable Site Cache should be checked. -
Press OK. Figure 22.3 shows how you should now have a check mark next to step one in any of the three tabs (Database, Bindings, Server Behaviors) within the Application panel. Figure 22.3. After you have defined your site, a check mark will appear after the first step.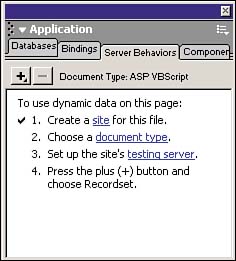
Choose a Document Type The document type will serve as the object model for the type of application you want to create and run. To define a document type follow these steps: -
Choose Document Type from step 2 in either the Database, Bindings, or Server Behaviors tab within the Application panel. CAUTION Sometimes step 2 may already be checked after you've defined your site. Dreamweaver MX does not know the model that you plan to use and will just default to the last one picked. You must still perform this step. -
When the Document Type dialog box appears as shown in Figure 22.4, select ASP VBScript. Figure 22.4. Choose the Document Type that you want to use in your application.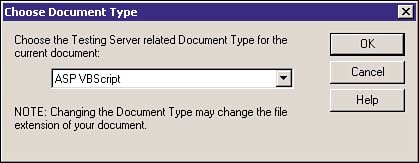
-
Select OK. Configure the Application Testing Server The final step in defining the Web Store application is setting up the testing server. Remember, in a Microsoft server environment, Web applications are run in the C:\Inetpub\wwwroot directory. Before you can define the testing server, you must properly create the project folder within the C:\Inetpub\wwwroot directory. To do so, follow these steps: -
Navigate to C:\Inetpub\wwwroot. -
Create a new folder called "Web Store." -
Inside of Web Store, create a new folder called Images. CAUTION Depending on which features you are using within your ASP environment, it may become necessary to create an application out of the project folder within IIS.
You are now ready to define the testing server: -
Choose Testing Server from step 3 in either the Database, Bindings, or Server Behaviors tab within the Application panel. -
The site definition for the Web Store window will appear. -
Select ASP VBScript from the Server Model drop-down list. -
Select Local/Network from the Access drop-down list. -
Navigate to C:\Inetpub\wwwroot\Webstore as the testing server folder. Click Select. -
Refresh File List Automatically should be checked. -
http://localhost/webstore should be set as the URL prefix. Your settings should appear similar to Figure 22.5. Figure 22.5. Configure the testing server for the Web Store application.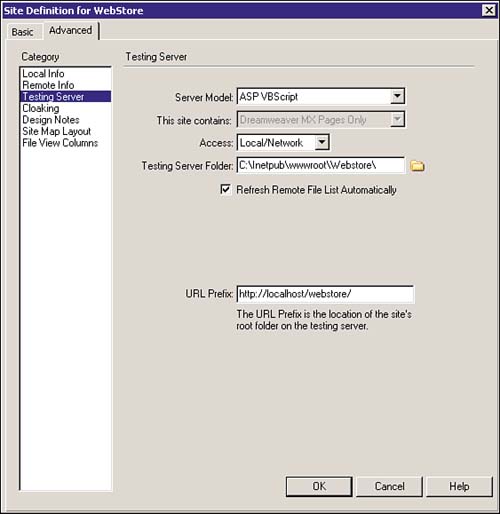
-
Click OK to set the site definition. Using ASP with Dreamweaver MX ASP integration begins with the Application panel. Most of the functionality that you will use, whether it is creating a database connection or working with recordsets, will spawn from the Application panel, most notably the Database, Bindings, and Server Behaviors tabs. The features that make up the ASP integration include the following: The Database panel The Database panel provides you with a way of defining a database connection by inputting or constructing your own custom string or by using the Data Sources Administrator to create a Data Source Name (DSN). The Data Bindings panel The Data Bindings panel enables you to work with recordsets, stored procedures, server variables, session variables, and application variables. You can also find more data sources from the Macromedia Exchange by selecting Get More Data Sources. The Server Behaviors panel The Server Behaviors panel gives you the opportunity to work with Data Sources such as recordsets and stored procedures. It also affords you the ability to work with various data binding, paging, and authentication features. ASP objects ASP objects are available either through the Insert menu or the Objects panel. With ASP objects, you have the ability to insert various predefined data handling, string manipulation, and conditional statement objects. |

