| Most CGI scripts are written in Perl. Perl is a general purpose programming language, an acronym of Practical Extraction and Report Language. In the words of its creator, Larry Wall: "The language is intended to be practical (easy to use, efficient, complete) rather than beautiful (tiny, elegant, minimal)." Perl is often described as a "gaffer-tape" language because it is often used to tie different documents together or to try and get different systems talking to each other. Its main strength lies in its capability to easily manipulate large strings of text. Perl is not a difficult language to learn, but to go into any detail here would be beyond the scope of this book. I recommend Teach Yourself Perl in 24 Hours by Clinton Pierce (Sams Publishing) if you want to learn Perl in any depth. Much of Perl looks rather like JavaScript so if you already know a bit of JavaScript, you would probably feel happy poking around with Perl programs. However, most of the time you will want to look at programs that have already been written, and you will only have to do simple modifications, which will usually be documented in a readme file. Dreamweaver MX does not have any tools to help you write Perl, so you have to rely on the code view and your sharp eyes to spot any mistakes! You will need to configure Dreamweaver to read Perl files in code view. To do this, from the Edit menu choose Preferences, and then select the File Types/Editors category. In the top text box (marked Open in Code View) add the .pl extension (see Figure 21.5). Figure 21.5. Using Dreamweaver preferences, you can configure the File Types so that Dreamweaver can open Perl files.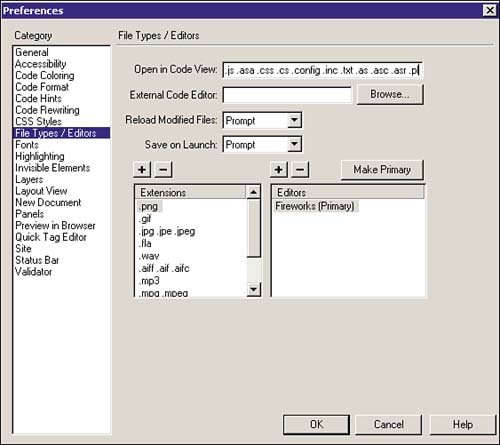
Perl programs are written in plain text, and each time they are run, a Perl interpreter reads the text and translates it into machine code. This is why Perl programs are called scripts. The first line of any Perl script needs to point to the Perl interpreter, and is usually #!/usr/bin/perl. If you have a Unix machine, and the Perl interpreter is located in a different location, you will have to change this line. In Windows you can safely ignore this line the Windows Perl interpreter does not read it. Except for this line, all other lines in a Perl program finish with a semicolon (;). Leaving this out is usually the source of most errors in Perl. Lines in the program that are just comments start with the symbol #. These lines will be ignored by the Perl interpreter but are very useful to understand what's going on in the program you should include lots of them, and read comments put in by others. Variables If you are using downloaded Perl programs, generally all you have to do is change the values of variables. Variables in any programming language, Perl included, are holders for data values. These values can be changed as the program progresses, or they can have different values for different users, so the variable called name is equal to "Hugh" for me, but may be equal to "Sally" for someone else. Age could also be a variable, as could address, or item number. A Scalar Variable in Perl holds letters, numbers, phrases in fact, whatever you like. It begins with a dollar sign ($) and the name cannot have any spaces in it. It's a good idea to give your variables sensible, descriptive names it makes a script easier to understand. If you want to give the variable a value, do something like this: $age=34 $customer_no=567 $value=34.99 $name="Hugh" $tip = "Don't eat stuff off the sidewalk" Notice that groups of letters to form words and phrases are surrounded by quote marks these are called strings. Arrays An array variable is a special kind of list variable. It holds many scalar variables in numbered slots or elements, starting at elements zero. Here is an example of an array variable. $customer(0) = "Fred Smith" $customer(1) = "Charles Fox" $customer(2) = "Sally Jones" Or you may see arrays defined like this @customer("Fred Smith", "Charles Fox", "Sally Jones") NOTE The @ sign is used in this case to indicate the array variable. This automatically fills in the elements with values, starting at element zero.
Although this barely scratches the surface of Perl, it should be enough to let you read Perl programs that you have downloaded from the Web. However, to test out Perl programs you will need to have Perl installed on the same computer as your Web server. Installing Perl Perl is open-source software. This means it's free and maintained by volunteers. Bugs are usually found and fixed pretty quickly, and you can even view and modify the source code if you really want to. Perl runs on almost any operating system, although it was originally developed for Unix and so retains a few peculiarities for that operating system (peculiar if you are used to Windows or Macs!). We will install Perl for either Windows or Mac. The current version of Perl is version 5, but the sub-versions change frequently. You should download the version marked as the latest "production" or "stable" version. Installing Perl on Windows First, check to see if you might already have Perl. Open up an MS-DOS window, and at the C:\prompt type C:\>perl -v If Perl is already there, you will get the version number (if it is earlier than 5, you need a new version). If Perl does not exist and needs to be installed, DOS will reply bad command or file name. The easiest way to get and install Perl is to download it from Active State. They have bundled Perl with an easy-to-use installation routine. Go to http://www.activestate.com and download the latest version. After downloading it, double-click set-up.exe and follow the prompts. Perl will be installed and it will also configure both the computer and the Web server installed on the machine. Installing Perl on the Mac Again, first check to see if you already have Perl. Run File Find (Command+F) to look for MacPerl. If it is found, open it, and look at About Perl under the Apple menu. It should be at least version 5.2.0 Patchlevel 5.004. Otherwise, install a new version. Figure 21.6. The Active State Web site from here you can download Perl for Windows.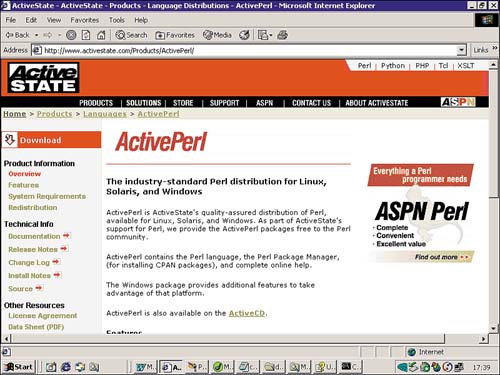
To install Perl, download it from http://www.perl.com/CPAN/ports/mac/ Download the most recent macperl.appl.bin. If you are unsure which file to use, look in the Mac_Perl.info text file. Unstuff it and run the installation program. To access the documentation properly, MacPerl comes with a utility called Shuck, located in the MacPerl folder. Add a file extension mapping for .pod files to the Shuck application. Using a CGI Script To show how easy it is to use prewritten CGI scripts, we will create a guest book. The CGI script we are using, called simply Guestbook, can be freely downloaded from Matt's Script Archive at the URL: http://www.scriptarchive.com/ CGI Checklist Before using any script, you should check a few things and write down the answers for later use. If you are renting Web space, you may need to contact your ISP or read their FAQ. If the server is at your company, you may need to speak to the system administrator. Figure 21.7. Matt's Script Archive is a great resource for common CGI scripts. 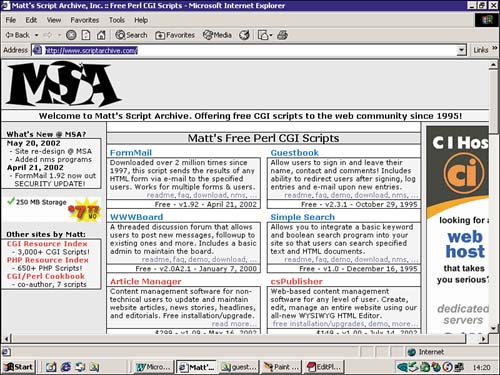
First ensure that your Web server is working correctly test it out on a static HTML page. Check the operating system and Web server type being used. For the examples, I am using Microsoft Internet Information Server and Windows 2000. CGI scripts should work with any Web server that has been configured to use CGI (and nearly all are) but check that this is the case, too. Find out the location of Perl on the Web server. The first line of every program looks something like this: #!/usr/bin/perl This line tells the script where the Perl interpreter is. You may need to change it to reflect your own server setup. If the Web server runs under Windows, you probably won't need to set this line (we do not in our setup). Find out the location of the Web servers log files to help you debug script that is not working. Some Web servers, such as IIS, will display CGI errors to you. Others may hide messages in a log file and you can't fix a script unless you know what's wrong with it! Find out the extension to be used for CGI programs. Most Perl programs end .pl but some servers require them to end in .cgi (our setup uses .pl). Check the location of your CGI program directory. You usually have to place scripts in a directory with special permissions to run programs. It's usually called /cgi-bin and is at the top level of the server. Check the URL of the CGI directory. This is usually the URL of the server with the CGI directory added; for example, on your local development Web server, it may well be http://localhost/cgi-bin/. Installing a CGI Program Download the guest book program file guestbook.zip. You will need to unzip it using a program such as WinZip or Stuffit. After uncompressing the file, you should see the following files (if you have used a different guest book script, the filenames will differ but hopefully there will still be a readme file). addguest.html guestbook.html guestlog.html guestbook.pl readme The HTML files are static Web pages (addguest.html includes a form) associated with the script. This script is a Perl file called guestbook.pl. Now open and print out the readme file to see what needs changing for your script. Open the guestbook.pl in code view. You need to change the following variables: $guestbookurl needs modifying to give the full URL of the file guestbook.html. $guestbookreal gives the path to the guest book file according to the file system on your computer. If you're using IIS, it is likely to be something like c:/inetpub/wwwroot/yoursite/guestbook.html $guestlog is the location of the guest book file, according to the file system on your computer you will probably keep it in the same directory as guestbook.html. $cgiurl is the URL to the guestbook.pl file. If you are renting Web space, you may need to check these details with your ISP. See Figure 21.8 for a view of guestbook.pl open in Dreamweaver's code view. As you can see, I have set the variables for use on my local IIS server (localhost). Figure 21.8. Guestbook.pl is open in Dreamweaver's code view, so you can make small changes to it for use on your own Web server.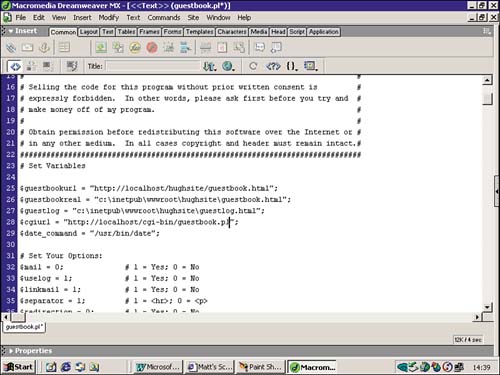
The Readme file also tells you the permissions you need to set if your Web server is Unix. If you are using IIS, you don't need to do this. You should open the HTML files in design view. The site users are going to see both guestbook.html and addguest.html, so you will probably want to personalize both files and make them part of the overall Web site design. In their raw state, they both are very plain and boring. You can do almost anything you like to them, except change the names of the form objects. You will also need to change the action property of the form in addguest.html to point to the URL of guestbook.pl. As you can see in Figure 21.9, the action has been changed to reflect the URL on my own server, and I have applied my own template to the file. This page also has a link back to the guest book entries you will need to amend the URL for that, too. Figure 21.9. The Guestbook form page, addguest.html, is open in Dreamweaver's design view, and the action of the form is being changed.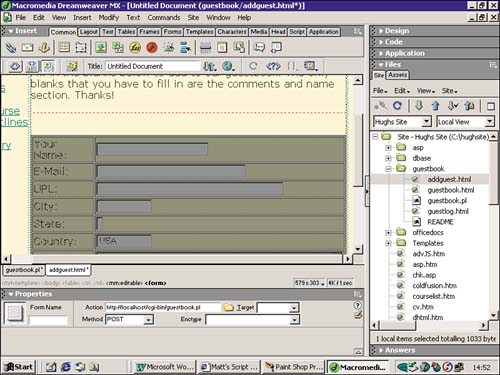
The file guestbook.html has a relative link to addguest.html check it and amend if necessary. After you have completed these changes, transfer the file to your server, view addguest.html, and add a guest book comment. Possible Problems If you are using IIS as your Web server, the error messages will be displayed in the browser and will hopefully be quite explanatory. These are the two likely problems and their solution. Perl Syntax Problems If the error is a Perl syntax problem, this indicates you have edited guestbook.pl inadvertently. The best solution is to go back to the original file and change the variables again. Make sure it's only the variables that get changed nothing else. File Not Found If you get this message after submitting addguest.html, you have probably not correctly defined the action of the form. Check this and try again. | 
