| To really understand the power of CGI and how you can use it, we will look at the nitty-gritty of how CGI works when it is used on a Web server. Nothing is overly complicated about CGI; it simply extends the process that occurs when an ordinary Web page is requested by a user. HTML Documents As explained previously, the Web is a conversation between two computers. The computer trying to fetch a Web page is called the client. The client machine is running a Web browser the software that requests and displays pages of HTML. When the client wants a Web page, it sends a URL to a server. At the other end of the conversation is the Web server. This computer is running Web server software that enables it to respond to URL requests by retrieving a copy of the page from its own hard disk and sending it on to the client. Figure 21.1 illustrates this familiar process. Figure 21.1. The Web server responds to a URL request from the client.
If you're using dynamic HTML or Flash to provide interactive Web pages, the process is the same as this, except that the page sent to the client contains additional JavaScript code or Flash movies. CGI Pages With static Web pages, a server does not process any data it simply examines the request it receives from a client and sends the page. But when you use CGI programs, you get the server to do some work before sending a page to the client. If the URL indicates that a CGI program should be used, the Web server starts the CGI program, the CGI program generates the page content, and the server passes that content to the client, as shown in Figure 21.2. Figure 21.2. With CGI, the server processes the script before responding to the client.
Giving Information to the Server CGI Environment Variables You can see the URL in the browser's address bar or status bar, but when the client makes a request to a server, it gives the server more information than the page it wants. The client also sends the server additional information you cannot see, such as its own IP address (otherwise, where would the server send the page back to?) and the browser type. When the server responds to the client, it also sends information in addition to the requested page, such as its own name and IP address and the type of Web server software it is running. This additional information is called CGI Environment Variables. A partial list of the useful ones is shown in Table 21.1. You need to refer to your own particular Web servers documentation to get a full list. Table 21.1. Selected CGI Environment Variables | Variable | Description | | CONTENT_LENGTH | The number of bytes that the script can expect to receive from the client if method POST is used. | | CONTENT_TYPE | The content type of the information supplied in the body of a POST request. | | HTTP_ACCEPT | Additional information given by the client. This is used to list the MIME formats that can be accepted by the user; for example, if the client browser can accept JPEG and GIF images, this variable will contain image/gif, image/jpeg. | | HTTP_USER_AGENT | By looking at this variable, the browser used by the client can be determined. For example, if Internet Explorer version 5.5 is being used by the client, this variable will contain the value Mozilla/4.0 (compatible; MSIE 5.5; Windows NT 5.0). The general format of this variable is software/version/operating system but is slightly different for each browser. | | PATH_INFO | This is the trailing part of the URL after the script name but before the querystring (if any). | | QUERY_STRING | The information that follows the question mark (?) in the URL that referenced the script. | | REMOTE_ADDR | The IP address of the client. | | REMOTE_USER | If the user had to log on to the server, this contains the username supplied by the client and authenticated by the server. | | REQUEST_METHOD | The HTTP request method (GET or POST). | | SCRIPT_NAME | The relative URL of the script program being executed. | | SERVER_NAME | The servers hostname (or IP address). | | SERVER_PORT | The TCP/IP port on which the request was received (usually 80). | | SERVER_SOFTWARE | The name and version of the Web server software that is running. | Passing Your Own Information to the Server You can call a CGI program from a Web page in two ways. The easiest way is to put the program's name in a hyperlink. The Web browser sends the URL to the server and the CGI program is run. The other way to start the CGI program is to make it the action of an HTML form. The following form calls a program called formhandle.pl when the Submit button is clicked. <form action="../cgi-bin/formhandle.pl" method="get"> Enter your name:<input name="username"> Enter your password:<input type="password" name="pword"> <input type="submit"> </form> When you use a form, the values of each form object are automatically passed to the CGI program. If the form method is GET, you can see the name and value of each form object appended to the action of the form to make a single, long URL. After filling in the preceding form, the URL would look something like this: http://www.server.com/cgibin/formhandle.pl?username=hugh&password=sherbertlemon If the form method is POST, this information is sent to the server as one of the CGI environment variables, still as one long string of form object names and values, but you cannot see it in the URL. You should use POST for forms that pass confidential information or for forms that have lots of form objects in them and would make the URL too long for the server to handle (usually above 255 characters). You can also pass parameters into a CGI program with a link. You need to construct the link URL as though it was a form using the GET method. To construct such a link, start with the URL to the CGI program. At the end of the filename goes a question mark, then each parameter name, an equal sign, and its value. Each parameter name/value pair is separated by an ampersand. Dreamweaver helps you to construct these links with the Parameters button. Start to make a hyperlink as you would normally on the Properties palette, click the Link Folder button. This brings up the Select File dialog box, and you can choose the file to link to. Either choose the CGI script file or manually enter it. Then click the Parameters button. For each parameter you want to add, click the plus (+) button in the top-left corner, and then add the parameter name and its value. The Parameters dialog box is shown in Figure 21.3. Figure 21.3. The Parameters dialog box helps you construct a parameterized URL.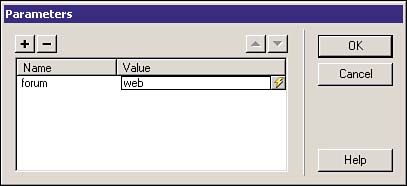
When you are constructing these URLs, bear in mind that you are not allowed to have spaces or other special characters in the string. For these characters to be included, they must be replaced by the character's ASCII value as a hexadecimal number. If that sounds complicated don't worry! Both JavaScript and PERL have a special function called escape to do this (and unescape to turn these values back to normal). If you are entering the strings manually, the following table lists the ASCII values of common characters. Table 21.2. Common Characters and Their Hexadecimal ASCII Equivalent | Sign | Hexadecimal ASCII value | Description | | | %20 | Space | | ! | %21 | Exclamation mark | | " | %22 | Double quote | | # | %23 | Pound or number sign | | $ | %24 | Dollar sign | | % | %25 | Percent | | & | %26 | Ampersand | | ' | %27 | Single quote/apostrophe | | ( | %28 | Open parenthesis | | ) | %29 | Close parenthesis | | * | %2A | Asterisk | | + | %2B | Plus sign | | , | %2C | Comma | | - | %2D | Dash/hyphen | | . | %2E | Period | | / | %2F | Slash | | ~ | %7E | Tilde | The CGI Process Step-by-Step To summarize, this is what happens to a request for a CGI script step-by-step. Some of these steps would be the same if the request was for a static HTML page; others are specific to the CGI process. This is the same process that happens with application servers: -
A URL is constructed. It may be hardcoded into the page, typed into the browser address bar, or the result of a form submission. This URL refers to a CGI script file (often these have the extension PL or CGI) and may contain additional information. -
Client makes a request to the server, using the constructed URL. -
The URL is converted to an IP address (this step happens to all HTTP requests). -
A connection is established with the server. -
The server receives the request for the CGI file. The client waits for a response. -
The server starts a new instance of the CGI script. -
The CGI script generates a new page using the information it has received with the URL and CGI environment variables. -
The page is sent back to the client as a server response. -
The CGI script exits. -
The connection between the client and server is dropped. -
The client renders the page onscreen. Using Prewritten CGI Scripts Because CGI is such a long established technology, others have already done many of the things you are likely to use CGI for. Many Web sites let you download scripts for free and put them on your own Web server. You may also find that your ISP will provide you with prewritten CGI scripts. In some cases, ISPs will not allow you to put your own scripts on their server for security reasons, but will allow you to use their own provided scripts at no charge. Figure 21.4 shows some of the scripts that my ISP makes available to me for use with my free Web space. The key to using any of these free scripts, whether provided by your ISP or others, is to read the instructions in the readme file carefully. Figure 21.4. Most ISPs will provide some free CGI scripts for you to use on your Web space.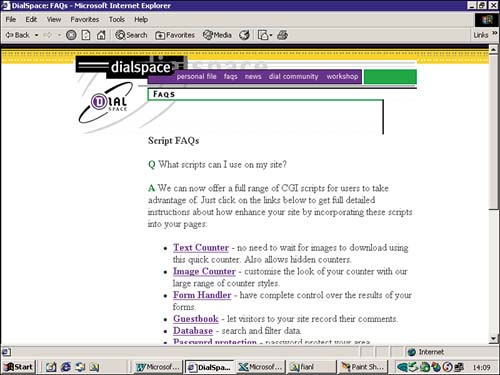
| 
