| Dreamweaver and Fireworks integration goes beyond inserting Fireworks HTML and updating graphics on-the-fly. Dreamweaver can actually control Fireworks, and that's what we're going to look at by using the Create Photo Album command. This feature is very powerful and can automate many tasks if you need to post large quantities of images on the Web. Furthermore, you don't even need to know HTML less so than working with Dreamweaver alone to make the most out of this feature. The Create Web Photo Album command works with a folder of images that can open any of the following formats: GIF, JPEG, TIFF, PSD, PICT, BMP, and PNG. The images can be resized for thumbnails anywhere from 36x36 pixels to 200x200 pixels. If you would like to follow along for this exercise, navigate to the companion Web site located at http://www.dreamweavermxunleashed.com. Here you can download the zipped folder called gato_images. This folder contains several images of my cat, Gato. We're going to create a Web photo album of him. | Follow these steps to create your own Web photo album. This exercise illustrates the power of communication between Dreamweaver MX and Fireworks MX. -
Create a new basic HTML page. In the new document choose Commands, Create Web Photo Album. This launches the Create Web Photo Album dialog box as shown in Figure 15.14. Figure 15.14. The Create Web Photo Album is packed with several options to get your images organized in an easy-to-navigate page.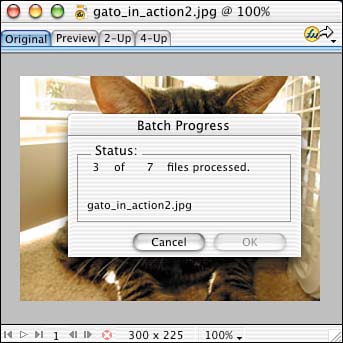
-
In this dialog box you should give the album a title. In this case, because we're using pictures of my cat, enter the title Matt's Fat Cat. -
The next text field is looking for subheading information. Again, because we're using pictures of Gato, type in Gato Jobs Weighs 20lbs! -
For other info, type Gato is now 2 years old. All this heading content will appear on the top of the page. -
Next select the folder you want this command to use to create this Web photo album. Click the Browse button and select the gato_images folder that you've downloaded from the companion Web site. -
In the next line you need to decide where the thumbnail images that Fireworks is going to create should be saved. Choose a folder located within the local root folder of the site you're currently working with. -
Determine the size in which you want the thumbnail images to appear. Choose 36x36 and leave the option to show the filenames checked. -
Next, type in a value for how many columns you want Dreamweaver to create when laying out the thumbnail graphics. In this case, type in 4. -
Choose a thumbnail format. For this exercise, choose JPEG-Better Quality. -
You also have to choose the quality for the actual image in the photo album. Again, choose JPEG-Better Quality. (I don't like to sacrifice quality when it comes to my cat.) You can also leave the scale at 100%. -
Leave Create Navigation for Each Photo as well. It makes it easier to navigate through the different images in the album. -
Choose OK. Fireworks will launch, and you'll see a batch dialog box as shown in Figure 15.15. Figure 15.15. The Batch Process dialog box indicates how long the process might take.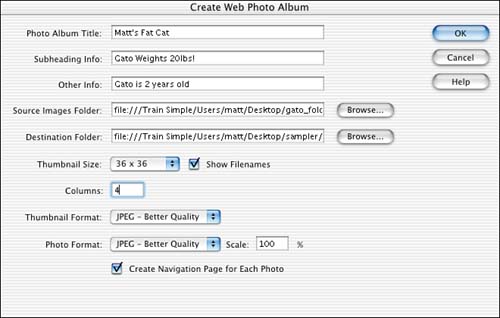
|
After the process is complete, you'll have an entire layout of pictures in a Web photo album, as shown in Figure 15.16. Preview this page in a browser; you can click any one of the thumbnail graphics and you'll get linked to a page with a larger version of the image, as shown in Figure 15.17. Also notice in Figure 15.17 that a navigation bar is located in the top-left corner. Figure 15.16. After the album is created, you'll see all the thumbnails of the images in the folder you specified.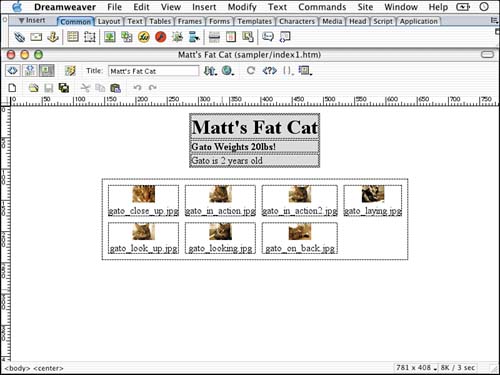
Figure 15.17. After clicking a thumbnail, you're brought to a detail page. You can also navigate through the images in the detail page format.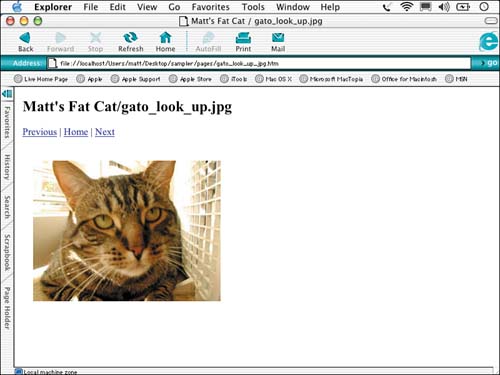
|

