| When you edit an image, selection is almost always the first step of the operation: First you select the area you want to operate on, and then you do something to it (for example, move it to another region of the Paint window, cut or copy it, or change its dimensions). The Paint window offers two selection tools: the Marquee tool, which selects a rectangular area, and the Lasso, which allows you to make a selection of any shape. Each has a number of options that can significantly change the tool's behavior. To select with the Marquee tool: -
In the Paint Tool palette, select the Marquee tool ( Figure 6.11 ). Figure 6.11. The Marquee tool.  The pointer becomes a crosshair pointer. -
In the Paint window, position the crosshairs pointer at one corner of your selection. -
Hold down the mouse button and drag the pointer diagonally to the opposite corner to create a selection box around the artwork ( Figure 6.12 ). Figure 6.12. Drag diagonally to make a rectangular selection. 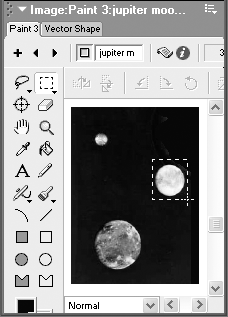 A dotted rectangle called a marquee appears as you drag. -
Release the mouse button when the marquee encloses what you want to select.  Tip Tip
To choose Marquee tool options: -
Select the Marquee tool and hold down the mouse button until the Options pop-up menu appears ( Figure 6.13 ). Figure 6.13. Open the Marquee tool's Options pop-up menu. 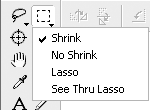 -
Select one of the four options ( Figure 6.14 ). Figure 6.14. The first three Marquee tool options. 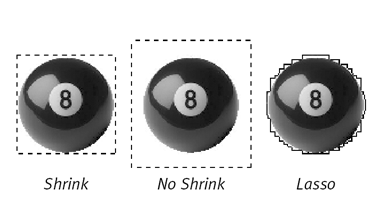 -
Shrink makes the rectangular selection marquee tighten around whatever object you've selected. -
No Shrink leaves the selection exactly as you draw it. -
Lasso creates a form-fitting selection around whatever object you've selected, as though you had used the Lasso tool. -
See Thru Lasso is similar to the Lasso option, but it makes all white pixels in the selection transparent. This is useful if you want to copy and paste the selected area on top of another image, and you want portions of the background to show through.  Tip Tip
To select with the Lasso tool: -
In the Paint Tool palette, click the Lasso tool ( Figure 6.15 ). Figure 6.15. The Lasso tool gives you greater freedom, letting you select any shape, no matter how irregular. 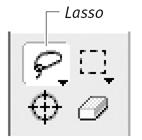 -
In the Paint window, position the Lasso wherever you want to begin your selection. -
Hold down the mouse button and drag the Lasso around the area you want to select ( Figure 6.16 ). Figure 6.16. To select an irregularly shaped item, drag the Lasso tool around it. 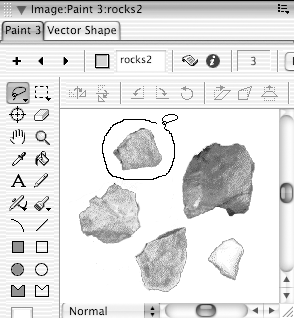 -
Release the mouse button. Director highlights the selected area. If you did not entirely enclose your selection, Director automatically connects its starting and ending points.  Tip Tip
To choose Lasso options: -
Select the Lasso tool and hold down the mouse button until the Options pop-up menu appears ( Figure 6.18 ). Figure 6.18. To further fine-tune your Lasso selections, use the Options pop-up menu.  -
Select an option ( Figure 6.19 ): Figure 6.19. Use the Lasso Tool's No Shrink option when you want to select the entire area that you enclose with the Lasso tool. For a tighter selection, use the Lasso option. 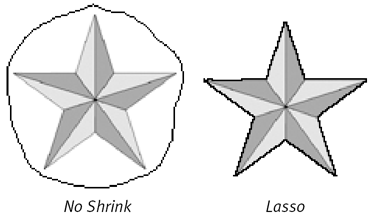 -
No Shrink selects the entire area that you enclose with the Lasso. -
Lasso makes the selection marquee tighten around whatever object you've selected. Director tries to identify an object's border by looking for color differences among pixels. -
See Thru Lasso makes all the white pixels in your selection transparent. To reposition a selected area: -
In the Paint window, make a selection with the Marquee or Lasso tool. -
Drag the selection to a new location ( Figure 6.20 ). Figure 6.20. To reposition a selected item, simply drag it. 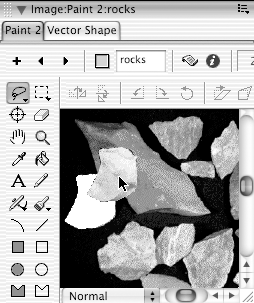 To copy a selected area: -
Make a selection with the Marquee or Lasso tool. -
Hold down the Alt key (Windows) or Option key (Mac), and drag the selection to a new place. The original image is left in place. To stretch or compress a selected area: -
Make a selection with the Marquee tool (you can't use the Lasso for this task). -
Hold down the Ctrl key (Windows) or Command key (Mac), click anywhere in the selection, and drag ( Figure 6.21 ). Figure 6.21. Drag while holding down the Ctrl or Command key to stretch a selection. 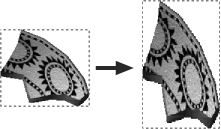 Drag away from the center to stretch the image; drag toward the center to compress.  Tip Tip
To erase a selected area: -
Make a selection with the Marquee or Lasso tool. -
Press the Backspace or Delete key. The selected area is erased.  Tip Tip
|


