| If you've seen old monster movies, you're probably familiar with a technique called stop-motion animation. The animator places a miniature model in front of the camera, poses it, shoots a frame of film, alters the model's pose slightly, shoots another frame of film...and so on, until the sequence is finished. Step recording is Director's version of stop-motion animation. Instead of manipulating a physical model, you change a sprite's properties slightly, one frame at a time, and Director saves those changes in a series of keyframes. Step recording gives you much more precise control over a sprite's movement than Director's automatic tweening does. To perform step recording: -
Within a sprite in the Score, click the frame in which you want step recording to begin. The entire sprite will be selected, and the playhead will jump to your chosen frame. -
Choose Control > Step Recording. An indicator appears to the left of the sprite in the Score ( Figure 4.32 ). Figure 4.32. Select a sprite for step recording, and click the frame where you want to start. An indicator appears to the left of the sprite. 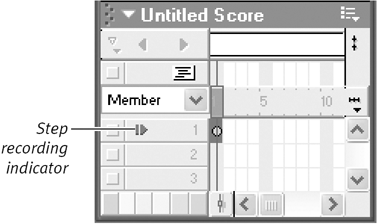 -
Arrange the sprite on the Stage the way you want it to appear in the first frame ( Figure 4.33 ). Figure 4.33. The sprite in frame 1. 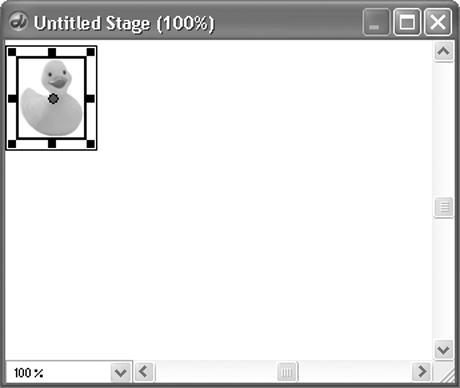 -
Click the Step Forward button in the Control Panel ( Figure 4.34 ) or in the secondary control panel attached to the bottom of the Stage. Figure 4.34. Click the Step Forward button to record a frame. 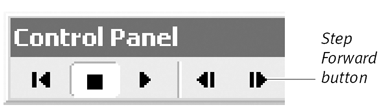 Director creates a keyframe in the Score and advances to the next frame. -
Arrange the selected sprite the way you want it to appear in the current frame. -
Repeat steps 4 and 5 to step-record as many frames as you need ( Figure 4.35 ). Figure 4.35. The motion path of a step-recorded sprite consists entirely of keyframes. (Each keyframe is represented by a small circle on the Stage.) The rubber ducky's zig-zag path was created by repositioning the sprite manually, keyframe by keyframe, during the step-recording process. 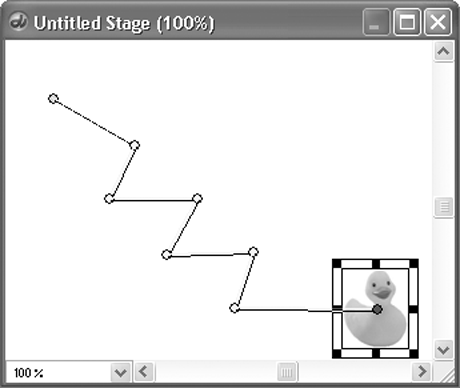 -
When you're finished, choose Control > Step Recording. -
Rewind and play the movie to see the animation.  Tips Tips -
If you step past a sprite's last frame, Director automatically extends the sprite. -
Step recording can be done with several sprites at oncejust select them all before you start recording. At any time, you can cancel step recording for one of the sprites (while continuing it for the others) by selecting the sprite and deselecting Step Recording in the Control menu.
|