| If you use Xtras (other than tool Xtras) to create a movie, the members of your audience must have the same Xtras available on their computer in order to view the movie. Therefore, if you distribute your movie by means of a projector file, you must include not only the movie itself, but also all the Xtras needed to view the movie. (See Chapter 16, "Creating a Projector.") There are two approaches to including Xtras with a projector: You can embed the Xtras directly into the movie that will be contained in the projector, or you can include a separate Xtras folder alongside the projector. The advantage of embedding Xtras into your movie is that the user gets one, self-sufficient file, which makes things easier. The advantage of including a separate Xtras folder alongside the projector is that the movie starts more quickly, because the projector file doesn't have to unpack the Xtras before playing the movie. If a projector contains several movies that use the same Xtras, you don't have to embed those Xtras in all the movies. The Xtras stay in memory for as long as the projector is running, so you only have to embed the necessary Xtras in the first movie, and the succeeding movies will still have access to them. Become an Xtras Developer After you've had some experience working with Xtras, you may decide you want to write your own. Be aware that writing an Xtra is not a trivial task; it requires professional-level programming experience. Most Xtras developers work in the C++ programming language, but some use Lingo. If you're interested in creating Xtras, look on Macromedia's Web site for information for Xtra developers. (You can get there from the main Director support page at www.macromedia.com/support/director.) In addition to explaining the basics of Xtra development, Macromedia offers the Xtras Developer Kit (XDK) as a free download. | To embed Xtras in a movie: -
Choose Modify > Movie > Xtras. The Movie Xtras dialog box opens ( Figure 19.9 ). The list in this dialog box shows the Xtras that are currently embedded in your movie. Those include: Figure 19.9. The Movie Xtras dialog box lists the Xtras that are embedded in a movie. 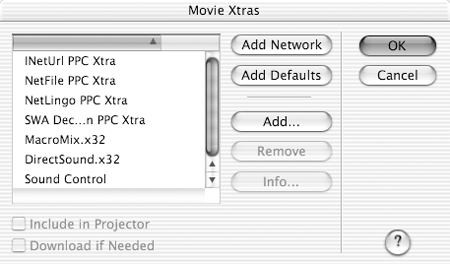 -
The default Xtras that are automatically embedded in every movie. -
Xtras that were embedded "behind the scenes" as you created your movie. For example, if you use text in a movie, Director embeds several text- related Xtras at the moment the first text cast member is created ( Figure 19.10 ). Figure 19.10. When you create or import a cast member, Director automatically embeds the Xtras needed to display that type of cast member (in this case, text). 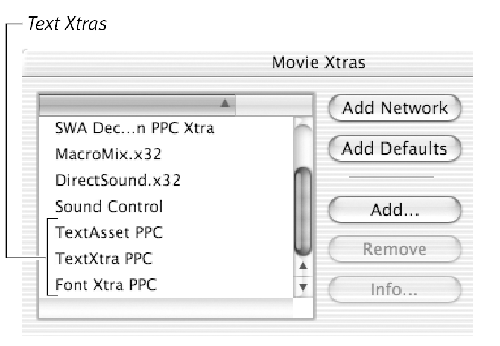 The list may not include all the Xtras that have been used in the movie. Some Macromedia Xtras, and many third-party Xtras, are not embedded automatically by Director. (An example is the Speech Xtra required for the text-to-speech feature. See Chapter 20, "Accessibility," for more information the Speech Xtra.) If you've used any Xtras in creating this movie that are not on the list, you'll need to add them manually. -
If you need to add an Xtra, click the Add button. The Add Xtras dialog box appears ( Figure 19.11 ). Figure 19.11. The Add Xtras dialog box allows you to select an Xtra that you want to embed. 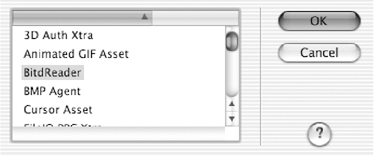 -
Select the Xtra that you want to add. -
Click OK to close the Add Xtras dialog box. -
Repeat steps 2 through 4 as many times as necessary for additional Xtras. -
If your movie is intended to connect to the Internet, click the Add Network button in the Movie Xtras dialog box. The necessary network Xtras are added to the list, if they're not there already. -
Click OK to close the Movie Xtras dialog box. The movie is now ready to be included in a projector file. (See Chapter 16, "Creating a Projector.")  Tips Tips -
Some Xtras are so commonly used in Director movies that they're automatically embedded in every movie, as noted in step 1. That doesn't mean, however, that they're necessarily required by your movie. If you're sure that a particular Xtra isn't necessary, you can reduce the movie's file size by deleting that Xtra. (See "To remove embedded Xtras from a movie," on the following page.) -
As described in step 1, when you create or import certain types of cast members, Director automatically embeds the necessary Xtras in your movie. If you later delete those cast members, the Xtras remain embedded. To reduce your movie's file size, you should manually remove the embedded Xtras for cast-member types that are no longer in your movie. (Again, see "To remove embedded Xtras from a movie" on the following page.)
To remove embedded Xtras from a movie: -
Choose Modify > Movie > Xtras. The Movie Xtras dialog box opens. -
In the list, select the Xtra that you want to remove ( Figure 19.12 ). Figure 19.12. If you're certain that a particular Xtra isn't needed in your movie, you can remove it by selecting it and clicking Remove. 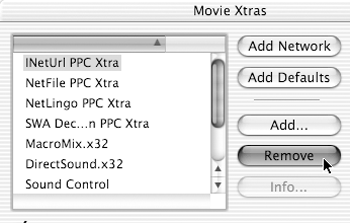 Removing unneeded Xtras is a good way to reduce your movie's file size, but you should remove an Xtra only if you're absolutely certain that your movie doesn't require it. If in doubt, leave it alone. -
Click the Remove button. The selected Xtra disappears from the list. -
Repeat steps 2 and 3 as many times as necessary to remove other Xtras. -
Click OK to close the Movie Xtras dialog box.  Tips Tips -
If you want more information about what an Xtra does before you delete it, select it in the Movie Xtras dialog box and click the Info button. (The Info button is dimmed for some Xtras.) Assuming your computer is connected to the Internet, Director will download a description of the Xtra and display it in your browser. -
If you accidentally delete one of the default Xtras, click the Add Defaults button to restore the full default set.
To distribute Xtras with a projector (without embedding them in a movie): -
Open a movie that you plan to include in a projector. -
Choose Modify > Movie > Xtras. The Movie Xtras dialog box opens. -
Select the first Xtra in the list. -
Deselect the Include in Projector check box ( Figure 19.13 ). Figure 19.13. If you want to distribute Xtras in an external folder, deselect Include in Projector in the Movie Xtras dialog box. 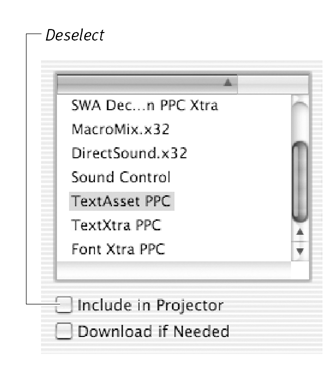 -
Repeat steps 3 and 4 for all the remaining Xtras in the list. -
Write down the names of all the Xtras in the list. These are the Xtras you'll have to distribute along with the projector. If you intend to create a Shockwave projector (also known as a slim projector )a projector that uses the resources of the Shockwave Player to play moviesyou can omit the Xtras that are installed with the Shockwave Player. For more information, see step 3 of "To make a movie's Xtras downloadable by the Shockwave Player," later in this chapter. -
Repeat steps 1 through 6 for any additional movies that you plan to include in the projector. In step 6, you need only add the names of Xtras that you haven't already written down. -
Create the projector (see Chapter 16, "Creating a Projector"). -
Create a folder called Xtras in the same folder where the projector file resides ( Figure 19.14 ). Figure 19.14. The folder in which you distribute your Xtras must be called "Xtras," and it must be in the same folder that contains your projector. 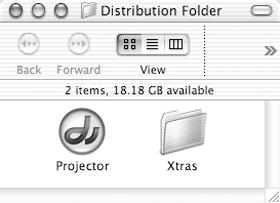 -
Locate the Xtra files whose names you wrote down in step 6. (All are in the Xtras folder inside the Director MX application folder, but some may be in subfolders .) -
Copy each of the Xtra files you located in step 10 into the folder you created in step 9. -
If any of the movies in the projector use Xtras that aren't on your list, copy them into the new folder as well. (See step 1 of "To embed Xtras in a movie," earlier in this section.) -
When you distribute your projector file, make sure the new Xtras folder accompanies it. |


