| You must add headers and footers to your slides through the master slide (see 86 About Impress Views ). Each header and footer is saved in the presentation's master slide so that the header and footer (you can have one or the other or both) reside on all slides throughout your presentation. You cannot add a different header or footer on different slides, although you can hide the header or footer from individual slides. Before You Begin  81 Create a New Presentation 81 Create a New Presentation
See Also  102 Create Presentation Handouts 102 Create Presentation Handouts
You may add the date, time, or slide number (referred to as the page number ) in a header or footer area. When that slide appears during your presentation, the current date or time at that moment appears in the header or footer area. 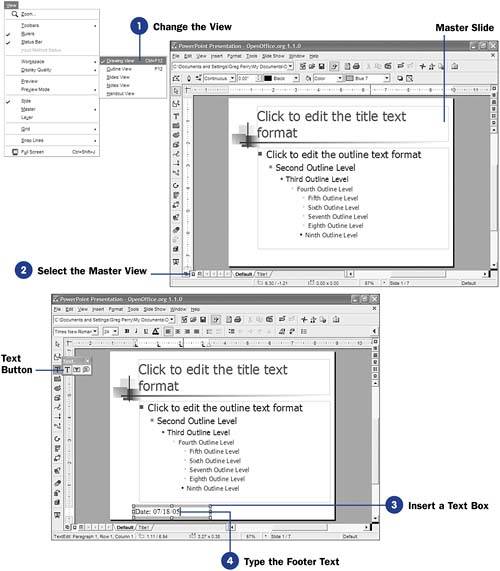 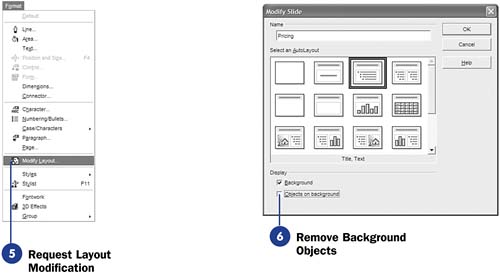 -
Change the View Select View, Workspace, Drawing View to enter the normal Drawing view. You can also press Ctrl+F12 or click the Drawing View button above the vertical scrollbar to enter the Drawing view. NOTE  | Technically, Impress does not support headers and footers. You can, however, add text to the top or bottom of your slides that acts just like Writer or Calc headers and footers. The rest of this task refers to such text as header and footer text, even though such text is just normal text that you place on your slides near their top or bottom. | -
Select the Master View
Because you must add header or footer text to the master slide, your header or footer generally appears on all slides throughout your presentation. Click the Master View button to display the presentation's master slide.
-
Insert a Text Box Your header and footer text must reside inside a text box. Long-click the Text tool on the Main toolbar. Click the Text button that appears. Your mouse cursor changes to a crosshair cursor, indicating that you can now place a text box anywhere on the slide. Click the upper-left corner of your footer's (or header's) text box and drag your mouse down and to the right to draw the text box. When you release your mouse button, Impress places the text box in that position and inserts the text cursor inside it so you can type the header or footer text. TIP  | If you don't want any text in the same header or footer that contains a graphic image, but the single line for the header or footer isn't large enough to display the graphic, insert a blank space before or after the image and set the font size for the space to 36 points or another setting that gives the graphic enough room to display. | -
Type the Footer Text Type the text that you want to appear in the footer (or header). If you want to display the time or date, you may want to label the time or date or leave the value to itself to appear. Generally, you'll want to insert the date or time that's current when you give your presentation, so select Insert, Fields, Date (variable) or Time (variable) to insert either the variable date or variable time . (In a similar manner, you can insert a fixed date or fixed time also.) KEY TERMS  | Variable date ” The current presentation date as opposed to the fixed date. Variable time ” The current presentation time as opposed to the fixed time. Fixed date ” The date you created the slide as opposed to the variable date. Fixed time ” The time you created the slide as opposed to the variable time. | -
Request Layout Modification
To hide the header or footer on any single slide, locate the slide you wish to modify. Select Format, Modify Layout to display the Modify Slide dialog box.
-
Remove Background Objects
Click to uncheck the Objects on background option to hide the header or footer. This might remove other items as well. After confirming that you wish to remove the background objects by clicking Yes , Impress removes your header or footer from that one slide but not from the other slides.
TIPS | | If you want to remove the header or footer from multiple slides within your presentation, you must change each slide's layout one at a time. Click the Select button atop the Main toolbar to stop adding text boxes to the slide and to return the mouse cursor to its normal pointing cursor shape. |
|