| Most presentations you create contain at least one list of key points. The bulleted list presents this information in a manner your audience can easily understand. You can enter text in a bulleted slide either in the Outline or Slide pane.  | An impressive feature of PowerPoint is its capability to AutoFit text to fit the placeholder. For example, if your bulleted list becomes a bit too long, PowerPoint will automatically resize the text to fit the placeholder. This also works in reverse; if you delete some items, PowerPoint will enlarge the text up to the original size. PowerPoint now enables you to use numbered lists in addition to bullets. To use numbers instead of bullets, select the entire text object and click the numbering button on the Formatting toolbar. |
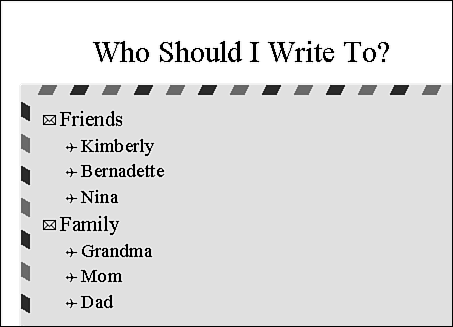
Entering Bulleted Text in the Slide Pane It's very simple to enter and modify bulleted text in the Slide pane. You can quickly promote (move up in the hierarchy) or demote (move down in the hierarchy) bullet items. To create a multilevel bulleted list as shown in Figure 24.3, use the following steps: -
Click on the text object Click to add text . -
Type your first item (a first-level bullet) and press Enter. -
Press the Tab key to demote the next bullet to a second-level bullet. -
Type the desired text, press Enter, and repeat as needed. Press Enter after the last item. A second-level bullet will be created. -
To promote the bullet to the first level, press Shift+Tab. Type the desired text and press Enter. -
Repeat steps 35 until your list is complete. Do not press Enter after the very last bullet. If you do, either press Backspace or use the Undo feature. -
Click anywhere outside the bulleted object to deselect the object. Figure 24.3. A bulleted slide can support multiple bullet levels.   | The bullet character for each level is determined by the presentation design that is chosen when you first created the presentation. You can edit the bullet style, color , and size can be edited, if desired. |
Entering Bulleted Text in the Outline Pane You can also enter bulleted text in the Outline pane almost as easily as you can in Slide view. To enter text in Outline view, use the following steps: -
On a new slide, type the title of the slide and press Enter. PowerPoint then adds a new slide. -
Press the Tab key to convert the new slide to a first-level bullet. -
Type the desired text, a first-level bullet, and press Enter. -
Press the Tab key to demote the next bullet to a second-level bullet (if desiredif not, skip steps 5 and 6). -
Type the desired text, press Enter, and repeat as needed. Press Enter after the last item. A second-level bullet will be created. -
To promote the bullet to the first level, press Shift+Tab. -
Type the desired text and press Enter. -
Repeat steps 37 as necessary. When you complete the list, you can press Shift+Tab to create a new slide if desired or press Backspace to delete any unwanted bullets. |
