Creating a Task
| Tasks can help you organize your busy lifebusiness and personal especially in our upcoming example, in which your family is soon to be enlarged. The following few pages follow a working parent-to-be. Over the next few months a lot must be done to prepare for the new arrival. For you to get everything done without waiting until the last minute, a task list will really be handy. To create a task list, you can activate the New Task window (also called the Task tool) in several ways. When in the Tasks view
After you employ any one of these methods , the New Task screen is displayed, as shown in Figure 19.2. Figure 19.2. The New Task screen is used to enter more detailed data than can be entered from the simple view. The Subject line should be simple and to the point. Extra information can be added in the Note box at the bottom of the Task tool as needed. The next information group is the Due Date field. The default is None. By clicking the drop-down arrow, you see the Date Navigator box. The current date is highlighted. Select the date by which you want to complete the task, or leave it at None. For the current date, either click the Today button or click the current day's date on the Date Navigator. To choose another date, click the appropriate date in the Date Navigator. Also, you can just type the correct date directly over None. The Start Date field works in much the same way as the Due Date field. It is used to establish the date on which the task will begin. This date can be immediately or some time in the near future. If the task is already in progress, the start date might be in the past. The next field is the Status field. How is the project going? Has it begun? This is what Outlook means by Status. In the Status field, there are five choices: Not Started, In Progress, Completed, Waiting on Someone Else, and Deferred. After the task is underway, depending on how you use Tasks, you might need to open the task and change the status from time to time. Another drop-down list box lists three Priority choices: High, Normal, and Low. The next field, % Complete, is another way to think about statuslike most of the Task fields, it too is optional. In certain situations pinning down a percentage value is tricky. When the task is more segmented or can be easily measured, however, it's helpful to use this field. For instance, when writing a specific number of chapters in a book, an author could change the percentage of chapters completed and submitted to the editor by either directly entering the percentage or using the spin buttons to the right of the field to increase or decrease the percentage. You might also think in terms of budget. When you're executing a project, you might think of % Complete as % Spent. In the following steps, you practice entering several tasks that are of concern to the expectant parents.
Table 19.1. Data For Task Entry
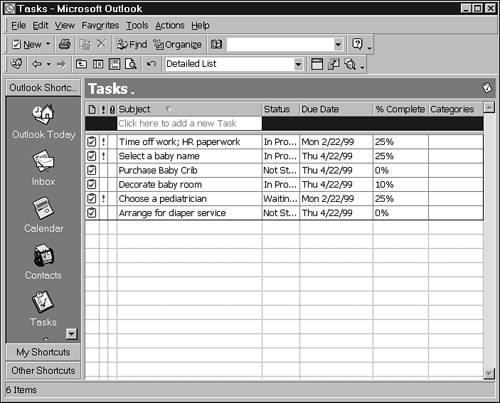
Your tasks should look similar to the ones shown in Figure 19.4. Figure 19.4. The tasks in Table 19.1 have all been entered. Creating a Task AutomaticallyYou may get a lot of email that contains urgent matters that require efficient processing to keep your world from collapsing. You knowthings such as, "Could you get me a copy of that song?" or "Can you finish three more chapters by Friday?" Messages such as these can be converted to a task quite easily.
Finishing a TaskThere's no greater satisfaction than a job well done, but how do you tell Tasks you're done? There are four ways:
After you have marked a task complete, it does not disappear from the Simple List view. Rather, it changes to a lighter, strikethrough text. This helps you keep track of the recent things you've accomplished. In the Active Tasks view, however, tasks disappear when they are marked complete. Although the tasks are still in the folder, to see them you must switch to the Simple List view. Later you will learn to completely delete a task. Editing a TaskEditing a task is not difficult. If the item you want to edit is visible in the Information Viewer, you can edit it directly without opening the Task tool. In the next exercise, you'll learn to add a reminder date. When you want to do more detailed editing, double-click on any task in the Information Viewer. This opens that task's Task tool. Editing any of the fields on the Task tab is the same as creating the task. Deleting a TaskAs I've mentioned, when tasks are completed, they do not just vanish into the air. They stick around, reminding you of all the good work you've accomplished. You can keep tasks around until they are auto-archived, but you might want to clean house and sweep out these old tasks sooner than that. You might even need to delete a current task if someone else has taken it over and you are no longer responsible for its completion. In any case, to delete a task, highlight the task in question and then click the Delete button on the Standard toolbar in Tasks or on the Task tool toolbar if the Task Detail screen is open. |
EAN: 2147483647
Pages: 474