Assigning Tax Lines


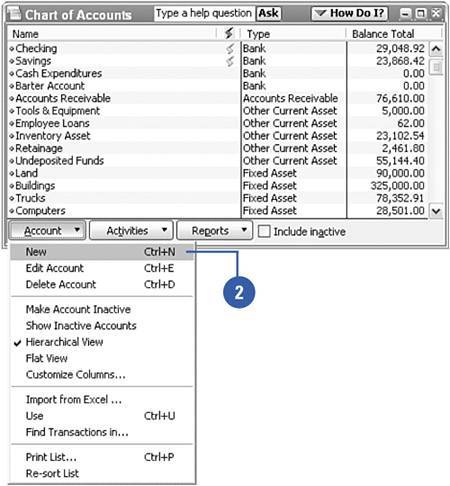
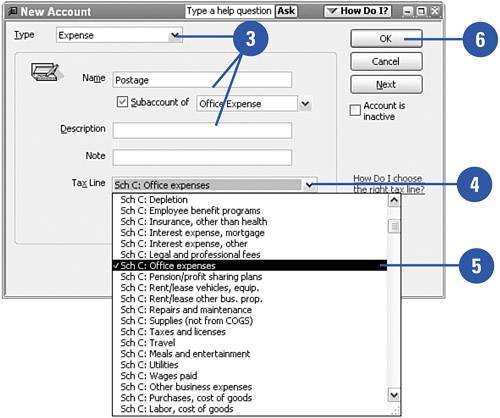
If you plan to use QuickBooks to help prepare your company's income tax forms, you must assign a tax line to each of your company's accounts. You can assign tax lines as you set up your accounts, or you can open a chart of accounts report, see which accounts are unassigned, and assign tax lines to all your accounts at once.

Assign a Tax Line When Setting Up a New Account

Click the Chart of Accounts icon on the QuickBooks Home page.

TIMESAVER

Press Ctrl+A to quickly open the Chart of Accounts.

Select New from the Account menu (or press Ctrl+N).

Enter appropriate information such as Account Type, Name, and Description to set up your account.

Click the drop-down list in the Tax Line field to view the list.

Did You Know?

Tax lines vary depending on the tax return you file. When you selected your company's tax form, QuickBooks loaded the tax lines that apply to that particular form. Different companies see different tax lines on the drop-down list.


Click the tax line that is appropriate for this account.

Click OK.

See Also

See "Adding Accounts" on page 76 for information on how to set up new accounts. [ch3]


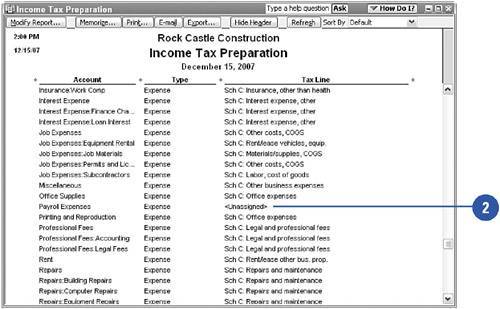
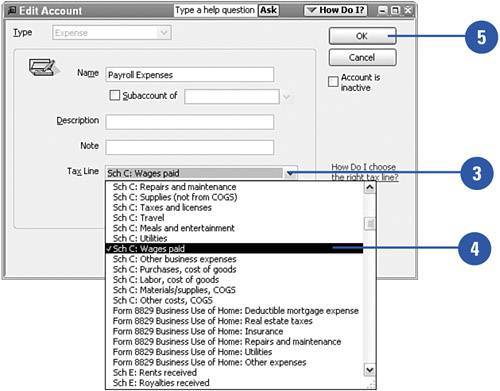
Assign a Tax Line to an Existing Account

Select Accountant & Taxes from the Reports menu; then select Income Tax Preparation.

TIMESAVER

You can also open the Income Tax Preparation report by clicking the Accountant & Taxes category on the left side of the Report Center; then click Preparation under the Income Tax category. The Report Center provides detailed descriptions of each standard report.

Double-click any account showing <Unassigned> in the Tax Line column.

Click the Tax Line drop-down list to display the available tax lines.

Click the tax line for this account.

Click OK.

Repeat steps 25 for all accounts that need to be assigned to tax lines.


Show Me. QuickBooks 2006
Show Me QuickBooks 2006
ISBN: 0789735229
EAN: 2147483647
Year: 2005
Pages: 328
Authors: Gail Perry

flylib.com © 2008-2017.
If you may any questions please contact us: flylib@qtcs.net