Manipulating Files and Folders
Wanting to watch a directory for file changes? Or find out the .NET replacement for App. Path ? Or uncover how big that file is in English? If you re looking for the best file and folder techniques for your VB .NET applications, simply read on.
Two Easy-to-Use Functions for Reading and Writing Files
Download supporting files at www.apress.com .
The files for this tip are in the Ch7 ”Read and Write Files folder.
Reading and writing to simple text files is perhaps one of the most common tasks in the programming world. The old VB6 way of doing this is now defunct , and a new .NET method is here, involving objects within the System.IO namespace.
The following functions help simplify the process of reading and writing to files. The first is called ReadTextFromFile and accepts a filename as a parameter. It returns the text from the specified file:
Public Function ReadTextFromFile(ByVal Filename As String) As String ' Returns text from the specified file On Error Resume Next Dim strFileText As String ' Open the file and launch StreamReader object Dim MyReader As System.IO.StreamReader = _ System.IO.File.OpenText(Filename) ' Read all text through to the end strFileText = MyReader.ReadToEnd ' Close the stream MyReader.Close() ' Return data Return strFileText End Function
The second code snippet is a method called WriteTextToFile , and it accepts a filename and the text to write as parameters:
Public Sub WriteTextToFile(ByVal Filename As String, ByVal Text As String) ' Writes the passed Text into the specified file ' Create file and StreamWriter object Dim MyWriter As System.IO.StreamWriter = _ System.IO.File.CreateText(Filename) ' Write text to the stream MyWriter.Write(Text) ' Close the stream MyWriter.Close() End Sub
Here is an example of each of these code snippets in action:
WriteTextToFile("c:\myfile.txt", TextBox1.Text) MessageBox.Show(ReadTextFromFile("c:\myfile.txt")) Files: Moving, Deleting, Attributes, and More!
If you re looking to manipulate files using the .NET Framework base classes, you should be heading to the System.IO.File class, where you ll find functions to delete files, copy files, check file attributes, and much more.
Here is a commented example demonstrating the most common uses of the File class:
Dim objFile As System.IO.File ' Check for existence of a file Dim blnExists As Boolean blnExists = objFile.Exists("c:\unlikely.txt") ' Delete a file objFile.Delete("c:\goodbye.txt") ' Copy a file objFile.Copy("c:\source.txt", "e:\destination.txt") ' Move a file objFile.Move("c:\oldlocation.txt", "e:\newlocation.txt") ' Check whether a file is read-only Dim blnReadOnly As Boolean blnReadOnly = CType(objFile.GetAttributes("c:\readonly.txt").ReadOnly, Boolean) ' Check whether a file is hidden Dim blnHidden As Boolean blnHidden = CType(objFile.GetAttributes("c:\hidden.txt").Hidden, Boolean) ' Check a file creation date Dim datCreated As DateTime datCreated = objFile.GetCreationTime("c:\created.txt") It s worth noting that you don t have to create a new File object to use this functionality. The File class consists of what are known as shared methods , meaning that you can call them directly without having to instantiate a new object. This means you can delete a file with one direct line of code, like this:
System.IO.File.Delete("c:\goodbye.txt") Checking Whether Two Files Are Identical
Download supporting files at www.apress.com .
The files for this tip are in the Ch7 ”Check Files Are Identical folder.
Checking whether the contents of two files are identical is a surprisingly common request in the programming world, but, beyond simply comparing file sizes, many developers are unsure about how to actually check this.
There s no need to worry. This excellent CompareFiles function does it all for you, initially comparing by size and then byte by byte. If the two file paths you pass in as arguments match, the function passes back a True ; otherwise , it returns False .
Here s the code:
Public Function CompareFiles(ByVal File1 As String, _ ByVal File2 As String) As Boolean ' Compares contents of two files, byte by byte ' and returns true if no differences Dim blnIdentical As Boolean = True Dim objFS1 As System.IO.FileStream = _ New System.IO.FileStream(File1, System.IO.FileMode.Open) Dim objFS2 As System.IO.FileStream = _ New System.IO.FileStream(File2, System.IO.FileMode.Open) ' Begin by checking length If (objFS1.Length <> objFS2.Length) Then blnIdentical = False Else ' Start looping through, comparing bytes Dim intByteF1 As Integer Dim intByteF2 As Integer Do intByteF1 = objFS1.ReadByte() intByteF2 = objFS2.ReadByte() If intByteF1 <> intByteF2Then blnIdentical = False Exit Do End If Loop While (intByteF1 <> -1) End If ' Close files and set return value objFS1.Close() objFS2.Close() Return blnIdentical End Function
Here s how you might call this function in your code:
If CompareFiles("c:.txt", "c:.doc") Then MessageBox.Show("Files are identical!") Else MessageBox.Show("Files do not match!") End If The Trick to Temporary Files
Download supporting files at www.apress.com .
The files for this tip are in the Ch7 ”Writing to Temp File folder.
Temporary files are incredibly useful. Most applications use them to store information while running some sort of processing. And you can too. When you re finished, either delete the temporary file or leave it for the next Windows Disk Cleanup operation to thwart.
But how do you go about working with temporary files? Well, firstly you need to get a temporary filename, and the System.IO.Path has a shared function called GetTempFileName to help you here. Then you simply write to the file as normal.
This handy little function wraps all this functionality up for you into one neat function. Simply call WriteToTempFile and pass in your data. It ll return your temporary file path:
Public Function WriteToTempFile(ByVal Data As String) As String ' Writes text to a temporary file and returns path Dim strFilename As String = System.IO.Path.GetTempFileName() Dim objFS As New System.IO.FileStream(strFilename, _ System.IO.FileMode.Append, _ System.IO.FileAccess.Write) ' Opens stream and begins writing Dim Writer As New System.IO.StreamWriter(objFS) Writer.BaseStream.Seek(0, System.IO.SeekOrigin.End) Writer.WriteLine(Data) Writer.Flush() ' Closes and returns temp path Writer.Close() Return strFilename End Function
Here s how you might call this function in your code:
Dim strFilename As String = WriteToTempFile("My data for the temp file") MessageBox.Show(strFilename) Doing Directories
When it came to working with directories in Visual Basic 6, we had MkDir , RmDir , and CurDir . If you wanted anything more complicated, you either had to write your own API routines and sacrifice a few hours of development time, or reference the external FileSystemObject DLL and sacrifice the size of your final project, and, potentially , application speed.
In VB .NET, however, it s plain sailing... introducing the System.IO.Directory class!
Cram packed with shared methods, this class provides you with everything you need to create, move, delete, and check for the existence of directories. It also allows you to retrieve a list of files from a directory, plus obtain a list of the logical drives on your system.
Here s a chunk of sample code showing you how:
Dim objDir As System.IO.Directory ' Creates a directory objDir.CreateDirectory("c:\mydata") ' Delete a directory, recursively objDir.Delete("c:\temp", True) ' Get current directory Dim strCurDir As String = objDir.GetCurrentDirectory ' Check whether a directory exists Dim blnExists As Boolean = objDir.Exists("c:\mydata") ' Get string array of all directories in a path Dim strDirectories() As String = objDir.GetDirectories("c:\Program Files\") ' Get files in a directory Dim strFiles1() As String = objDir.GetFiles("c:\winnt") ' Get all *.DOC files in a directory Dim strFiles2() As String = objDir.GetFiles("c:\my documents", "*.doc") ' Move a directory objDir.Move("c:\backup", "c:\original") ' Retrieve array of drives Dim strDrives() As String = objDir.GetLogicalDrives As with the System.IO.File class, it s worth noting that you don t have to create a new Directory object to use this functionality. The Directory class consists of shared methods , meaning that you can call them directly without having to instantiate a new object. This means that you can create a directory with one direct line of code, like this:
System.IO.Directory.CreateDirectory("c:\mydata") Watching a Directory for Changes
Directory watching is one of those really cool techniques that took quite a large lump of skill to implement successfully in Visual Basic 6. With this latest version of VB, however, you can get such functionality by utilizing the brand new FileSystemWatcher class.
The new System.IO.FileSystemWatcher class can be set up either in code or, rather easier, by dragging and dropping the FileSystemWatcher component from the toolbox Component tab onto your application.
Next, you need to start setting properties. First, there s the Path property, which you need to set to the path of the directory that you wish to monitor, such as c:\ or e:\whitecliff\ . Next, there s the Filter property, where you specify which files you want to monitor. You can use *.* to keep an eye on everything in the directory, something like *.doc to check Word documents, or simply use an exact filename, such as datalog.txt .
There s also the NotifyFilter property, which lists exactly what you want your FileSystemWatcher object to inform you about. The default is FileName, DirectoryName, LastWrite , which means that you re informed when a filename or directory name is changed, or a file is written (that is, the LastWrite date and time changes). You can specify your own in code by typing the options from the dropdown list, separated by commas, or in code using the bitwise Or operator. Finally, there s the IncludeSubdirectories property. Change this to True if you want to monitor all subdirectories ”or False otherwise.
And after you ve set up your FileSystemWatcher object? Simply respond to its events (ensure that the EnableRaisingEvents property is set to True ). You have the Changed , Created , Deleted , and Renamed events all at your disposal. Each will fire off whenever a related action occurs. For example, if you re monitoring c:\mydata\ , with a filter of *.txt and the default NotifyFilter property value, and your user or an application edits the contents of c:\mydata\test.txt ”the Changed event will fire.
From within the event, you can use the e argument (the System.IO.FileSystemEventArgs object) to find out more about the altered file. You may use the e.FullPath property to find out the filename, for example ”or analyze the ChangeType or Path .
| TOP TIP | There s an Error event associated with the FileSystemWatcher component, too. It only ever comes into play when far too many changes are being made at once (typically a result of badly chosen properties, or mass file alterations by the user) and the system just cannot cope. If it ever occurs, you ll know the events raised may not cover all items. Not always good to experience, but certainly a great event to be aware of. |
And that, quite simply, is how you can easily plug directly into the file system and directly monitor its contents. Doddle!
| TOP TIP | Certain users of the FileSystemWatcher component complain they receive multiple (sometimes delayed) events firing in their application, for even the simplest of operations. You may receive two or three notifications for a simple file copy in Windows Explorer, for example. The official explanation is that each operation consists of a number of simpler actions, which each raise their own events (see the note in ˜FileSystemWatcher class, about FileSystemWatcher class in the help index). Unofficially, Microsoft has identified this as an issue and is working to resolve it. If this problem affects you, you need to create your own workaround ”such as maintaining your own unique list of alterations and then running your code a few seconds after the last event has fired . |
How Big Is That File ”in English?
Download supporting files at www.apress.com .
The files for this tip are in the Ch7 ”English File Size folder.
Humans and computers sometimes just don t get along. Take file sizes, for example. What a human being would call one gigabyte, a computer would call 1073741824 bytes. How do you translate one into the other? Pull up a chair .
The following handy function takes a number of bytes and translates it into a readable human string. Here s the code:
Public Function ConvertBytes(ByVal Bytes As Long) As String ' Converts bytes into a readable "1.44 MB", etc. string If Bytes >= 1073741824 Then Return Format(Bytes / 1024 / 1024 / 1024, "#0.00") _ & " GB" ElseIf Bytes >= 1048576 Then Return Format(Bytes / 1024 / 1024, "#0.00") & " MB" ElseIf Bytes >= 1024 Then Return Format(Bytes / 1024, "#0.00") & " KB" ElseIf Bytes > 0 And Bytes < 1024 Then Return Fix(Bytes) & " Bytes "Else Return "0 Bytes" End If End Function
Here s an example of the function in use. Here, the length of my file is 3027676 bytes ”and the ConvertBytes function returns 2.89MB . (See Figure 7-4.) Perfect:
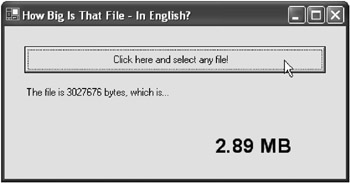
Figure 7-4: My file size in English ”all thanks to this nifty little function!
Dim objInfo As New System.IO.FileInfo("c:\myfile.bmp") MessageBox.Show("File is " & ConvertBytes(objInfo.Length)) Retrieving Special Folder Paths
It s often useful to know the location of a particular folder. For example, you might want to know where the Favorites folder is, so you can add a link to your company Web site. Or you may need to know where the Desktop directory is, so you can save a file directly to it.
For this, the .NET Framework provides the System.Environment.GetFolderPath function. Simply call this, passing in a SpecialFolder enumeration. This will then return a string containing the appropriate path.
For example:
Dim MyFolderPath As String MyFolderPath = System.Environment.GetFolderPath( _ Environment.SpecialFolder.Favorites) MessageBox.Show(MyFolderPath)
Which Program Handles That File Extension?
Download supporting files at www.apress.com .
The files for this tip are in the Ch7 ”File Associations folder.
Looking to open a program in its default application? Simply use the Start class and let Windows do the rest of the work for you, like this:
System.Diagnostics.Process.Start("c:\myfile.doc") But sometimes you want a little more. Sometimes you want to retrieve the exact path to the default program associated with that file type.
With a little rummaging around in the registry, that s exactly what this next code snippet manages to achieve. Simply pass it the file extension, and it ll return the path of the associated application. Passing in the .doc extension on a machine running Office XP, for example, will return the exact path to the Microsoft Word executable.
It s worth noting that this function automatically handles system defined variables , plus removes a number of the excess parameters included in some registry entries. In other words, it works ”and well, too, unlike many samples of this technique currently floating around the Internet.
Here s the function:
Public Function GetAssociatedProgram(ByVal FileExtension As String) As String ' Returns the application associated with the specified FileExtension ' ie, path\denenv.exe for "VB" files Dim objExtReg As Microsoft.Win32.RegistryKey = _ Microsoft.Win32.Registry.ClassesRoot Dim objAppReg As Microsoft.Win32.RegistryKey = _ Microsoft.Win32.Registry.ClassesRoot Dim strExtValue As String Try ' Add trailing period if doesn't exist If FileExtension.Substring(0, 1) <> "." Then _ FileExtension = "." & FileExtension ' Open registry areas containing launching app details objExtReg = objExtReg.OpenSubKey(FileExtension.Trim) strExtValue = objExtReg.GetValue("") objAppReg = objAppReg.OpenSubKey(strExtValue & "\shell\open\command") ' Parse out, tidy up and return result Dim SplitArray() As String SplitArray = Split(objAppReg.GetValue(Nothing), """") If SplitArray(0).Trim.Length > 0 Then Return SplitArray(0).Replace("%1", "") Else Return SplitArray(1).Replace("%1", "") End If Catch Return "" End Try End Function And here s how you might call it in your application:
Dim strPath As String = GetAssociatedProgram(TextBox1.Text) System.Diagnostics.Process.Start(strPath)
Retrieving a Drive Serial Number
Download supporting files at www.apress.com .
The files for this tip are in the Ch7 ”Get Drive Serial folder.
The serial number of a drive sounds like a relatively unimportant factor and certainly not worthy of an entry in this book. But it can actually prove highly useful.
Many developers, for example, check which drive Windows is installed on and then send the serial number of the drive ( alongside other unique system information) to their online validation service to activate the product. If they spot a particular user installing their product on a number of machines with different serial numbers , they suspect piracy and refuse to activate the product any further.
So, you see, retrieving a volume serial number can be very handy indeed.
To begin, you ll need to set a reference to the System.Management DLL. Click on Project ![]() Add Reference, find and highlight System.Management, click on Select, then hit OK.
Add Reference, find and highlight System.Management, click on Select, then hit OK.
Next, add the following function to your project:
Public Function GetDriveSerial(ByVal DriveLetter As String) As String ' Returns the serial number of the specified drive ' ie, GetDriveSerial("c:") Dim strSelectText As String = "Win32_logicaldisk='" & DriveLetter & "'" Dim objMO As New System.Management.ManagementObject(strSelectText) objMO.Get() Return CType(objMO.Properties("VolumeSerialNumber").Value, String) End Function And this is our GetDriveSerial function. It works by creating an instance of the ManagementObject , then using an SQL-like string to retrieve details about the specified disk. We then pick out and return the VolumeSerialNumber property.
Here s how we might call this function in code:
Label1.Text = GetDriveSerial("C:") The .NET Replacement for App.Path
A lot of confusion surrounds how to find out the startup path of your application ”the .NET equivalent of the App.Path property we had in Visual Basic 6. I ve personally written my own elongated routines, when in fact the solution is incredibly simple.
If you want to find out the application path of your Windows application, just reference the StartupPath property of the Application object, as so:
Dim strPath As String = Application.StartupPath
Note that the returned path doesn t include a trailing slash.
If you re developing a class library or similar project, however, you might stumble upon a slight problem. You see, not all projects support the Application object. In these cases, you can use the System.Reflection class to analyze the executing assembly and return its location. A little like this:
Dim strPath As String = System.Reflection.Assembly.GetExecutingAssembly().Location
A bit more in depth, but still pretty darn simple.
INI Files Will Never Die: How to in .NET
Download supporting files at www.apress.com .
The files for this tip are in the Ch7 ”INI Files folder.
Microsoft has been trying to get developers to move away from INI files for quite some time, pithily suggesting using the registry instead despite the fact that it s rarely a suitable replacement. Well, this hint persists with .NET, which proudly boasts absolutely no intrinsic support for INI files.
But, of course, there s always a workaround.
In previous versions of Visual Basic, you d access your INI file through the API. Well, in VB .NET, we can simply do the same. Admittedly, Microsoft would prefer us to run safe, managed code within the .NET Framework ”it can then automatically handle resources for you and ensure a more error-free environment.
However, you can still access unmanaged code, such as functions within the Windows API and COM components , with great ease.
In fact, here I ve developed a class to encapsulate the functionality of some of those older INI file API functions. The fact that they re wrapped up in a class also means that, should you ever implement another method of handling such settings, you can simply edit your code while the interfaces remain the same.
Anyway, enough talk ”here s my class code:
Public Class IniFile ' API functions Private Declare Ansi Function GetPrivateProfileString _ Lib "kernel32.dll" Alias "GetPrivateProfileStringA" _ (ByVal lpApplicationName As String, _ ByVal lpKeyName As String, ByVal lpDefault As String, _ ByVal lpReturnedString As System.Text.StringBuilder, _ ByVal nSize As Integer, ByVal lpFileName As String) _ As Integer Private Declare Ansi Function WritePrivateProfileString _ Lib "kernel32.dll" Alias "WritePrivateProfileStringA" _ (ByVal lpApplicationName As String, _ ByVal lpKeyName As String, ByVal lpString As String, _ ByVal lpFileName As String) As Integer Private Declare Ansi Function GetPrivateProfileInt _ Lib "kernel32.dll" Alias "GetPrivateProfileIntA" _ (ByVal lpApplicationName As String, _ ByVal lpKeyName As String, ByVal nDefault As Integer, _ ByVal lpFileName As String) As Integer Private Declare Ansi Function FlushPrivateProfileString _ Lib "kernel32.dll" Alias "WritePrivateProfileStringA" _ (ByVal lpApplicationName As Integer, _ ByVal lpKeyName As Integer, ByVal lpString As Integer, _ ByVal lpFileName As String) As Integer Dim strFilename As String ' Constructor, accepting a filename Public Sub New(ByVal Filename As String) strFilename = Filename End Sub ' Read-only filename property ReadOnly Property FileName() As String Get Return strFilename End Get End Property Public Function GetString(ByVal Section As String, _ ByVal Key As String, ByVal [Default] As String) As String ' Returns a string from your INI file Dim intCharCount As Integer Dim objResult As New System.Text.StringBuilder(256) intCharCount = GetPrivateProfileString(Section, Key, _ [Default], objResult, objResult.Capacity, strFilename) If intCharCount > 0 Then GetString = _ Left(objResult.ToString, intCharCount) End Function Public Function GetInteger(ByVal Section As String, _ ByVal Key As String, ByVal [Default] As Integer) As Integer ' Returns an integer from your INI file Return GetPrivateProfileInt(Section, Key, _ [Default], strFilename) End Function Public Function GetBoolean(ByVal Section As String, _ ByVal Key As String, ByVal [Default] As Boolean) As Boolean ' Returns a boolean from your INI file Return (GetPrivateProfileInt(Section, Key, _ CInt([Default]), strFilename) = 1) End Function Public Sub WriteString(ByVal Section As String, _ ByVal Key As String, ByVal Value As String) ' Writes a string to your INI file WritePrivateProfileString(Section, Key, Value, strFilename) Flush() End Sub Public Sub WriteInteger(ByVal Section As String, _ ByVal Key As String, ByVal Value As Integer) ' Writes an integer to your INI file WriteString(Section, Key, CStr(Value)) Flush() End Sub Public Sub WriteBoolean(ByVal Section As String, _ ByVal Key As String, ByVal Value As Boolean) ' Writes a boolean to your INI file WriteString(Section, Key, CStr(CInt(Value))) Flush() End Sub Private Sub Flush() ' Stores all the cached changes to your INI file FlushPrivateProfileString(0, 0, 0, strFilename) End Sub End Class
After you ve added this class code to your application, here s how you may want to use it:
Dim objIniFile As New IniFile("c:\data.ini") objIniFile.WriteString("Settings", "ClockTime", "12:59") Dim strData As String = _ objIniFile.GetString("Settings", "ClockTime", "(none)") | TOP TIP | As I mentioned earlier, Microsoft doesn t really like people using INI files. It doesn t fit in with its vision . They would prefer developers use code like this only as a stop-gap measure while upgrading existing systems, then move onto an XML-based method of storing settings. Visit www.gotdotnet.com/userfiles/demeester/XMLINIFile.zip for an INI file replacement, using XML. But, of course, it s completely up to you. |
EAN: 2147483647
Pages: 76
- Challenging the Unpredictable: Changeable Order Management Systems
- The Second Wave ERP Market: An Australian Viewpoint
- Healthcare Information: From Administrative to Practice Databases
- A Hybrid Clustering Technique to Improve Patient Data Quality
- Development of Interactive Web Sites to Enhance Police/Community Relations