Report Part Viewer
A key feature of using the Java Crystal Report viewer is that you can pick and choose elements of the report that you want to display using your JSP application. This is all made possible by using Crystal Reports 10 report parts and the CrystalReportsPartsViewer class.
Consider a report that includes information about towns and cities throughout the United States. The report is designed so that you can see detailed information for all towns and cities, you can summarize by state, or you can choose to see detailed information about a particular town or city.
You can write code in your JSP application to select the level of detail that you want to display in the browser window. This eliminates the need to display the entire report and force the user to drill down to the appropriate level of detail.
First, create an instance of the CrystalReportPartsViewer class and an instance of the ReportPartsDefinition class. The ReportPartsDefinition class defines methods that are used to select the level of the report that you need to display. Here are the statements you need:
 CrystalReportPartsViewer viewer = new CrystalReportPartsViewer();
 ReportPartsDefinition def = new ReportPartsDefinition();
Next , you ll need to define the report level. You do this by calling the setDataContext() method that is defined in the ReportPartsDefinition class. The setDataContext() method requires one argument, which is a string that identifies the report level.
Each level of a report is called a node. The highest level, called a parent node, contains all levels of the report. Levels beneath the highest level are called subnodes. A subnode contains its own level and any subnodes below that level. Users can drill down to subnodes using the mouse once the report is displayed on the screen.
You specify the names of the node and the subnodes in the string that is passed to the setDataContext() method. These names are unique to each report. Consider a report that is organized into regions and then, within each region, into cities. The highest node might be called Region, and the subnode within the Region might be called City.
You must supply the name of the node and the search value in the string that you pass to the setDataContext() method. Search values are placed within square brackets. So if you wanted to see information about Irvine, California, you d create the following string:
def.setDataContext("/Region[CA]/City[Irvine]") However, if you wanted all cities in California, you d use this string. The asterisk is a wildcard character.
def.setDataContext("Region[CA]/City[*]"); And if you want to see information about the California region, you d use this string:
def.setDataContext("/Region[CA]") Once you ve defined the report level, you need to call the getReportPartNodes() method, which is defined in the ReportsPartDefinition class. The getReportPartNodes() method returns a reference to a ReportPartNodes object that contains all the report nodes and corresponding drill-down information. Here s how you retrieve all the report nodes:
ReportPartNodes nodes = (ReportPartNodes) def.getReportPartNodes();
You ll also need ReportPartNode objects for each node that you want to use in your JSP application. Consider that the report contains sales information about customers and you want to use the following nodes of the report. Keep in mind that the names and natures of nodes are unique to each report, so reports that you access may not have the same nodes used in this illustration.
-
Customer
-
Customer Sales
-
City
-
City Sales
-
Region
-
Regional Sales
-
City Drill-Down Information
-
Regional Drill-Down Information
The names for the nodes should be the exact names of the report objects as they appear in the report designer. For example, the Region node would represent a database field object titled Region in the report designer. Additionally, the Regional Sales node would refer to a summary field in the report titled Regional Sales.
Each of the previous nodes must have its own instance of the ReportPartNode, as shown here:
 ReportPartNode customerNode = new ReportPartNode ();
 ReportPartNode customerSalesNode = new ReportPartNode ();
 ReportPartNode cityNode = new ReportPartNode ();
 ReportPartNode citySalesNode = new ReportPartNode ();
 ReportPartNode regionNode = new ReportPartNode ();
 ReportPartNode regionSalesNode = new ReportPartNode ();
 ReportPartNodes cityDrillNodes = new ReportPartNodes ();
 ReportPartNodes regionDrillNodes = new ReportPartNodes ();
Each node must be named by calling the setName() method, which is defined in the ReportPartNodes class. The name must be passed as a string to the setName() method, as shown here:
 customerNode.setName("Customer");
 customerSalesNode.setName("CustomerSales");
 cityNode.setName("City");
 citySalesNode.setName("CitySales");
 regionNode.setName("Region");
 regionSalesNode.setName("RegionSales");
Since you are using parts of the report rather than the entire report, you ll need to identify the portion of the report that is displayed when the user drills down to subnodes. The drill- down path is
Top Node / Region Node / City Node / Customer Node
Begin creating this association from the bottom up by using the add() method. The add() method is defined in the ReportPartNodes class and requires one argument, which is a reference to the object that is to be displayed when the user drills down.
In the following example, the customerNode and the customerSalesNode will be displayed when the user drills down on the city node. Therefore, the following statements will be included in the JSP application:
 cityDrillNodes.add(customerNode);
 cityDrillNodes.add(customerSalesNode);
Next, set the drill-down path that is followed when the user clicks the City field and the CitySales field. This is done by calling the setDrillDownPath() method and passing it the reference to the corresponding node, as shown here:
 cityNode.setDrillDownPath(cityDrillNodes);
 citySalesNode.setDrillDownPath(cityDrillNodes);
You ll also need to name the region node and associate the region node with the city using the following statements:
 regionDrillNodes.add(cityNode);
 regionDrillNodes.add(citySalesNode);
The drill-down path for the region must also be set, as shown here:
 regionNode.setDrillDownPath(regionDrillNodes);
 regionSalesNode.setDrillDownPath(regionDrillNodes);
The final association that needs to be made is between the top node and the region node by using the following statements:
 nodes.add(regionNode);
 nodes.add(regionSalesNode);
There are a few more steps that are necessary before you re ready to display the report on the screen. The next step is to set the title for the report. Do this by calling the setTitle() method that is defined in the ReportPartNodes class described here:
def.setTitle("California Sales Report"); You re now finished defining the parts of the report and defining the drill-down path for each part. Now, associate those parts with the Crystal Report Part Viewer. This is accomplished by calling the setReportParts() method and passing it a reference to the ReportPartsDefinition object, as shown here:
viewer.setReportParts(def);
The final four steps are to display the column headings and the report title and then tell the Crystal Report Part Viewer where to find the report. Once this is accomplished, the report is displayed on the screen by calling the processHttpRequest() method. All these steps are shown here:
 viewer.setDisplayHeadings(true);
 viewer.setDisplayTitle(true);
 viewer.setReportSource(reportSource);
 viewer.processHttpRequest(request, response,
 getServletConfig().getServletContext(), null);
The complete JSP application, showing the report generated by this example, appears in Figure 23-1.
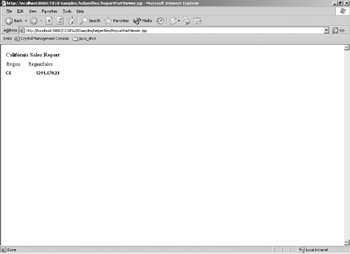
Figure 23-1: Report Part Viewer in a JSP application
Reprising the preceding steps, the following is the complete set of JSP code to complete this example:
 <%@ page import "com.crystaldecisions.report.web.viewer.CrystalReportPartsViewer,
 com.crystaldecisions.sdk.occa.report.partsdefinition.ReportPartsDefinition,
 com.crystaldecisions.sdk.occa.report.partsdefinition.ReportPartNodes,
 com.crystaldecisions.sdk.occa.report.partsdefinition.ReportPartNode"%>
 <%
 CrystalReportPartsViewer viewer = new CrystalReportPartsViewer();
 ReportPartsDefinition def = new ReportPartsDefinition();
 def.setDataContext("/Region[CA]");
 ReportPartNodes nodes = (ReportPartNodes) def.getReportPartNodes();
 ReportPartNode customerNode = new ReportPartNode ();
 ReportPartNode customerSalesNode = new ReportPartNode ();
 ReportPartNode cityNode = new ReportPartNode ();
 ReportPartNode citySalesNode = new ReportPartNode ();
 ReportPartNode regionNode = new ReportPartNode ();
 ReportPartNode regionSalesNode = new ReportPartNode ();
 ReportPartNodes cityDrillNodes = new ReportPartNodes ();
 ReportPartNodes regionDrillNodes = new ReportPartNodes ();
 customerNode.setName("Customer");
 customerSalesNode.setName("CustomerSales");
 cityNode.setName("City");
 citySalesNode.setName("CitySales");
 cityDrillNodes.add(customerNode);
 cityDrillNodes.add(customerSalesNode);
 cityNode.setDrillDownPath(cityDrillNodes);
 citySalesNode.setDrillDownPath(cityDrillNodes);
 regionNode.setName("Region");
 regionSalesNode.setName("RegionSales");
 regionDrillNodes.add(cityNode);
 regionDrillNodes.add(citySalesNode);
 regionNode.setDrillDownPath(regionDrillNodes);
 regionSalesNode.setDrillDownPath(regionDrillNodes);
 nodes.add(regionNode);
 nodes.add(regionSalesNode);
 def.setTitle("California Sales Report");
 viewer.setReportParts(def);
 viewer.setDisplayHeadings(true);
 viewer.setDisplayTitle(true);
 viewer.setReportSource(reportSource);
 viewer.processHttpRequest(request, response, getServletConfig().
 getServletContext(), null);
 %>
EAN: N/A
Pages: 223
- An Emerging Strategy for E-Business IT Governance
- Linking the IT Balanced Scorecard to the Business Objectives at a Major Canadian Financial Group
- Measuring and Managing E-Business Initiatives Through the Balanced Scorecard
- Governing Information Technology Through COBIT
- Governance in IT Outsourcing Partnerships