Imagining Images
| Probably more than anything else, the Internet has fueled the average computer user's need for visual stimuli. Web sites are awash with GIF, JPG, TIFF, and a variety of other image formats. Even if you deal with non-web applications, it's likely that you, as a programmer, will come into more frequent contact with graphic images. Fortunately, GDI+ includes features that let you manage and manipulate these images with ease. The "BMP" file format is the native bitmap format included in Microsoft Windows, but it's not all that common in the web world. But none of that matters to GDI+. It can load and manage files using the following graphics formats.
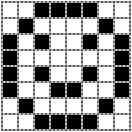
There are three primary classes used for images: Image (an abstract base class for the other two classes), Bitmap, and Metafile. I'll discuss the Metafile class a little later. Bitmaps represent an image as drawn on a grid of bits. When a bit in the grid is on, that grid cell is visible or filled. When the bit is off, the grid cell is invisible or empty. Figure 17-7 shows a simple image using such a bitmap grid. Figure 17-7. An 8x8 monochrome bitmap containing great art Because a bit can support only two states, "1-bit bitmap files" are monochrome, displaying images using only black and white. To include more colors, bitmaps add additional "planes." The planes are stacked on each other, so that a cell in one plane matches up with that same position cell in all other planes. A set of eight planes results in an "8-bit bitmap image," and supports 256 colors per cell (because 2planes = 28 = 256). Some images include as many as 32 or even 64 bits (planes), although some of these bits may be reserved for "alpha blending," which makes perceived transparency possible. Unless you are a hardcore graphics junkie, manipulating all of those bits is a chore. Fortunately, you don't have to worry about it, because it's all done for you by the Bitmap class. You just need to worry about loading and saving bitmaps (using simple Bitmap methods, of course), using a bitmap as a brush or drawing object (as we did in some sample code in this chapter already), or writing on the bitmap surface itself by attaching a Graphics object to it. If you have a bitmap in a file, you can load it via the Bitmap class constructor. Dim niceImage As New Bitmap("LookupItem.bmp") To save a bitmap object to a file, use its Save method. niceImage.Save("LookupItem.jpg") Another constructor lets you create new bitmaps in a variety of formats. ' ---- Create a 50-50 pixel bitmap, using 32 bit-planes ' (eight each for the amounts of red, green, and blue ' in each pixel, and eight bits for the level of ' transparency of each pixel, from 0 to 255). Dim niceImage As New Bitmap(50, 50, _ Drawing.Imaging.PixelFormat.Format32bppArgb) To draw a bitmap on a graphics surface, use the Graphics object's DrawImage method. e.Graphics.DrawImage(niceImage, leftOffset, topOffset) That statement draws the image to the graphics surface as is, but that's kind of boring. You can stretch and crop the image as you draw it, or even generate a thumbnail. I'll try all these methods using the image from the Library Project's "splash" welcome form (SplashImage.jpg). Dim splashImage As New Bitmap("SplashImage.jpg") ' ----- Draw it at half width and height. e.Graphics.DrawImage(splashImage, New RectangleF(10, 50, _ splashImage.Width / 2, splashImage.Height / 2)) ' ----- Stretch it with fun! e.Graphics.DrawImage(splashImage, New RectangleF(200, 10, _ splashImage.Width * 1.25, splashImage.Height / 4)) ' ----- Draw the middle portion. e.Graphics.DrawImage(splashImage, 200, 100, New RectangleF( _ 0, splashImage.Height / 3, splashImage.Width, _ splashImage.Height / 2), GraphicsUnit.Pixel) Figure 17-8 shows the output for the previous block of code. But that's not all the drawing you can do. The DrawImage method includes 30 overloads. That would keep me busy for 37 minutes at least! Figure 17-8. Three views of a reader: a masterpiece by the author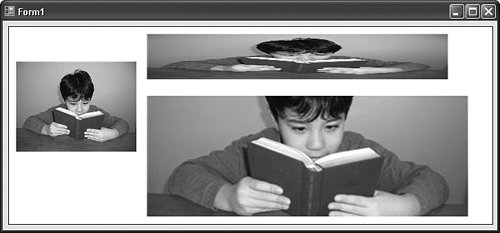 |
EAN: 2147483647
Pages: 247