6.2. Spotlight Effect Using Mask Layers Imagine placing a sheet of red construction paper containing a cutout of a star over a piece of green construction paper. The result you see, when you look at the two sheets stacked on top of each other, is a green star on a red background. That's the concept behind mask layers , a special type of layer that lets you create shaped "portholes" through which content in an underlying ( masked ) layer appears. As you may have noticed, mask layers are horribly misnamed. In real life, masks hide stuff. In Flash, masks reveal stuff. Still, if you can keep the difference straight in your mind, they're easy to use. And when you apply a motion tween to the "porthole," you can create an effect that looks like a spotlight playing over an imagemighty cool, indeed. Here's how you go about it: -
Open the file mask_begin.fla . You can download this file, a working example of the file (mask.fla), and all the other examples shown in this chapter from the "Missing CD" page at www.missingmanuals.com/cds. -
Click Layer 1 to select it . In the example file for this section (mask.fla), Layer 1 contains a bitmap image. -
Click the Insert Layer button . Flash creates a new layer named Layer 2 and places it above Layer 1. -
Double-click the layer icon next to Layer 2 . The Layer Properties window appears. -
In the Layer Properties window, turn on the checkbox next to Mask and then click OK . Flash displays the mask icon next to Layer 2 (Figure 6-12). -
Double-click the layer icon next to Layer 1 . The Layer Properties window appears again. -
This time, turn on the checkbox next to Masked and then click OK . Flashed displays the masked icon next to Layer 1 (Figure 6-12).
Tip: Flash gives you a bunch of ways to create masks and masked layers (by right-clicking an existing layer and choosing Mask or Masked, for example), but one thing doesn't change: Masked layers must appear directly below mask layers in the Layers window for the effect to work. If you create a mask layer and a masked layer in the wrong order, just drag the mask layer above the masked layer, and you're all set.
-
Click to select the first keyframe in Layer 2 (the mask layer) . -
On the Stage, click the Oval tool and then draw a circle in the upper-left corner of the Stage (Figure 6-13) . The oval can be any color you choose, since it won't appear in the finished effect; instead, it'll act as a see-through portal. Figure 6-12. The difference between mask layers and masked layers can be confusing. It helps to remember that the mask layer, just like a piece of red construction paper containing a cutout of a star, always goes on top of a masked layer (the green construction paper background)both conceptually and in the Layers window. Notice also that Flash indents the masked layer, to remind you that it's attached to the mask layer directly above it. Here, the masked layer contains a bitmap image. 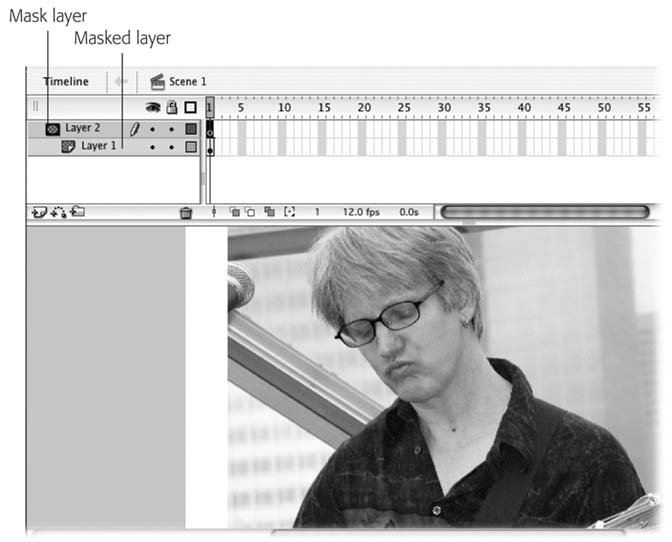 Figure 6-13. The shape you use as a portal must be either a fill (like the circle shown here) or a symbol. Because the Brush tool creates fills, you can use the Brush to draw a freehand-shaped portal. (Strokes on the mask layer have no effect.) 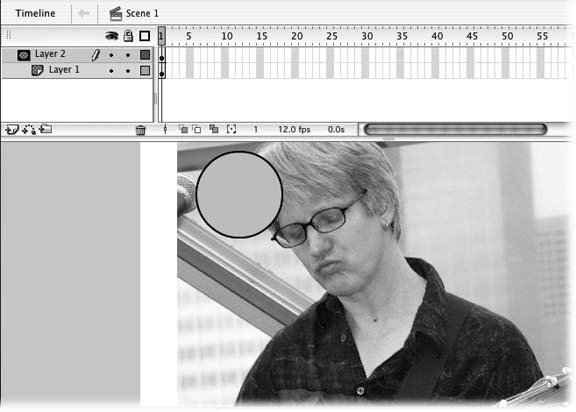 -
In Layer 2, click Frame 20 and then select Insert  Timeline Keyframe . Timeline Keyframe . Flash inserts a keyframe in Frame 20. On the Stage, the bitmap image disappears so that all you see is the circle you drew in step 8. -
Click the Select tool; then drag the circle to the lower-right corner of the Stage (Figure 6-14) . Figure 6-14. In this example, you're creating a simple tween in Layer 2, so that the portal moves across the bitmap image showing only a circle's worth of image at any one time (a spotlight effect). But you can create static portals (masks), too. The simplest is a circle or a square, but nice thick letters also make a compelling effect. 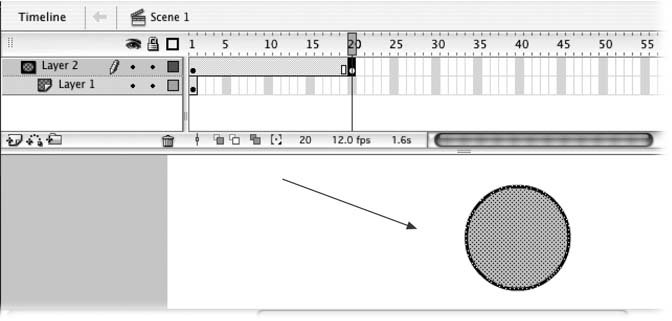 -
In Layer 2, click Frame 2 . The circle jumps back into the upper-left corner of the Stage, and the Property Inspector appears. -
From the Tween drop-down box in the Property Inspector, choose Shape . Flash displays an arrow in Layer 2 from Frame 2 through Frame 19, showing you it's created a successful shape tween. -
In Layer 1, click Frame 20 and then select Insert Timeline Keyframe . Flash inserts a keyframe. On the Stage, the bitmapped image appears behind the circle (Figure 6-15). -
Click the lock icon you see above the layers once to lock both Layer 1 and Layer 2 . Flash shows you the mask effect on the Stage (Figure 6-16). -
Run the animation by choosing Control Test Movie . In the test window, you see the circle move in a diagonal line, revealing the bitmap beneath just as though you were looking through a tube sweeping diagonally across the image. 6.2.1. Adding a Motion Path to a Mask In the previous section, you saw an example of an animated mask that moves in a straight line across the image on the masked layer. Wouldn't it be great if you could add a motion path to the mask to make the spotlight dip and weave and wiggle its way around the image? Well, you can but not in the usual way. Figure 6-15. At Frame 20 (notice the position of the playhead), the bitmapped image appears on Stage along with the circle. At this point, testing the animation by choosing Control Test Movie shows you the mask effect. But to see the mask effect on the Stage, in edit mode, you need to lock both the mask and masked layers. 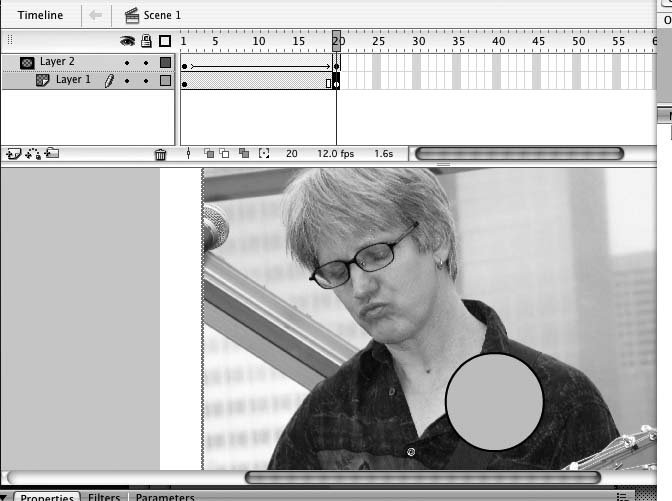
Figure 6-16. Here you see the effect at Frame 20: a circle's worth of bitmap, just like that cutout star showing the green construction paper underneath. You can test the effect quickly on the Stage by dragging the playhead backward, from Frame 20 to Frame 1. 
Flash doesn't let you apply a motion guide layer (Chapter 3) to a mask layer. (Selecting a mask layer and clicking the Add Motion Guide icon has no effect, and right-clicking a layer and then trying to choose Add Motion Guide from the shortcut menu doesn't work, either: The Add Motion Guide option appears grayed out.) But you can add a motion path to a mask indirectly, by using an animated movie clip symbol as the mask shape. It's a simple matter of creating the mask shape, then converting it to a movie clip symbol before applying your motion tween. (You can learn a lot more detail about movie clip symbols on Section 7.1.2.4 in the next chapter.)
Note: You can find a copy of the example shown in this section, at the "Missing CD" page. Look for spotlight_begin.fla (ready for you to begin the exercise) and spotlight.fla (a completed, working example).
Here's how to animate a mask layer, step by step: -
Open the file spotlight_begin.fla. Click the first keyframe of a new document and add the image or drawing you want on the masked layer (Layer 1) . As you can see in Figure 6-17, the background image for this example file is a guitarist. -
Choose Insert Timeline Layer . Flash creates a new layer named Layer 2 and places it just above Layer 1. -
Double-click the layer icon next to Layer 2 . The Layer Properties window appears. -
In the Layer Properties window, turn on the checkbox next to Mask and then click OK . Flash displays the mask icon next to Layer 2. -
Double-click the layer icon next to Layer 1 . Once again, the Layer Properties window appears. -
This time, turn on the checkboxes next to Masked and Lock and then click OK . Flash displays the masked icon next to Layer 1; there's also a little padlock that lets you know Layer 1 can't be edited (you don't want to modify it inadvertently). -
Click the first keyframe in Layer 2 . Flash highlights the selected keyframe. -
Use the Oval tool to draw a circle on the Stage . So far, these are the same steps you take to create a straight-line motion tween. -
Select the entire circle (including its outline) and then choose Modify Convert to Symbol . The Convert to Symbol dialog box appears. -
In the Convert to Symbol dialog box, turn on the radio button next to Movie Clip and then click OK . The dialog box disappears. -
On the Stage, double-click the circle symbol . Flash pops you into symbol editing mode: The content you placed in the masked layer appears grayed out, the name of your symbol appears in the Edit bar, and you see a fresh, clean Timeline (the symbol's timeline) containing just one layer. -
On the Stage, select the entire circle again (including its outline) and then choose Modify Convert to Symbol . The Convert to Symbol dialog box appears. -
Leaving the Movie Clip radio button selected, click OK . The dialog box disappears. Flash places a copy of this second symbol into the Library. On the Stage, a selection box appears around the circle and a center point appears at the center's circle. -
Click in Frame 20 and then select Insert Timeline Keyframe . Flash inserts a keyframe into Frame 20. -
Click to select Layer 1 and then click the Add Motion Guide icon . Flash creates a guide layer and places it directly above Layer 1. -
In Guide: Layer 1, click Frame 1 (the first keyframe). Then use the Pencil tool to draw a line (a motion path) on the Stage . The motion path you draw can be curved , circular, jaggedanything you like. Figure 6-17 shows an example. Figure 6-17. Here's a motion path superimposed on the guitar player background (the masked layer). When you finish the steps in this example, the mask (the circle) will " shine a spotlight" on the guitar player following the curved motion path. 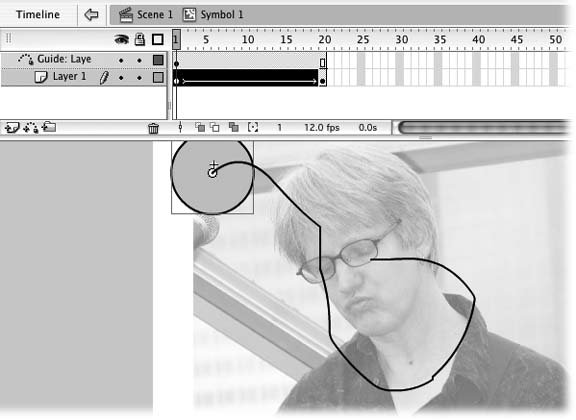 -
In Layer 1, click Frame 1. Using the Selection tool, drag the circle until its center snaps to the first end of the motion path (Figure 6-17). Click Frame 20 and then drag the circle until its center snaps to the second end of the motion path . You've just created the beginning and end points for the spotlight animation. Now you can tween it, as described next. -
In Layer 1, click Frame 2. In the Property Inspector, from the Tween drop-down box, choose Motion. Then select Edit Edit Document . Flash saves the movie clip symbol and returns you to your main Timeline. The movie clip symbol takes up just one frame (Frame 1) of the mask layer, which is Layer 2. You know it's a symbol because you see the cross and circle that are the symbol's registration point and center point, respectively; you know it's in the first frame because when you click the first frame of Layer 2, Flash displays a selection box around the symbol, as shown in Figure 6-18. You can test the effect by choosing Control Test Movie. In the test window, the "spotlight should move along the motion path you drew. Figure 6-18. When you've finished adding the movie clip symbol to the mask layer, this is what you see: the selected symbol on top of the Layer 1 background. (You know it's the mask layerLayer 2that contains the selected symbol because you can see that Layer 2's highlighted.) 
|