15.1. Preparing for Collaboration Before you send your presentation out for review, you may want to tell PowerPoint to inspect it for sensitive information that you added to the file yourself (like comments or speaker notes as reminders) or that PowerPoint has automatically added to the file (how many times you've edited the file and how long you've been working on it). -
Save a backup copy of the file. Always save a copy of the original file before you let PowerPoint have a crack at it. Doing so ensures that you can go back and retrieve sensitive information, should you need to. -
Open the presentation that you're going to distribute, and choose Office button  Prepare Inspect Document. Prepare Inspect Document. The Document Inspector dialog box appears (Figure 15-1). 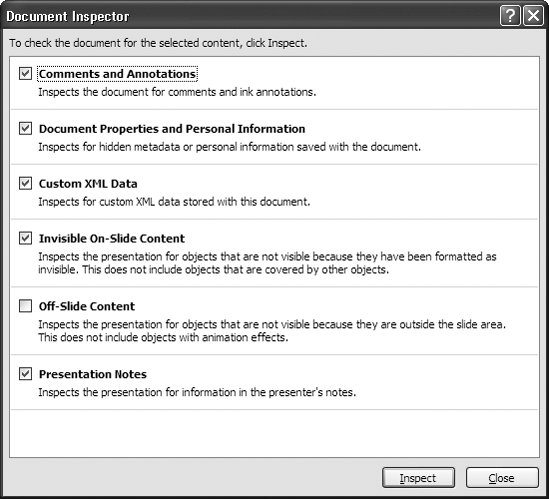 | Figure 15-1. New in PowerPoint 2007, the Document Inspector dialog box lets you strip potentially embarrassing information from the file you're about to sendincluding the comments and speaker notes you wrote for yourself, as well as PowerPoint-generated information, like how you've been working on the presentation. | | -
Turn on the checkboxes next to the kinds of information you want PowerPoint to remove from the file. Your choices include: -
Comments and Annotations. Tells PowerPoint to hunt for all the comments attached to your presentation no matter who created them, as well as any on-slide ink annotations you've chosen to save (page 239). -
Document Properties and Personal Information. Tells PowerPoint to hunt for program-generated information, such as the name of the person who created the file, the date the file was created, how many times the file was opened and closed, and so on.
Tip: To see a complete listing of all the document properties and personal information PowerPoint saves with a document, choose Office button Prepare Properties. Then, in the Properties pane that appears, click the Document Properties drop-down box and choose Advanced Properties.
When you finish, click Inspect. In the Document Inspector dialog box, list of inspection results appears, similar to the one in Figure 15-2. 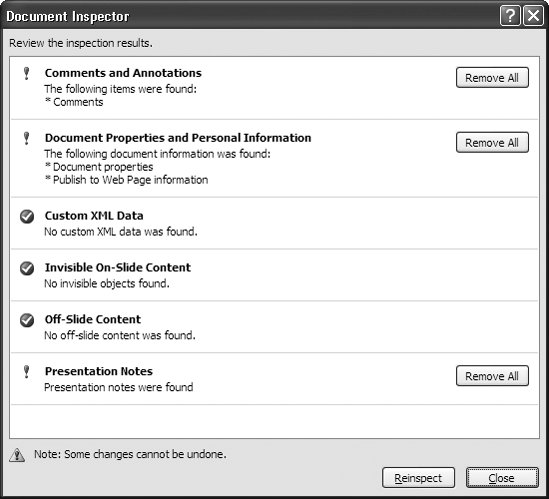 | Figure 15-2. An exclamation point means PowerPoint found sensitive information. If you haven't made a backup copy of your presentation file before you started the inspection process, stop right now and go do it before you click Remove All, which tells PowerPoint to delete the information for good. | |
-
To strip out one or more categories of sensitive information, click the Remove All button PowerPoint displays next to each category. When you finish, click Close. PowerPoint deletes the selected information from your presentation file. After you save the file, you can't get the deleted information back.
Note: If you've ever picked up a thread the vacuum cleaner missed and thrown it back down to give the vacuum a second chance, you know the reason for clicking Reinspect after you removed all the sensitive information PowerPoint found. Doing so tells PowerPoint to go through its inspection paces one more time, just to double-check that it removed all the sensitive information.
|