7.3. Presenting Your Slideshow The control you have when it comes time to present your slideshow depends on how you've chosen to set up your slideshow: as full-screen, browser, or kiosk mode (see page 222). -
Full-screen mode. Right-clicking your mouse while you're running a slideshow in full-screen mode kicks up a context menu that lets you choose how to present your slideshow, as you can see in Figure 7-13. But most folks find it quicker (and less distracting to the audience) to use the keyboard shortcuts described in Table 7-1. In addition, when you run a slideshow in full-screen mode, you see the ghosted controls shown back in Figure 7-1, you can control your presentation with a remove control, and you can draw ink annotations on your slides (page 239).
Note: If you're running a slideshow in full-screen mode and you don't see ghosted controls, flip to Chapter 13 to see how to tell PowerPoint to display them on your computer.
Table 7-1. Key Strokes for Navigating Your Slideshow | To Do This | Press This | | Go forward one slide | Enter, Space, Page Down, N, click, right-arrow, down-arrow | | Back up one slide | Backspace, Page Up, P, left-arrow, up-arrow | | Jump directly to a specific slide, even if it's hidden (page 225) | Type the slide number and then press Enter, or right-click the slide and, from the menu that appears, click the title of the slide you want to go to | | Scroll back and forth through slides quickly | Roll the wheel on your mouse | | Black out the presentation | B or . (period) | | White out the presentation | W or , (comma) | | End the slideshow | Esc or Ctrl+Break | | Hide the cursor (pointer) | = (A to show pointer again) | | Start drawing (annotating) electronically on a slide using your mouse or a graphics pen | Ctrl+P, then drag mouse (or stylus) to draw | | Stop drawing and turn pen back into arrow pointer | Ctrl+A | | Erase all the ink annotations on a slide | E | | Pause a slideshow that's running automatically | S (Press S again or + to restart it) |
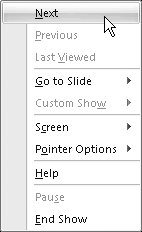 | Figure 7-13. Anything you can do with keyboard shortcuts, you can do with the context menu shown here. Trouble is, your audience has to sit through the menu selections, which may not do much for their concentration. | |
Tip: Even if you're not normally a keyboard shortcut fan, you may want to familiarize yourself with Table 7-1. That way, if you're in the middle of giving a presentation and you suddenly notice your slides racing by, for example, you'll know why (and what to do about it).
-
Browser mode. If you set up your slideshow to run in browser mode and told PowerPoint to show scroll bars (page 224), you can use the scroll bars in the browser window to scroll from slide to slide. Right-clicking shows a different context menu (shown in Figure 7-14) than the one that appears for full-screen presentations. Finally, only a few keyboard shortcuts work for browser-mode slideshows: Go forward one slide, Back up one slide, and End the slideshow (see Table 7-1).  | Figure 7-14. Right-clicking a slideshow set up to run in browser mode displays a different menu than the one that appears when you right-click a slideshow set up to run in full-screen mode. | |
-
Kiosk mode. If you set up your slideshow to run in kiosk mode (page 225), no ghosted controls appear, and no right-click menu appears, either. What's more, none of the keyboard shortcuts shown in Table 7-1 work. Instead, you need either to set up automatic timings (page 227) so that the slideshow runs through your slides automatically, or add interactive links or actions to your slides (Chapter 12) so that folks who stop by the kiosk can navigate your slideshow.
Tip: To test your slideshow from inside PowerPoint, simply press F5.But say you don't have PowerPoint running. Say you don't even have PowerPoint installed on your computer. You're a client who's just been handed a CD containing a self-running PowerPoint show. Just pop the CD into your CD drive, and the slideshow should start playing automatically. If it doesn'tfor example, if you've set Windows AutoPlay options to prevent programs from automatically runningthen surf to the file and double-click it. Either way, Windows launches either PowerPoint or the PowerPoint viewer (a copy of which came on the CD along with the PowerPoint show).
7.3.1. Drawing on Slides During a Presentation PowerPoint evolved as a virtual, interactive replacement for the overhead projector, so it's no surprise that the program gives you a way to make notes directly onto your slides during a presentation. Ink annotations are PowerPoint's answer to scribbling on an overhead transparency with a smelly felt-tip pen. As you see in the following steps, PowerPoint even lets you select the thickness and color of your virtual pen.
Note: PowerPoint only lets you draw on slides that you've set up to run in full-screen mode; you can't draw on slides set up to run in browser or kiosk mode. For more on these three different modes, flip to page 222.
To draw on your slides during a presentation: -
With your slideshow running, click the (ghosted) Pen icon in the lower-left corner of the screen (Figure 7-15). Up pops the context menu shown in Figure 7-15.
Note: If you don't see the Pen icon, right-click the slide and choose Pointer Options.
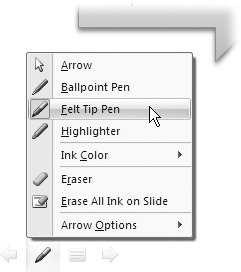 | Figure 7-15. PowerPoint lets you choose among virtual nibs. Your choices include a skinny ballpoint, a thicker felt-tip, and (thickest) highlighter pens. Make sure the color of your pen stands out against your slide's background. (This is just one time you'll regret giving your slides different-colored backgrounds. You'll have to change your pen color throughout the show.) | | -
Choose one of the following pen types: -
Ballpoint Pen. Gives your pen a small, round nib. -
Felt Tip Pen. Gives your pen a larger nib. -
Highlighter. Gives your pen the largest possible nib, shaped like a rectangle to mimic the yellow highlighter you keep in your desk. -
If you like, you can change the color of your pen. Click Ink Color and then, from the palette that appears, choose the color you want. By the way, if you know you'll always want to draw in a certain colorsay, redyou can set your pen color to red just once, instead of having to do it for each presentation you create. In the Set Up Show dialog box, head to the Pen Color drop-down list and choose your color. -
Drag your mouse to write or draw in virtual ink on your slide. You annotations appear directly on your slide as you drag your mouse. Figure 7-16 shows you an example. 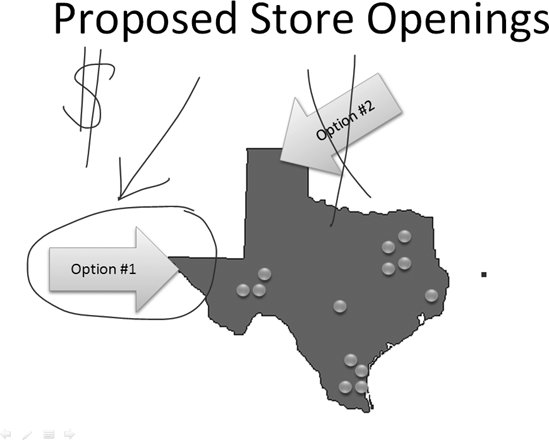 | Figure 7-16. If hand-drawn annotations are a big part of your presentation style, you may want to invest in a graphics tablet or even a Tablet PC. It's easier to write and draw neatly using a graphics pen than it is using a mouse. | | -
Continue clicking through the slides of your presentation, drawing on as many (or as few) as you like. If you make a mistake, you can easily erase annotations. Right-click your presentation, choose Pointer Options  Eraser, and, with the eraser that your cursor has become, click the line you want to erase. Or, to get rid of all scribbles on a particular slide, you can right-click and choose Pointer Options Erase All Ink on Slide. Eraser, and, with the eraser that your cursor has become, click the line you want to erase. Or, to get rid of all scribbles on a particular slide, you can right-click and choose Pointer Options Erase All Ink on Slide. -
Note: If PowerPoint doesn't ask you if you want to keep your ink annotations, it may be because you've told it not to. To display a reminder, check out Chapter 13.
 |