| Studio includes many different methods to capture and integrate audio into your production. Whether you're ripping music from a CD, adding a narration track, or creating background music from SmartSound, Studio places the results directly on the Timeline for you no muss, no fuss. (These activities are covered in Chapter 11.) On the other hand, if you're using audio files you previously produced, you'll have to import them into the Album (see "Working with the Sound Effects Tab" in Chapter 6) and then get them to the Timeline. Studio treats audio files almost identically to video files and still images, with exceptions noted in the sidebar, "Tracking the Audio Tracks," later in this chapter. Otherwise, all of the techniques described earlier for getting videos into the Movie window, moving them around, trimming them on the Timeline, and splitting and deleting them apply to audio files. This section takes a quick look at the Audio Clip Properties tool, demonstrates how to load only the Audio track from a captured video file into a project, and describes where to drag your audio files (see the sidebar "Tracking the Audio Tracks," later in this chapter). To change the duration of an audio file on the Timeline 1. | Do one of the following:
- Trim the audio file on the Timeline using the same techniques as for trimming video files, described in "Trimming a Clip on the Timeline," earlier in this chapter.
- Launch the Clip Properties tool by selecting the audio file and clicking the Speaker icon at the top left of the Movie window (Figure 7.81), or by double-clicking the audio clip.
Figure 7.81. Click here to open the Audio Clip Properties tool. 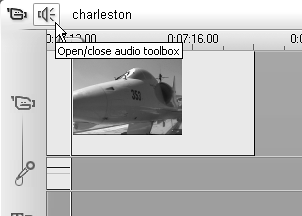
Studio opens the Audio toolbox.
If you don't see the Audio Clip Properties tool, click the Scissors icon at the upper left of the screen to open it.
| 2. | To adjust the start and end points of the audio file, use the controls described in "Trimming with the Clip Properties Tool," earlier in this chapter (Figure 7.46).
Note in particular that most CDs have several seconds of silence at the end of each track. To avoid this gap in your production, trim this space as shown in Figure 7.82.
Figure 7.82. How does "Anchors Away" sound as background music for a slide show on carrier-based airplanes? 
|
To add only the audio from a video file - From the Video Scenes tab in the Album window, drag a video file to either the Sound Effect track or the Music track.
Studio inserts only the audio from the video file. See Chapter 11 for more on audio.
 Tip Tip
Studio lets you drag an audio file into a clip in the Storyboard and Text views. However, since there is no indicator of duration, results are unpredictable, so you should work with audio in Timeline view.
Tracking the Audio Tracks Here are some rules of the road for Studio's audio tracks. (See Chapter 11 for much more on audio.) To add an audio file to your production, drag it to either the Sound Effect track or the Music track. Be careful, however, if you intend to use Studio's narration recording, CD-ripping, or SmartSound Music track features, because they require that a specific track be open for the files they produce. For narration recording, the Sound Effect track must be open; for CD-ripping and SmartSound, the Music track must be open. So if you drag an audio file onto the Sound Effect track, for example, you won't be able to record a narration track for that segment. To add the audio track from a captured video file to your production without the video drag it to either the Sound Effect track or the Music track. Studio prevents you from adding an audio file to either Audio track if the audio is present. However, if you delete the audio clip by locking the Video track and deleting the audio, Studio lets you add audio to either Audio track as well. Studio lets you place audio files anywhere in a production, even if it creates a gap in the playback audio. Be careful to avoid these unintended gaps when you place audio files. If you drag one audio file into another, Studio always trims the clip you're dragging. This makes it easy to accidentally truncate a clip by dragging it into another clip. (With video files, dragging doesn't trim a clip at all; you have to activate the trim handles.)
|
|