| Timeline view is where you'll spend the bulk of your editing time. Although it's not quite as straightforward as Storyboard view, its operational advantages quickly become apparent. This section identifies the various Timeline tracks and explains how to get video scenes to the Timeline. If your Timeline starts getting cramped or otherwise out of control, skip ahead one section to learn how to customize your Timeline view. As mentioned earlier, in default mode Studio automatically inserts the audio that was originally captured with the video file on the appropriate track when you transfer the video, so you don't have to worry about manually moving the audio track yourself. The components of the Timeline and other components of the Studio interface that are important in using the Timeline effectively are summarized here (Figure 7.19): Timescale: Shows the absolute time of the assets displayed in Timeline view. You can modify the Timescale to show more or less detail (see "Customizing Your Timeline View," later in this chapter). Menu track: Appears only after you add a DVD menu to the Timeline. (For details on DVD authoring, see Chapter 12.) Video track: The only track that can display video; it can also display still images. Audio track: Contains only the audio that was captured with the video clip. Note that Studio 8 referred to the Audio track as the Original Audio track, and still does in the Help files. However, Tool Tips refer to it as the Audio track. For the purposes of this book I also refer to it as the Audio track, though I may slip and mention Original Audio track occasionally. Overlay track: Contains titles and Studio 10 still image and video overlays. (For more information on creating titles, see Chapter 10. For more information on video overlays, see "Studio's Overlay Effects" in Chapter 9.) Sound Effect track: Studio places all voice-over recordings on this track, or you can insert audio from any source. For example, to insert only the audio from a captured video file into the production, simply drag it to this track. Note that the Studio 10 Help files may refer to this as the Sound Effect and Voice Over track, but I'm sticking with what the Tool Tips call it. If I happen to refer to it in the same way the Help files do, you'll know I'm talking about the Sound Effect track. Music track: Studio places background music produced by the SmartSound utility or from any source on this track. To learn how to set audio levels for the three Audio tracks, see "Using the Volume Tool" in Chapter 11. Edit line: The current editing position on the Timeline and the frame currently visible in the Player. Timeline scrubber: A tool used to drag the edit line to different positions on the Timeline. Player scrubber: A tool used to move the edit line through the project. Timeline slider: A tool used to drag the visible area on the Timeline forward and backward through the project.
Figure 7.19. The Timeline and other relevant Studio components. Take a good look around; you'll be spending lots of time here. 
To drag video clips to the Timeline 1. | On the Video Scenes tab, hold down the mouse button, and select one or more contiguous or noncontiguous scenes.
The borders turn from white to blue, and a small hand appears over the scenes.
| 2. | Do one of the following:
- Drag the scenes to the Video track.
- Drag the scenes to the Sound Effect track.
- Drag the scenes to the Music track.
A green rectangle representing the duration of the clip appears in the first open space on the Timeline, and a small plus sign appears below the pointer (Figure 7.20).
Figure 7.20. More placement cues. A green box defines the duration of the video clip on the Timeline, and the plus sign says it's okay to drop the file here. 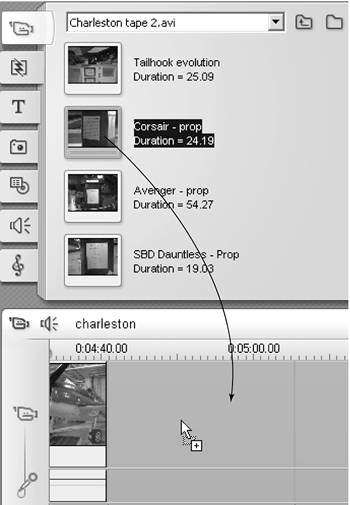
| 3. | Release the mouse button.
Studio inserts the scenes on the selected track (Figure 7.21).
Figure 7.21. There's your scene, ready to go. 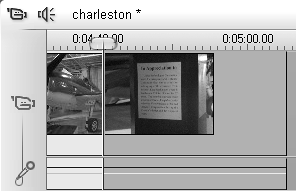
|
 Tips Tips
As shown in Figure 7.22, when you drag a video into the Overlay track, Studio adds new Video and Audio tracks, and opens a new Title track that can contain titles and still images (but no additional video files). Figure 7.22. Here's the fully tricked-out Studio timeline with separate Overlay and Title tracks. The error message notes that you can insert titles, photos, and transitions into the Title track, but not videos. 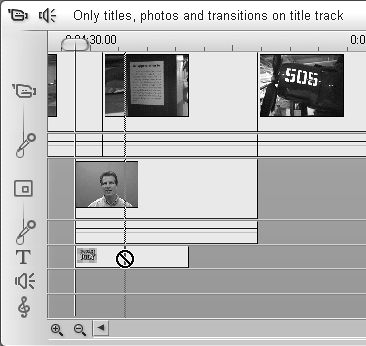
If you drop a video on the Video track, Studio always inserts the associated audio on the Audio track. To delete the Audio track, lock the Video track and delete the associated Audio track. See "Advanced Timeline Editing" later in this chapter for details on locking tracks. If you drop a video file on either the Sound Effect track or the Music track, only the audio, not the video, is inserted on the track. Studio provides the same visual cues on the Timeline to show where you can drop all assets as it does on the Storyboard. If you attempt to drop scenes on prohibited tracks, such as the Title track, you'll see red lines instead of green, a "prohibited" sign, and the error message "Only titles, photos and transitions on title track" above the Timescale (Figure 7.22). As with the Storyboard, Studio always drops video and still image assets in the first available space at the beginning of a project. Although you can reorder assets at will once they're on the Storyboard, you can't create gaps in your projects in any of the Movie window views.
To insert video clips between two clips on the Timeline 1. | On the Video Scenes tab, hold down the mouse button and select one or more scenes.
The borders turn from white to blue, and a small hand appears over the scenes.
| 2. | Drag the scenes to the desired location.
Two vertical green lines appear between the two selected video clips, and a small plus sign appears below the pointer (Figure 7.23).
Figure 7.23. Studio won't let you drop a clip in the middle of another one. Move the pointer until you see the green lines and plus sign. 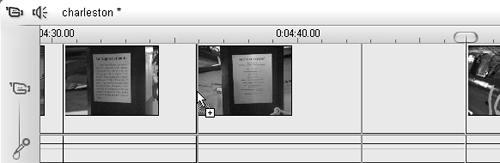
| 3. | Release the mouse button.
Studio inserts the scene between the existing scenes (Figure 7.24).
Figure 7.24. Release the mouse button, and there you go. 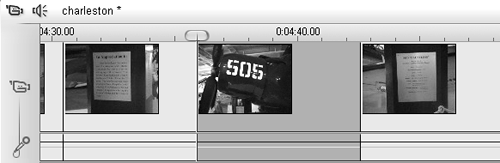
|
Tips Note that Studio inserts the new clip between the selected clips, pushing back all clips after the newly inserted clips (potentially out of your current view of the project). No clips are deleted or otherwise truncated. You can normally insert a clip only at the beginning or end of another clip, not in the middle of a clip. Both of the "To perform an insert edit" tasks later in this chapter show you how to insert a clip in the middle of a different clip, a process called insert editing.
To arrange video clips on the Timeline 1. | On the Video track, hold down the mouse button and select one or more scenes.
Studio highlights the clip in blue, and a small hand appears over the scene (Figure 7.25).
Figure 7.25. You move clips on the Timeline the same way you do on the Storyboard, with slightly different cues. Here I'll move the front shot of the F-14 Tomcat in front of the zoom into the engine air intake. I'll start by selecting the clip. 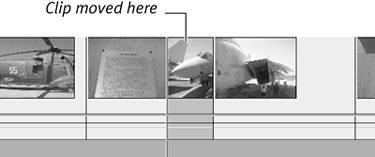
| 2. | Drag the clip to the desired location.
Studio displays green lines at the beginning and end of the clip that you're arranging, and a small box appears below the pointer (Figure 7.26).
Figure 7.26. Move the clip to the desired space, watching for the green lines and plus sign, and then release the mouse button. 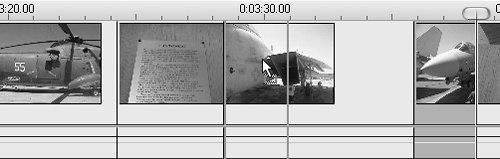
| 3. | Release the mouse button.
Studio inserts the scene in the specified location (Figure 7.27).
Figure 7.27. Studio inserts the clip and pushes all clips behind it to the back of the line. 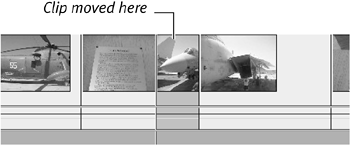
|
To preview your video clip on the Timeline 1. | Do one of the following:
- Select the scene you want to play back.
Studio highlights the clip in blue and positions the Timeline scrubber at the start of the scene.
- Drag the Timeline scrubber to the desired start location (Figure 7.28).
Figure 7.28. Get familiar with the Timeline scrubber, which shifts the edit line and controls the frames viewed in the Player. 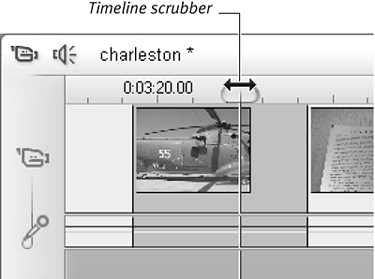
| 2. | Start playback by doing one of the following:
- In the Player, click Play.
The Play key switches to Pause mode, which you can click to stop playback.
- Press the spacebar to start playback. Press the spacebar again to stop playback.
- Press the L key to start playback (ignore the Tool Tip). Press K to stop playback.
Playback shifts automatically from scene to scene when multiple assets are present.
During playback, the Timeline and Player scrubbers advance with the video.
|
Tips Here are some relevant keyboard shortcuts: Press L for fast-forward (press L multiple times to accelerate the effect). Press J for fast-reverse (press J multiple times to accelerate the effect). Press K to stop playback.
You can always use the Player scrubber to position video playback. If your mouse has a wheel, you can use it to scroll through the video. Note that if you press and hold down the Ctrl key as you're doing it, you'll move through the video frame by frame.
|