Flylib.com

Books Software


Deleting Projects

 < Day Day Up > 

Deleting Projects

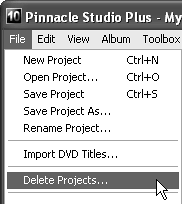
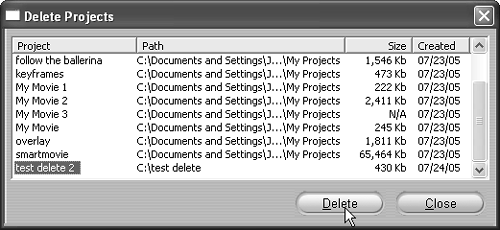
Also new in Studio 10 is a project delete function, which is a fast way to delete the STX file associated with your project and all auxiliary files. This function does not delete the source files that you've incorporated into your project, however.

Note that you can't delete the project that you're currently editing, so the first step in this process is to exit the project you want to delete and either start a new project or open an existing project.

To delete a project

1.

Choose File > Delete Projects ( Figure 2.47 ).

Figure 2.47. Step one toward deleting your projects.


Studio opens the Delete Projects dialog box ( Figure 2.48 ).

Figure 2.48. The Delete Projects window. Just select the project you no longer want and click Delete.


2.

Select the project you want to delete.

3.

Click Delete.

Studio deletes the project file and all auxiliary files.

4.

Do one of the following :

  • Repeat steps 2 and 3 to delete another project or projects.

  • Click Close to close the dialog box.

Tips

  • My tests revealed that the size provided in the Delete Projects window is not accurate, at least in the version of software I was using. Specifically, the project "test delete 2" selected in Step 2 actually had about 95 MB of auxiliary files that were deleted in the process, which is much more than the 430 KB shown in Figure 2.48.

  • Studio also allows you to delete project auxiliary files; see "Working With Auxiliary Files," later in this chapter.

  • Once again, this function does not delete the source files you've included in your project. To better manage these files, I typically capture or copy all files I use in a project into one folder that I can delete easily after project completion.


 < Day Day Up > 
 < Day Day Up > 

Hiding Premium Content and Features

Pinnacle sells multiple versions of its software, each with different feature sets, and also sells additional effects and transitions. In previous Studio versions, the program displayed these extra features and effects, and let you know that you could upgrade or buy the additional components at Pinnacle's Web site.

In Studio 10, Pinnacle allows you to hide features and effects you can't use by deselecting the Show Premium Content and Show Premium Features checkboxes in the Setup Options dialog box ( Figure 2.49 ).

Figure 2.49. If you don't want to see premium features you can't use, deselect the bottom two preferences in the Editing Environment section of the Setup Options dialog box.


 < Day Day Up > 
 < Day Day Up > 

Setting Default Durations

When you insert transitions, titles, still images, and audio fades into your video projects, Studio assigns default durations to these assets. You can modify these defaults for each asset or effect during editing, but here's how you set the default values.

To set default durations

1.

From the Studio menu, choose Setup > Project Preferences (Figure 2.40).

The Pinnacle Studio Setup Options dialog box appears (Figure 2.41).

2.

To change the default duration for transitions, titles, still images, or volume fades, do one of the following :

  • Click the number you want to change and enter a new number ( Figure 2.50 ).

    Figure 2.50. To change a default duration, you can click and enter the desired duration.


  • Use the arrow controls beside each duration to adjust the numbers manually ( Figure 2.51 ).

    Figure 2.51. Or use the arrows to increase or decrease the duration.


Tip

  • Note that these durations are in seconds and frames , not seconds and milliseconds . Since video displays at 30 frames per second, to produce a 2.5-second transition, select 2.15, not 2.5, which Studio wouldn't let you enter anyway (since there are only 30 frames a second). If you click through the durations using the number control, you'll find that after 29 frames, Studio adds a second in duration, and zeros out the frames.


 < Day Day Up >